Creating Your First Workflow
You can create your first workflow in Jodoo by following the steps in this passage.
What is Workflow?
In a workflow, data flow from bottom to top. Multiple members participate in the flow process and submit data in a certain order for approval.
Demonstration
Taking the leave application as an example, the workflow is as follows:
How to Create a Workflow
Step 1 Creating a Workflow Form
Select an app and create a workflow form. Then change the form name to Leave Application.
Step 2 Designing the Workflow Form
1. Determine the Field Type
When employees ask for leave, they need to fill in leave application forms. A leave application form usually includes the employee’s name, leave start date, leave end date, and the number of leave days. The corresponding field types are as follows:
Application Information | Field Type |
Name | Member |
Leave Start Date | Date&Time |
Leave End Date | Date&Time |
Number of Leave Days | Number |
Reason for Leave | Multi Line |
2. Complete the Application Form
Select Member from Member & Department Fields, and select Date&Time, Number, and Multi Line from Basic Fields in the left panel.
Modify the Field Name of Member, Date&Time, Number, and Multi Line to Name, Leave Start Date, Leave End Date, Number of Leave Days, and Reason for Leave respectively.
Step 3 Designing the Workflow
The leave application workflow is as follows:
According to the workflow, the nodes include:
- The node where one initiates an application.
- The node where a department head reviews the application.
- The node where the workflow ends.
On the Workflow page, you can modify the node names as follows.
Step 4 Setting Node Properties
Configure the field permissions and approvers for each node.
- Employee: go to Node Properties and tick Select All under View and Edit.
- Administration Department: go to Node Properties and tick Select All under View and Edit.
- Manager: go to Node Properties and tick Select All under View and Edit.
For the two approval nodes, go to Node Properties > Approver and select Jodoo Official and Joe respectively from Members in the pop-up window Dept. & Member List.
After the configuration is completed, click Save.
Step 5 Enabling the Workflow
After the workflow settings are complete, click Enable to enable the current version.
Until now, you have created your first workflow. In further steps, you can allocate permissions for members and view your workflow in Tasks. Let's explore these features!
How to Run Your Workflow
Step 1 Allocating Permission(s)
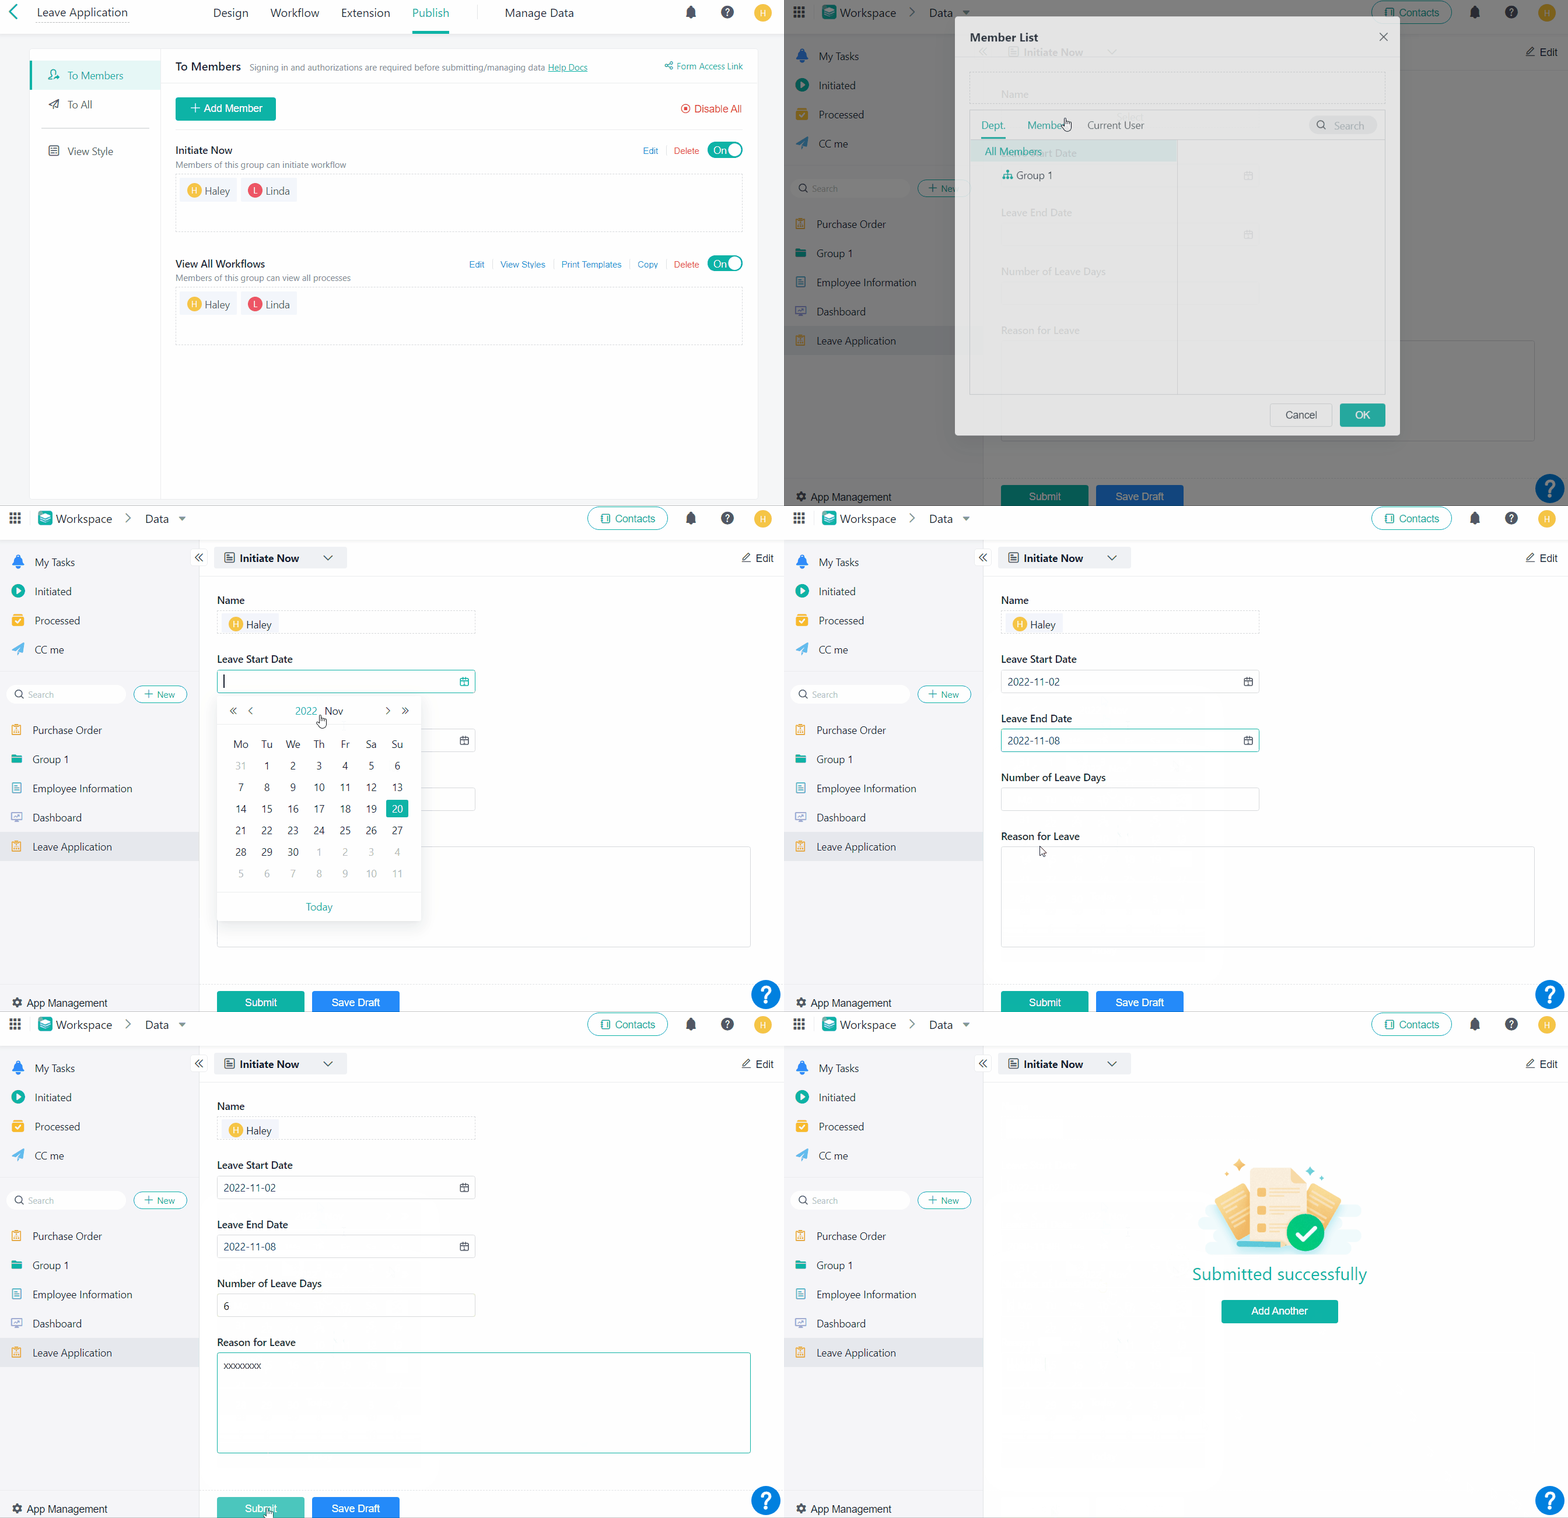
Configure permissions for members. For example, to allocate the permissions for initiating a workflow and viewing all workflows, you can follow the steps below:
Go to Publish > To Members, click Add Member, select Siran from Members in the pop-up window Dept. & Member List, click OK, select Initiate now from the drop-down list below Member Permission, and click OK.
Follow the same steps to allocate the permission View all workflows to Siran.
Step 2 Submitting an Application
Click in the upper left corner, fill in the leave application form and click Submit.
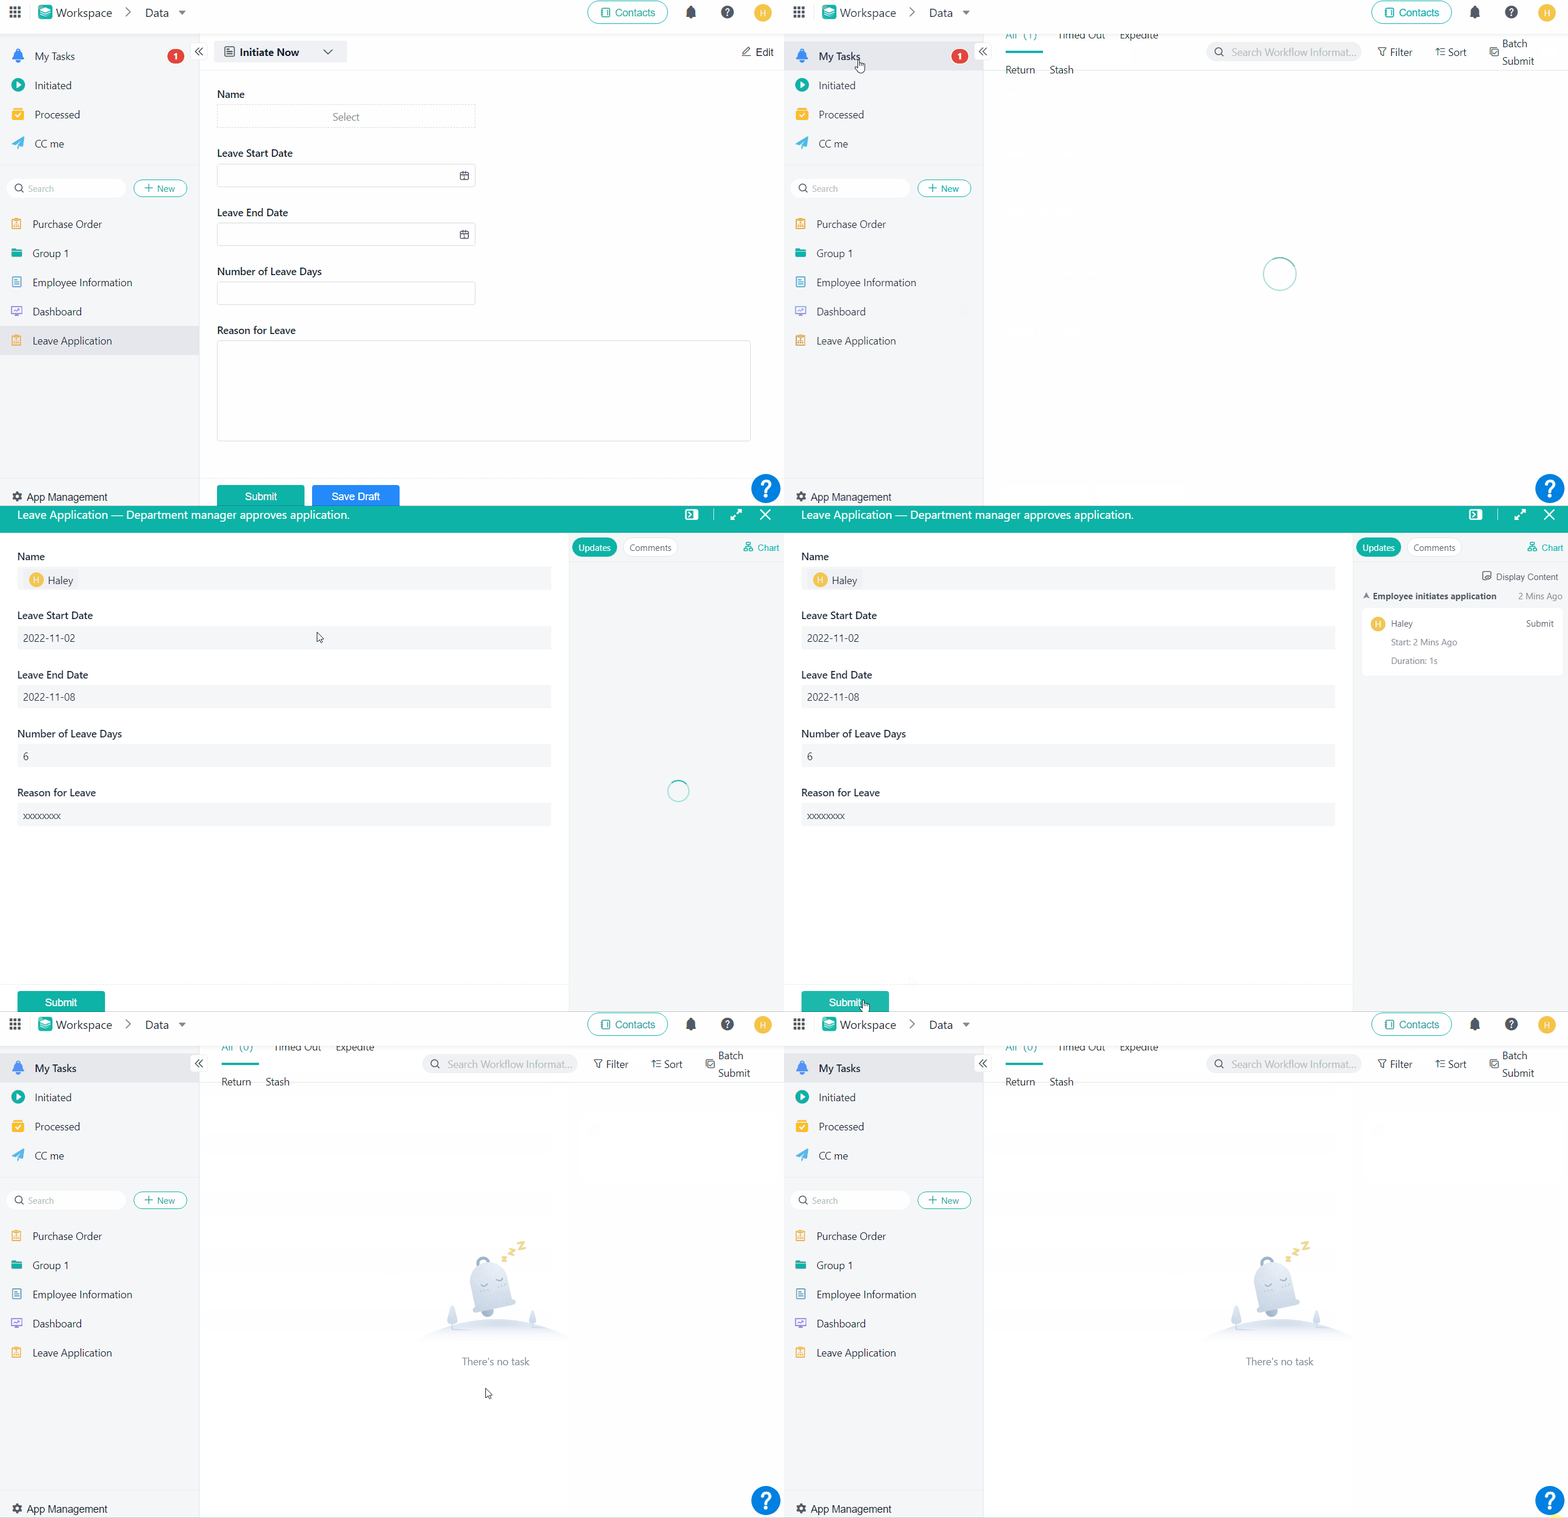
Step 3 Reviewing an Application
Go to My Tasks, and select the application submitted by the employee to review. If you click Submit, the application will be approved by default.
Step 4 Viewing a Workflow
If you have permission to view all workflows, select the permission set View all workflows from the drop-down list in the upper left corner to view all submitted workflows.
I have finished reading. 🏆
👉I can't wait to CREATE MY FIRST WORKFLOW.
👉I need more HELP in Discord Forum.


