


Managing Automations Pro
Introduction
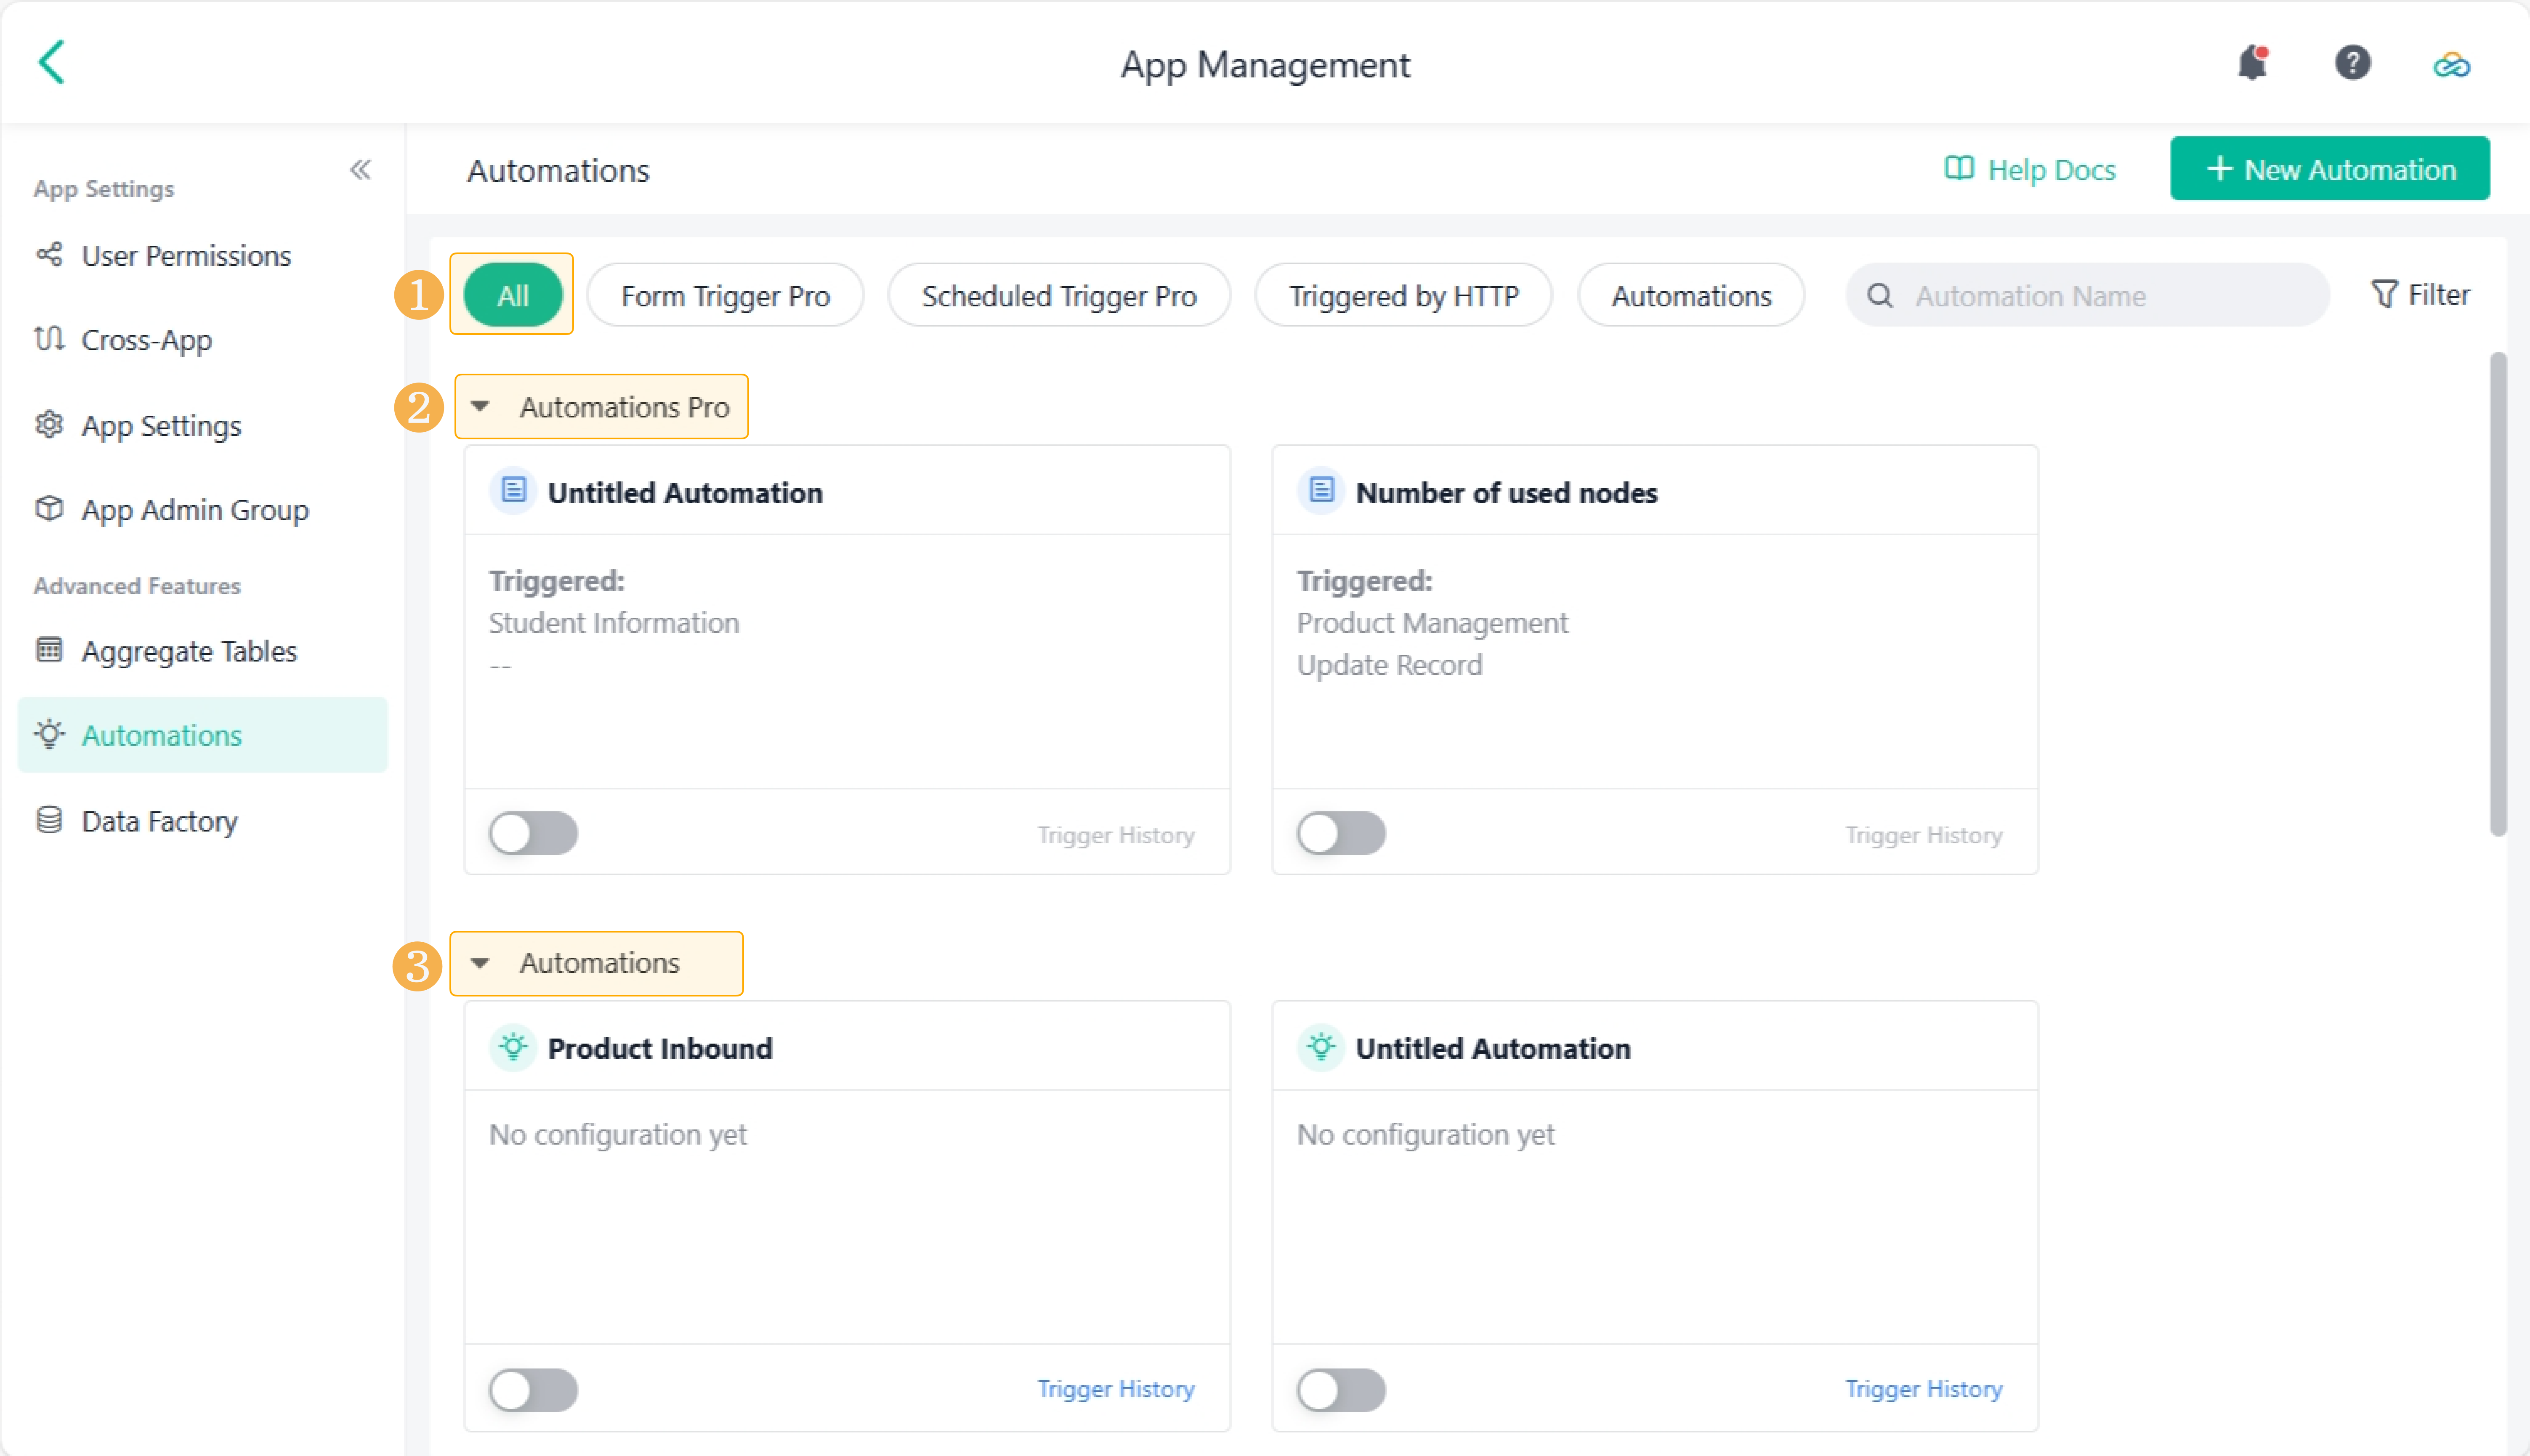
After creating an Automations Pro, it will be displayed as a card on the App Management > Automations page.
Admins can quickly locate the required automation on this page by categorizing, searching, and filtering, and perform operations such as editing, copying, and viewing the trigger history.
Categories
All
All displays all the automations in the current application that are grouped by two types: Automations (the basic version) and Automations Pro.
Form Trigger Pro
Under the Form Trigger Pro category, the Automations Pro triggered by forms are displayed.
- Automations Pro with their triggering forms existing are displayed in groups by the triggering form.
- Automations Pro with their triggering forms deleted are displayed under Others.

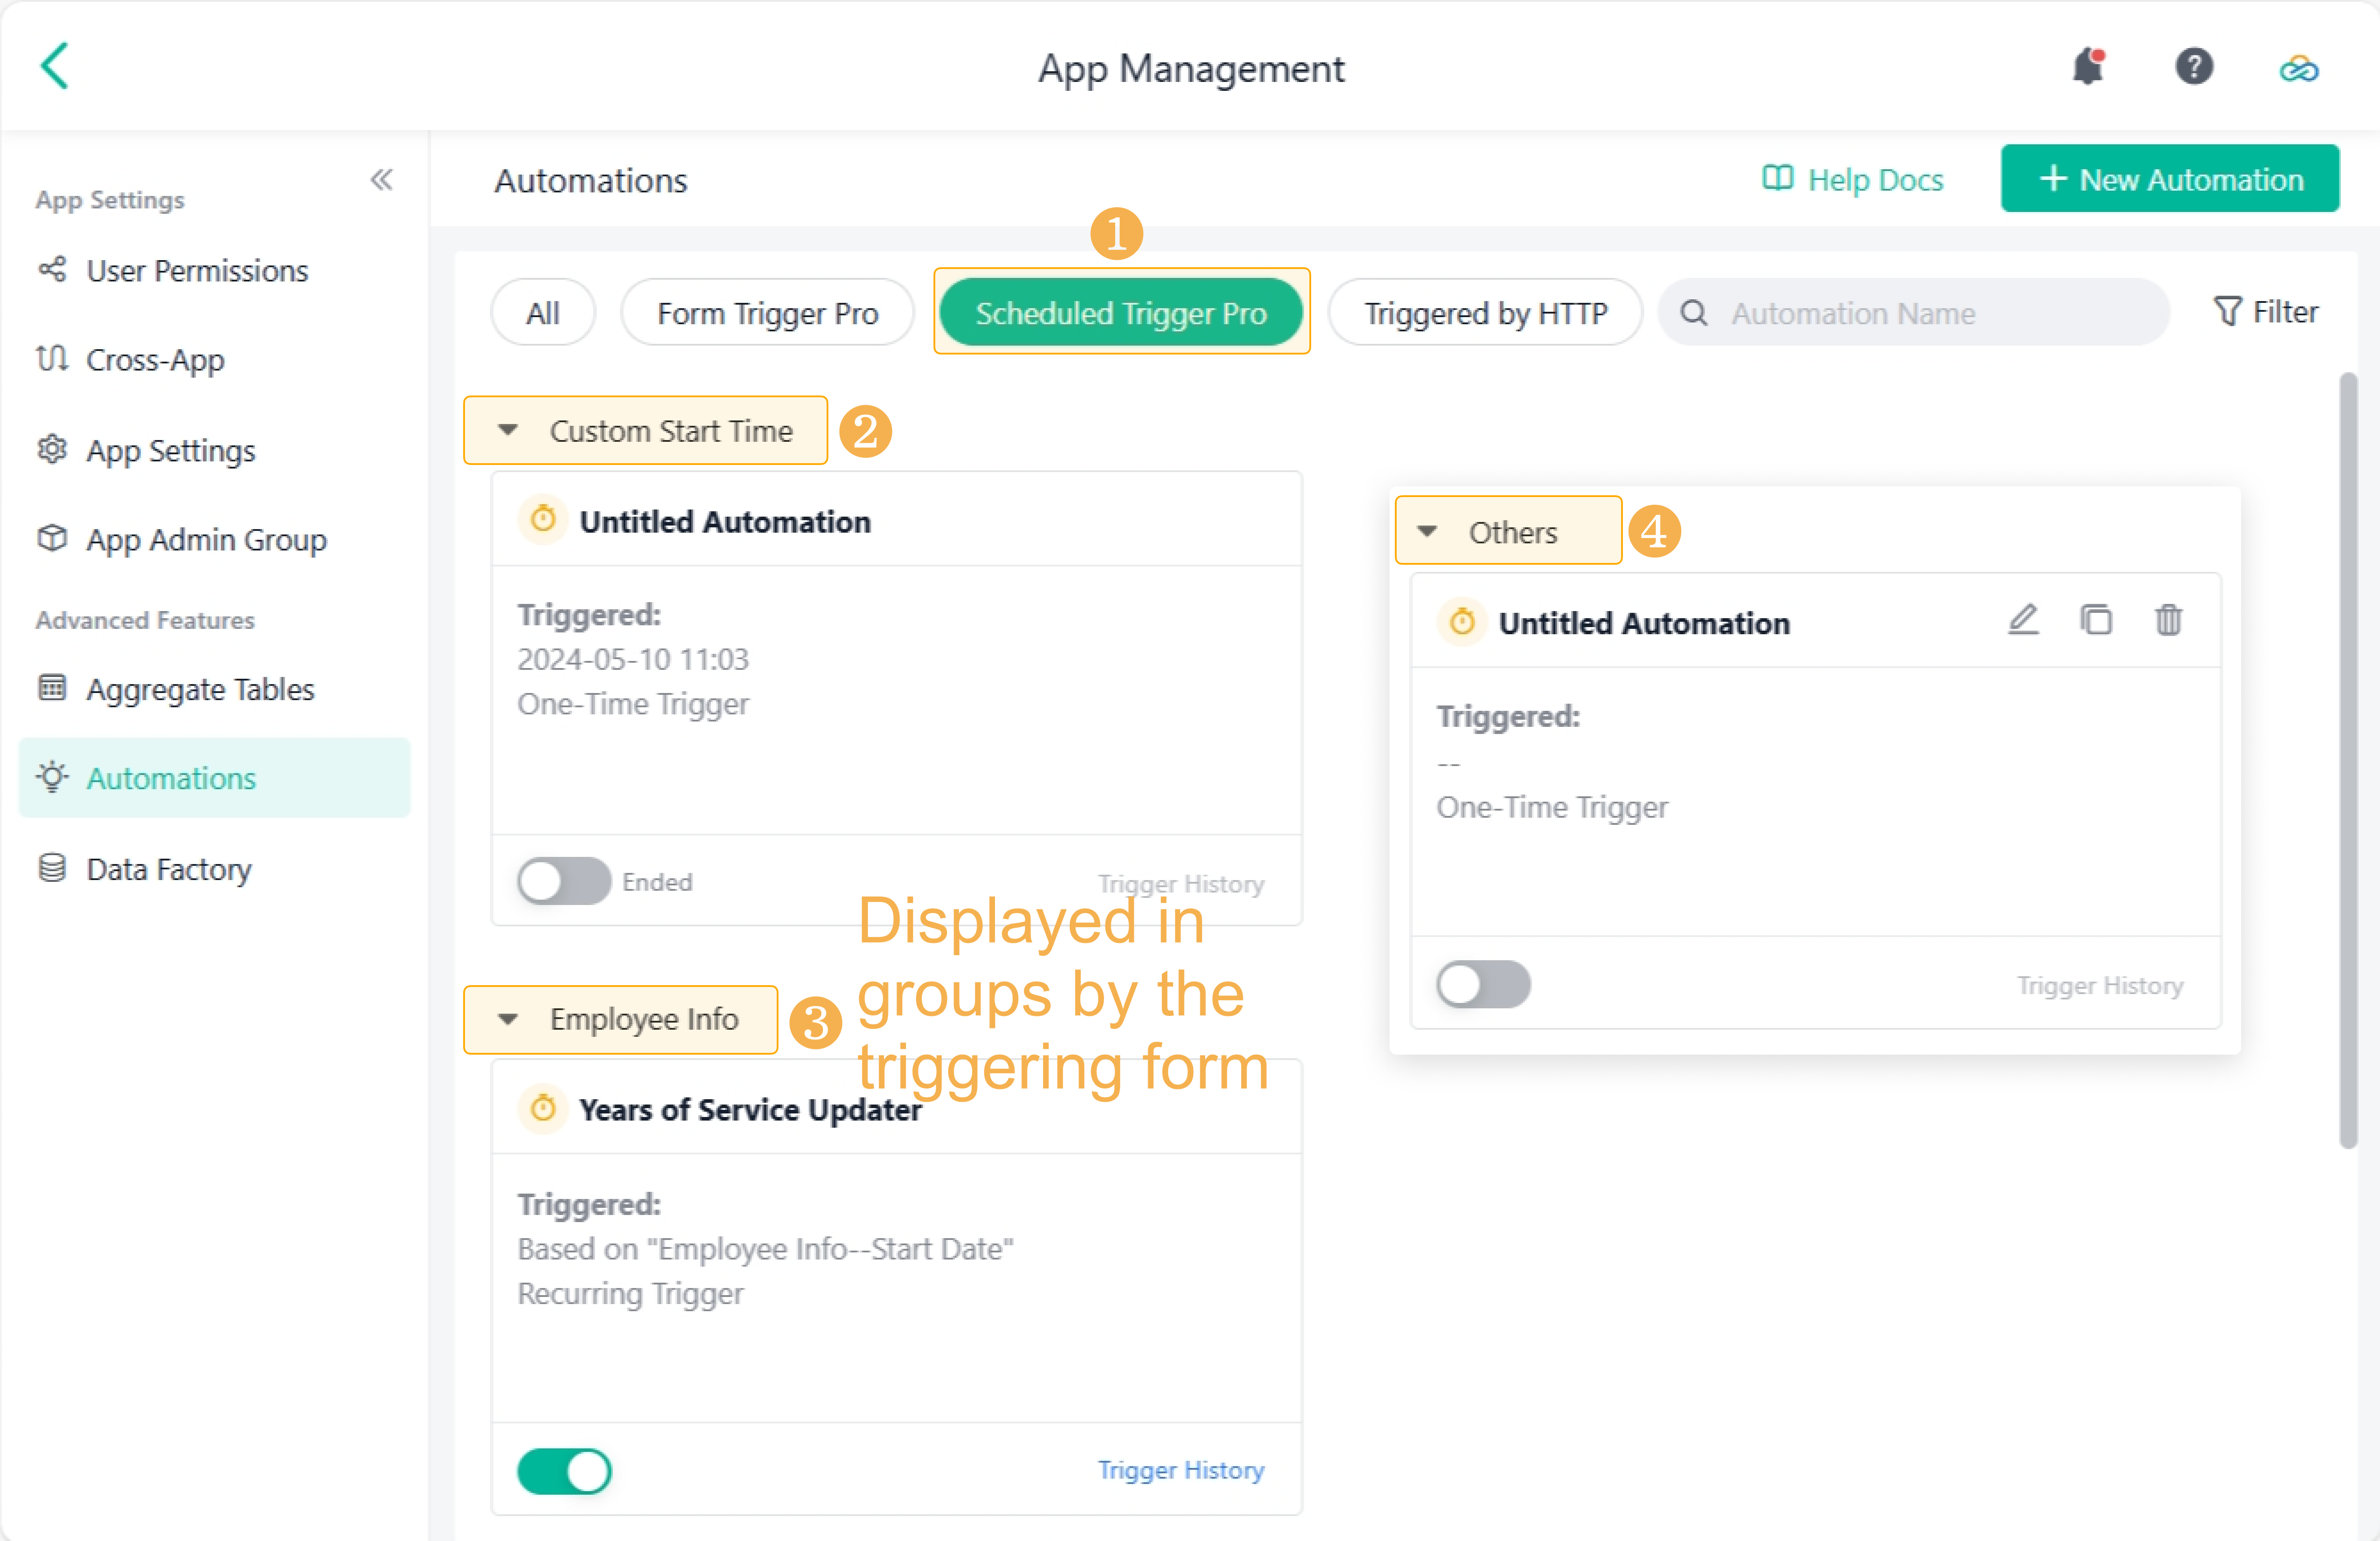
Scheduled Trigger Pro
The Scheduled Trigger Pro category groups the Automations Pro that are triggered on a schedule. There are three types of groups:
- Custom Start Time: Of automations that has been enabled and are with the trigger type, Custom Start Time.
- The triggering forms: Of automations triggered based on records of a form's Date&Time field. The automations are displayed based on the triggering form.
- Others: Of automations set to be triggered based on records of a form's Date&Time field, but the triggering form has not been selected or has already been deleted.
Triggered by HTTP
Under the Triggered by HTTP category, the Automations Pro triggered by HTTP are displayed.

Button Trigger Pro
Under the Button Trigger Pro category, the Automations Pro triggered by custom buttons is sorted by forms.

Note: This kind of automations does not support copying, only editing and deleting operations.
Automations
The Automations category will display all the Automations (the basic version) within the current application.
If there are no Automations in the app, this category will hide.

Actions
Search
To search for a specific type of automation, select the category and enter the name in the search box. The search will only show results within that category.
If no category is selected, the search range will default to All.

Filter
You can filter the existing automations based on:
- Triggering Form: You can choose forms within the current app.
- Triggered Form: You can select forms within the current app and from other apps
- Status: You can select the Enabled or the Disabled.

Edit
To adjust or redesign an existing automation, click (Edit) to enter the design interface.

Copy
For similar workflows, you can copy an existing automation and modify it. During copying, you can rename it to better distinguish its purpose.

Note:
1. If you copy an Automations Pro with a Form Trigger and change the triggering form of the copy (i.e., change the trigger node settings), the nodes dependent on the trigger node will become invalid and need reconfiguration;
2. The copied automation will initially be in the Disabled () mode. Enable it manually when it is needed.
Delete
To remove an unnecessary automation, click (Delete), and click OK.

Enable/Disable
In the App Management page, you can enable or disable the automation by switching the button on or off.

Note:
Automations Pro that have been configured but never enabled cannot be activated from the App Management list. You should be enter the design interface for activation.
Drag and Sort
You can drag and drop an automation in the list to arrange them in a specific order for easier viewing.

Note:
After you filter the automations, you cannot sort the filtered results.
View Trigger History
If an Automations Pro fails to execute or needs debugging, you can enter Trigger History to view the trigger history details and identify the specific issue. This allows efficient design adjustments.

Note:
Automations never enabled do not have Trigger History.