Notification Application Examples
When a Record Is Submitted
How to Set
Timing | Condition | Recipient | Content | Method |
When a record is submitted | / | Peach | Please note new data were submitted |
Application Scenario(s)
When a new record is created, Peach will receive a notification.
1. Select When a record is submitted.

2. After you create a record, Peach will receive an email and can click View details to view more details.

3. Check the details.

When a Record Is Submitted (Add Condition)
Application Scenario(s)
Add different conditions, and the recipients will receive their notifications accordingly.
For example, if the product orders are submitted from different regions, the system will send them to the corresponding recipients.
How to Set
Timing | Condition | Recipient | Content | Method |
When a record is submitted | Add Condition | Members | Please note new data were submitted |
Preview
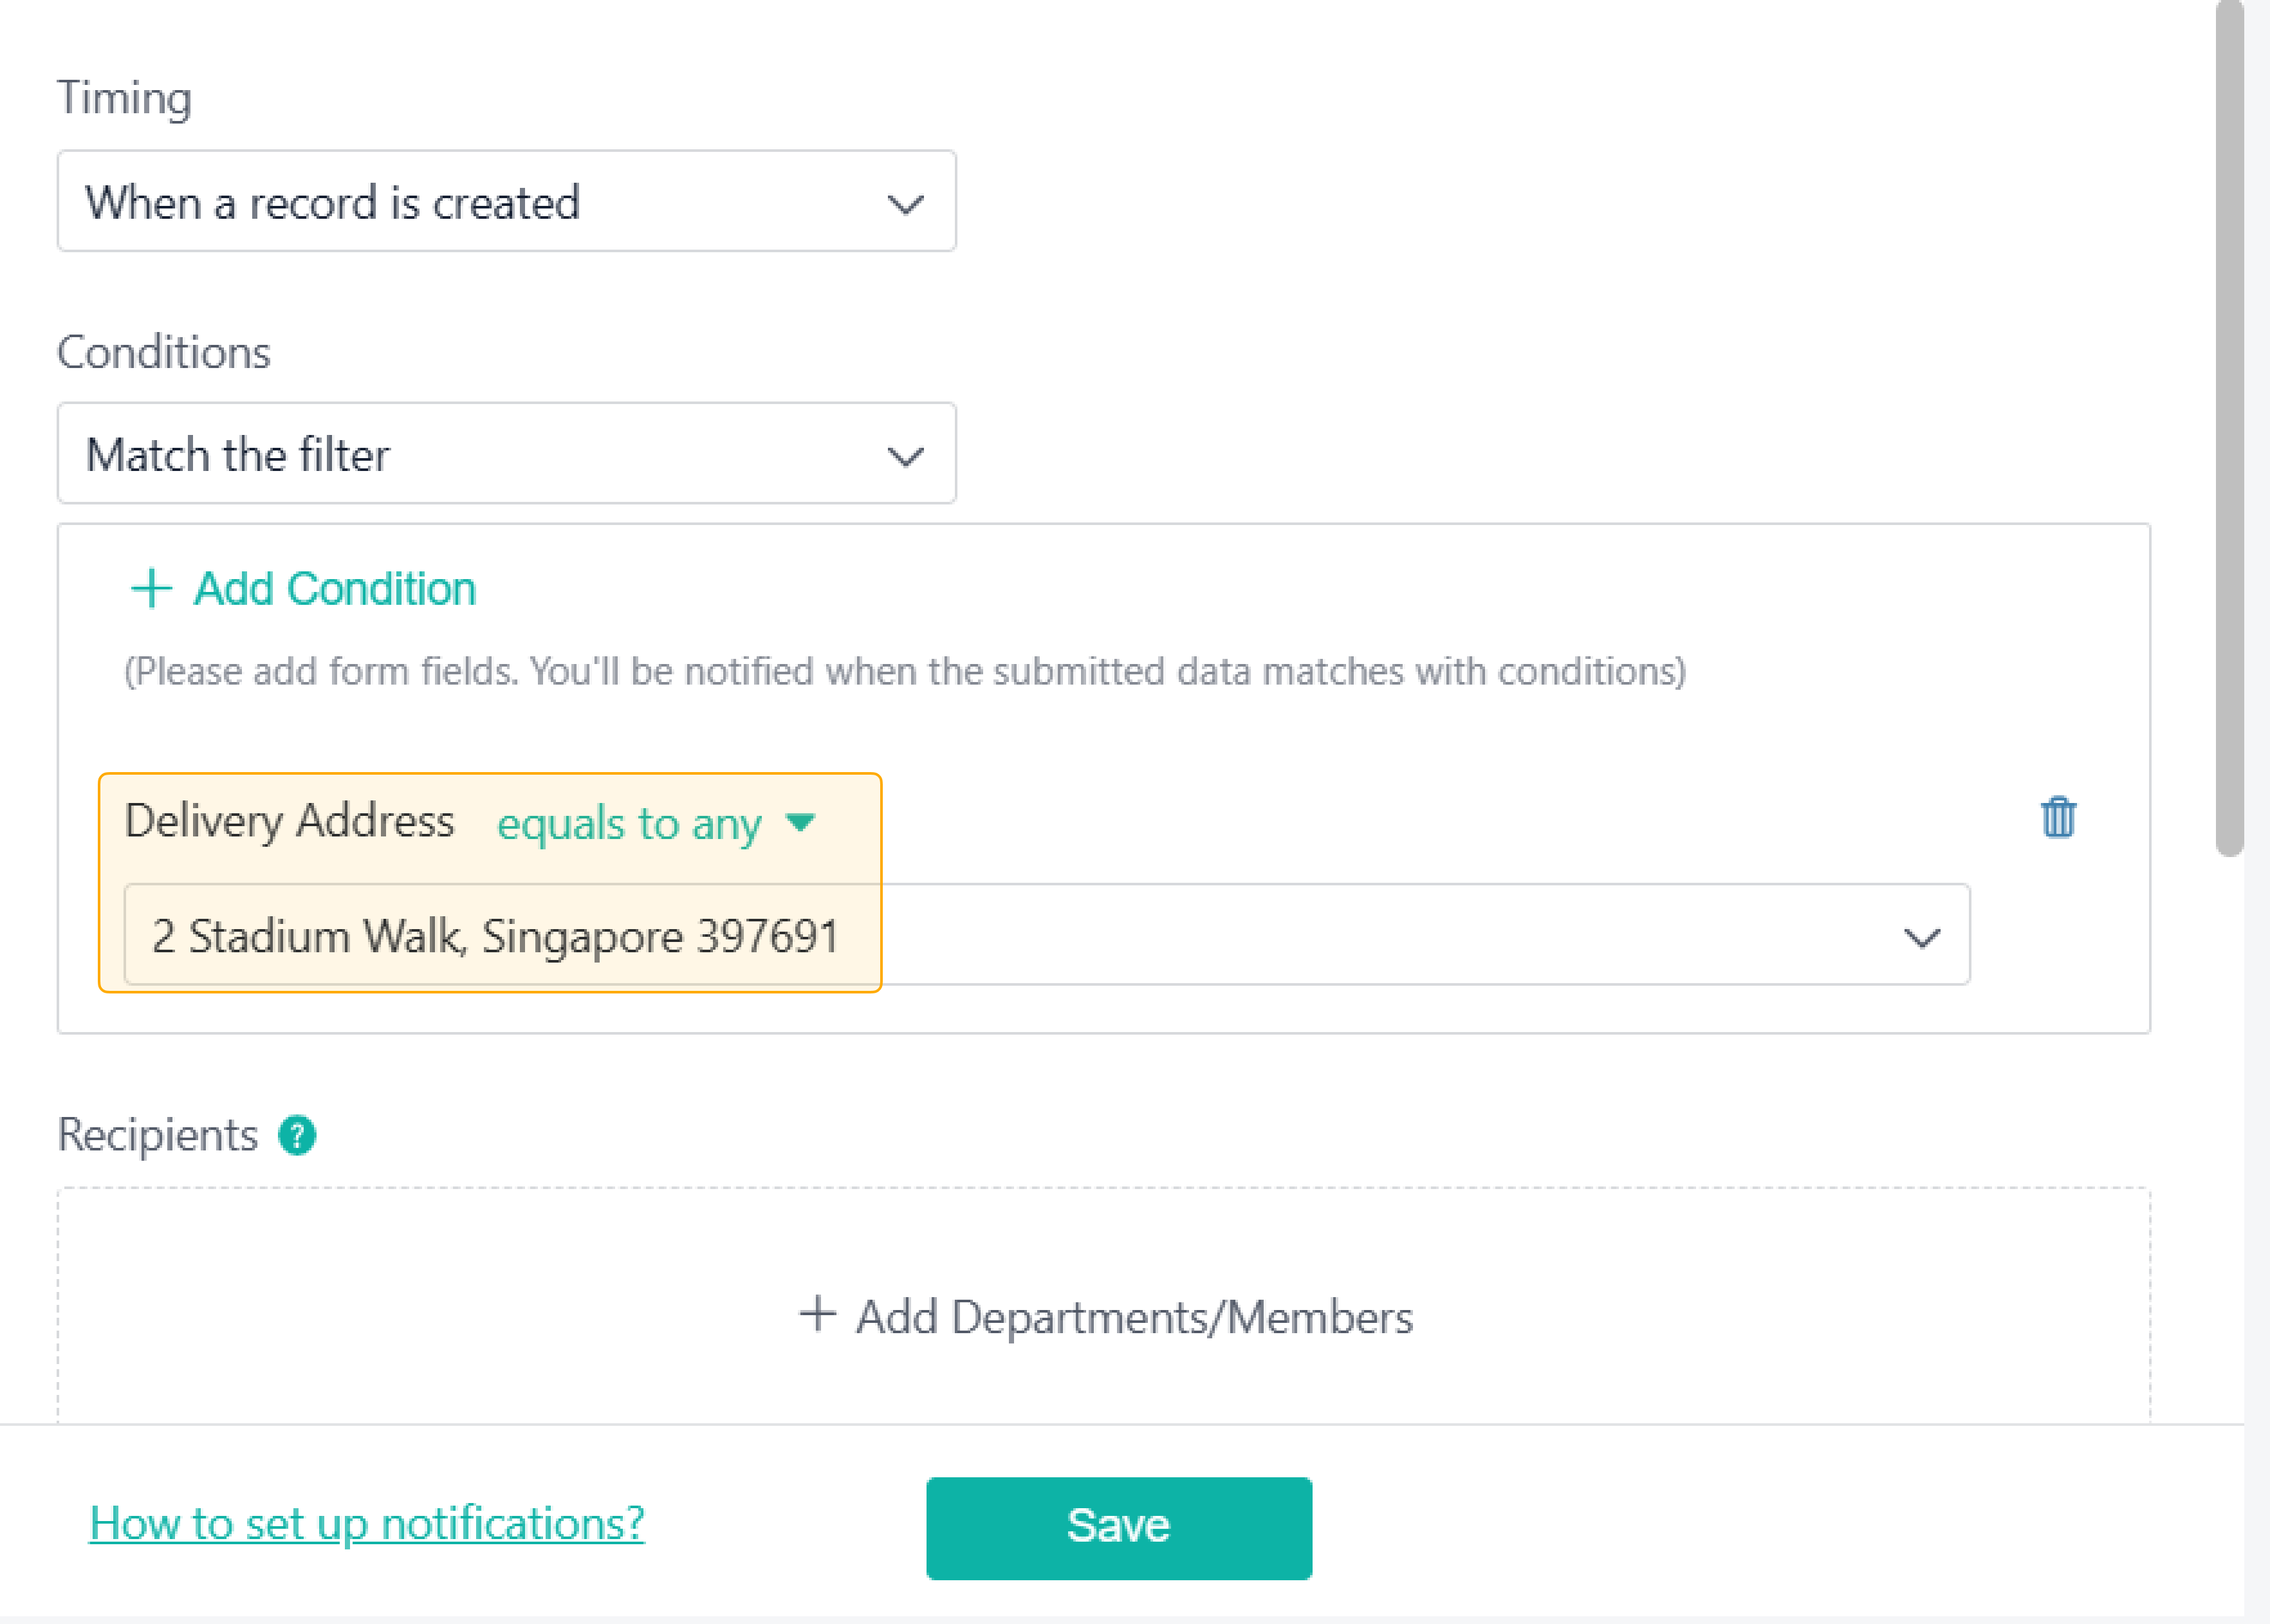
As product orders are submitted from different regions, you should select the corresponding recipients.
For example, if the delivery address is 2 Stadium Walk, Singapore 397691, the notification will be sent to Peach.

If you enter "2 Stadium Walk, Singapore 397691" in the form, the condition is met, and the notification will be sent to Peach.
1. Add conditions.
2. After creating a record, Peach will receive an email and click View details to view more details.

3. Check the details.

At Specific Time
Application Scenario(s)
Send a notification to the store owner at a specific time to handle the submitted orders.
How to Set
Start Time | Frequency | End Time | Recipient | Content | Method | Others |
2023-02-02 16:00:00 | Daily | 2023-02-28 16:00:00 | Owner | Custom | Publish the form to the recipient and configure the recipient's permissions to manage all data. |
Demonstration
If you set the start time as 2023-02-02 16:00:00, the recipient will receive the notification every day until 2023-02-28 16:00:00.
1. Select When a record is created.

2. After you create a record, the owner will receive an email and then click View Form to view the order.

3. Check the order.

Choose a Date&Time Field
Application Scenario(s)
- Send reminders seven days before an employee's birthday.
- Send reminders 15 minutes before a meeting.
- Send a reminder 15 days before a contract expires.
How to Set
Start Time | Condition | Recipient | Content | Method | Others |
Five days before the delivery date | No condition | Peach | Please be alerted that some jobs are overdue | Configure the view permission to the recipient at least. |
Preview
When an order is due to expire, the system will send a notification to the recipient to handle the order.
For example, an order is made at 2023-02-02 14:10:00, and the system sends a reminder to Peach at 2023-02-02 14:15:00.
1. Select Choose a Date&Time field.

2. After an order is made, Peach will receive an email and then click View details to view more details.

3. Check the details.

Choose a Date&Time Field (Add Condition)
Application Scenario(s)
When an order is due to expire, the system will send a notification to the recipient to handle the order.
How to Set
Recipient | Start Time | Condition | Content | Method | Others |
Members | Six days before the delivery date | Add condition | Please be alerted that some jobs are overdue | Configure the view permission to the recipient at least. |
Preview
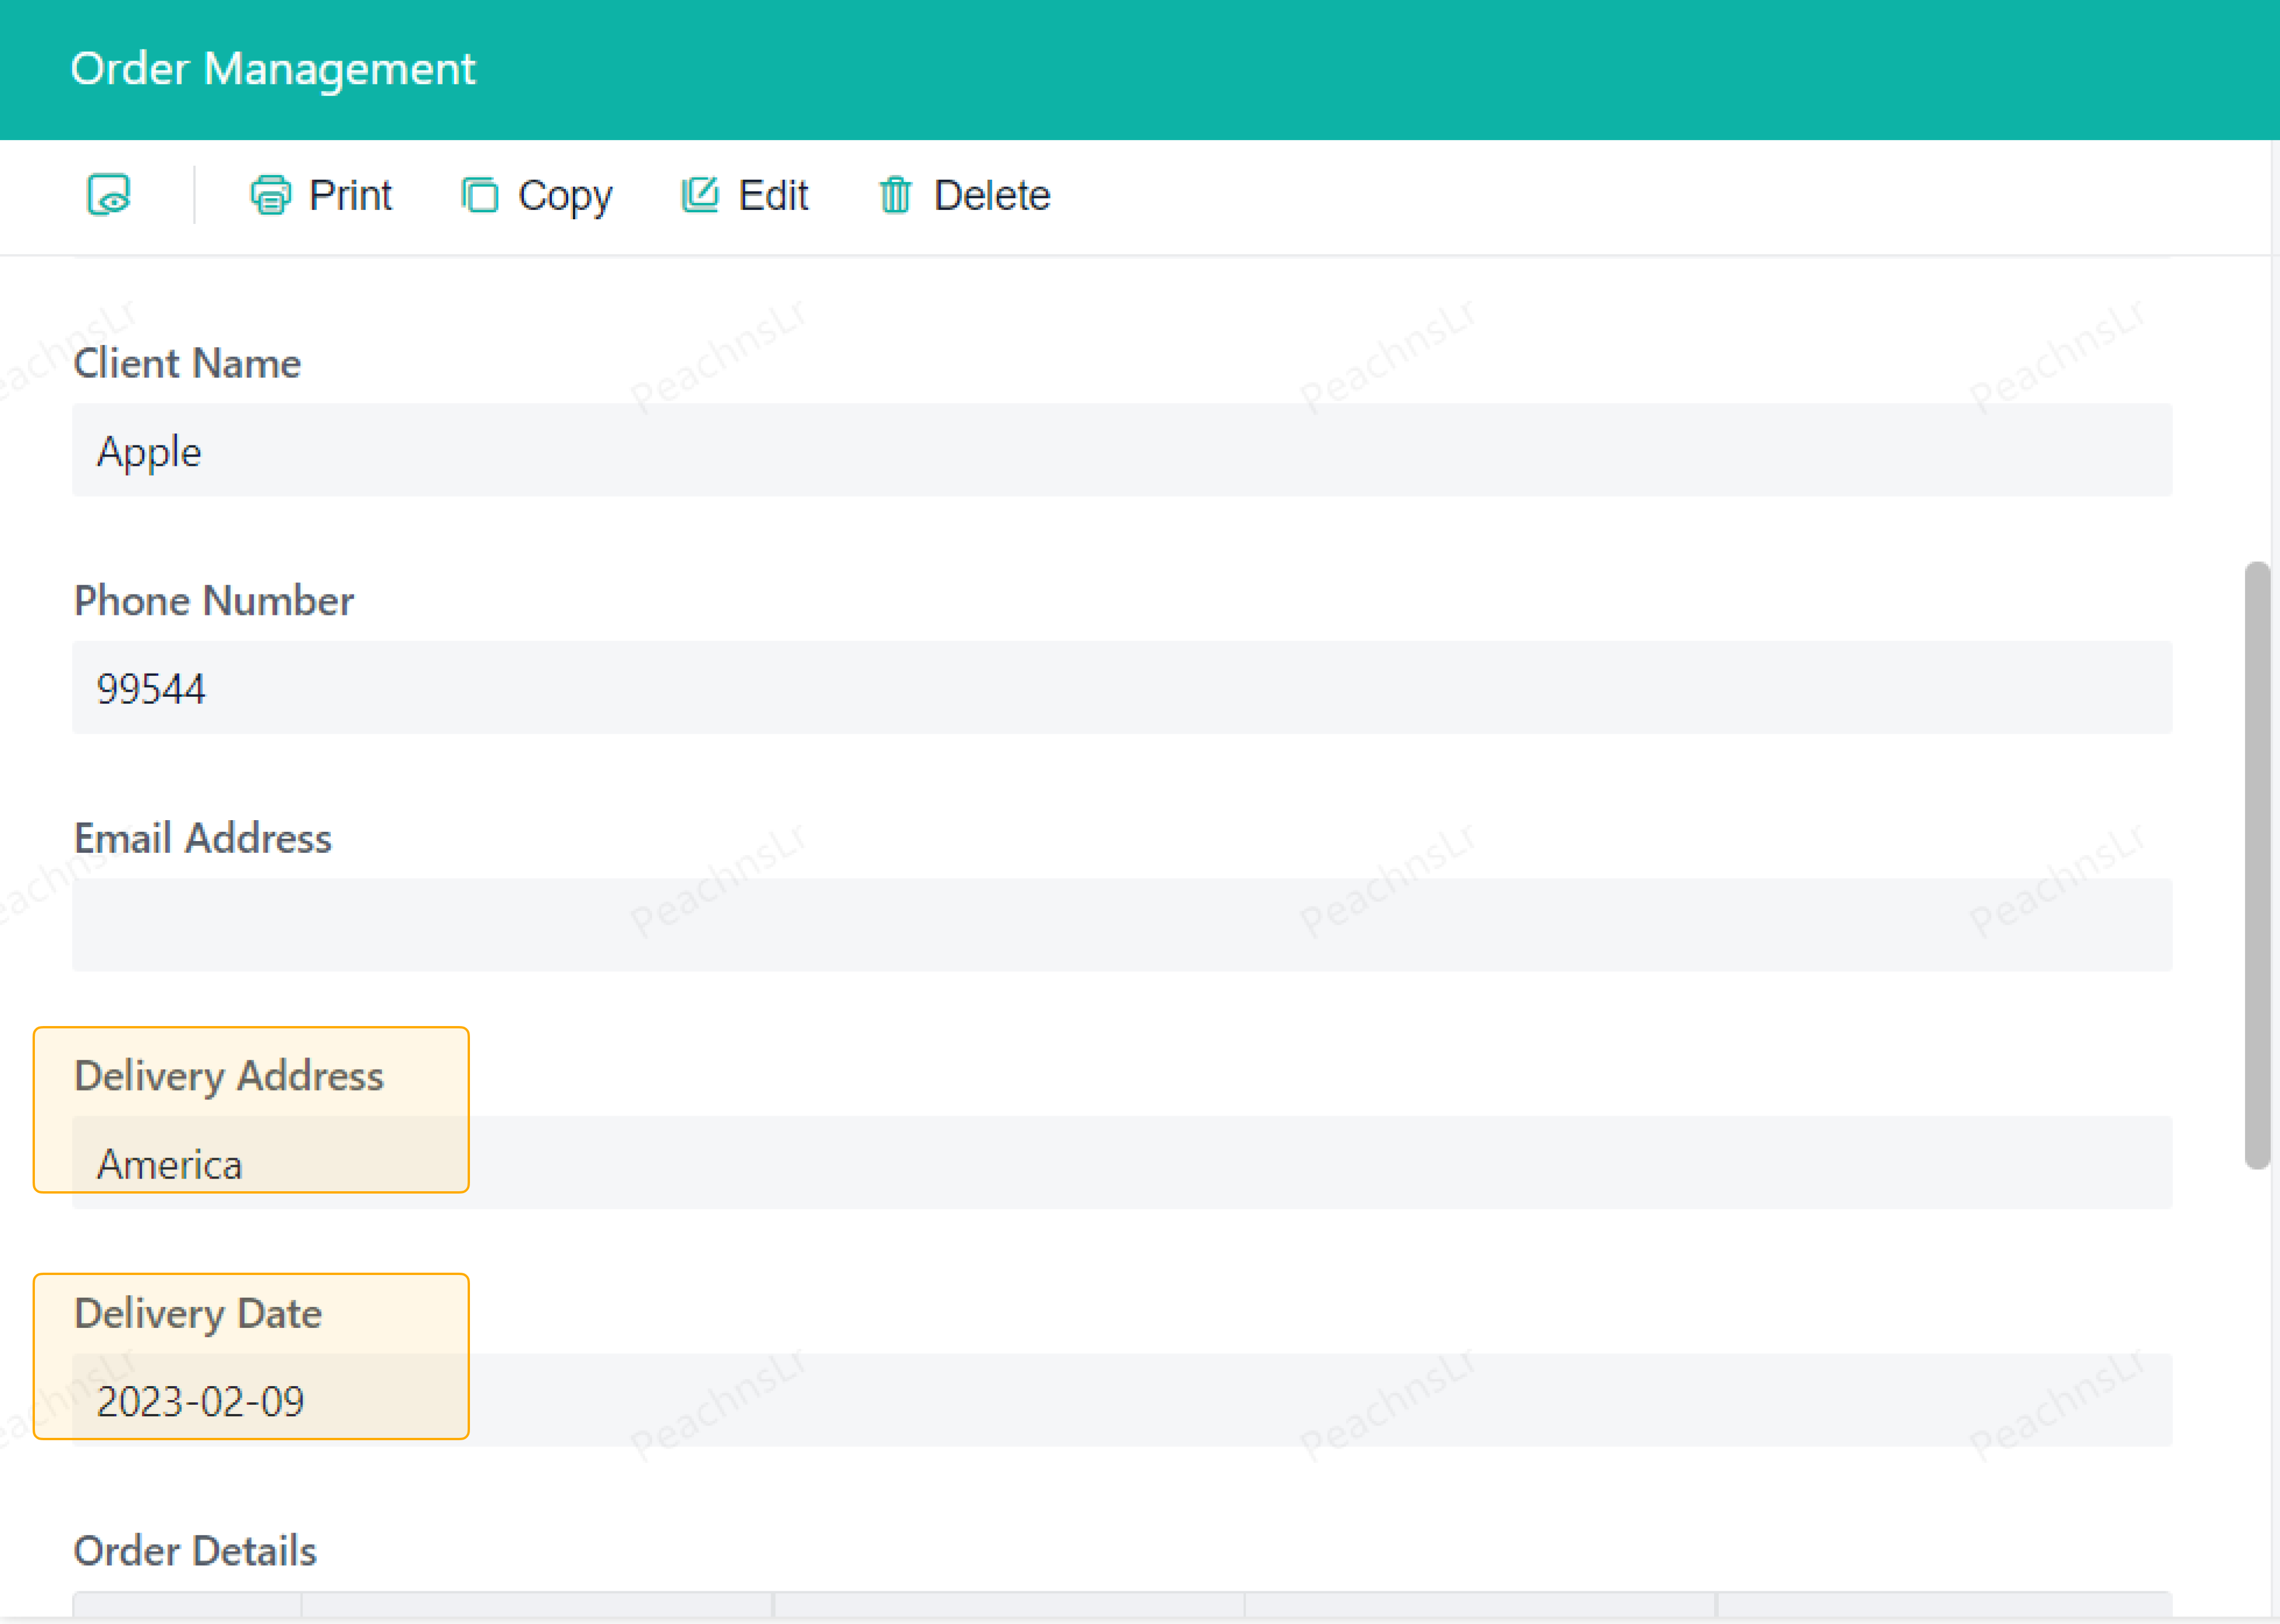
As product orders are submitted from different regions, you should select the corresponding recipients.
For example, if the delivery address is America, the notification will be sent to Peach.

If you select America in the Delivery Address, the notification will be sent to Peach.
1. Select Choose a Date&Time field.

2. Peach will receive an email one hour before the order date, and then click View Details to view more details.

3. Check the details.