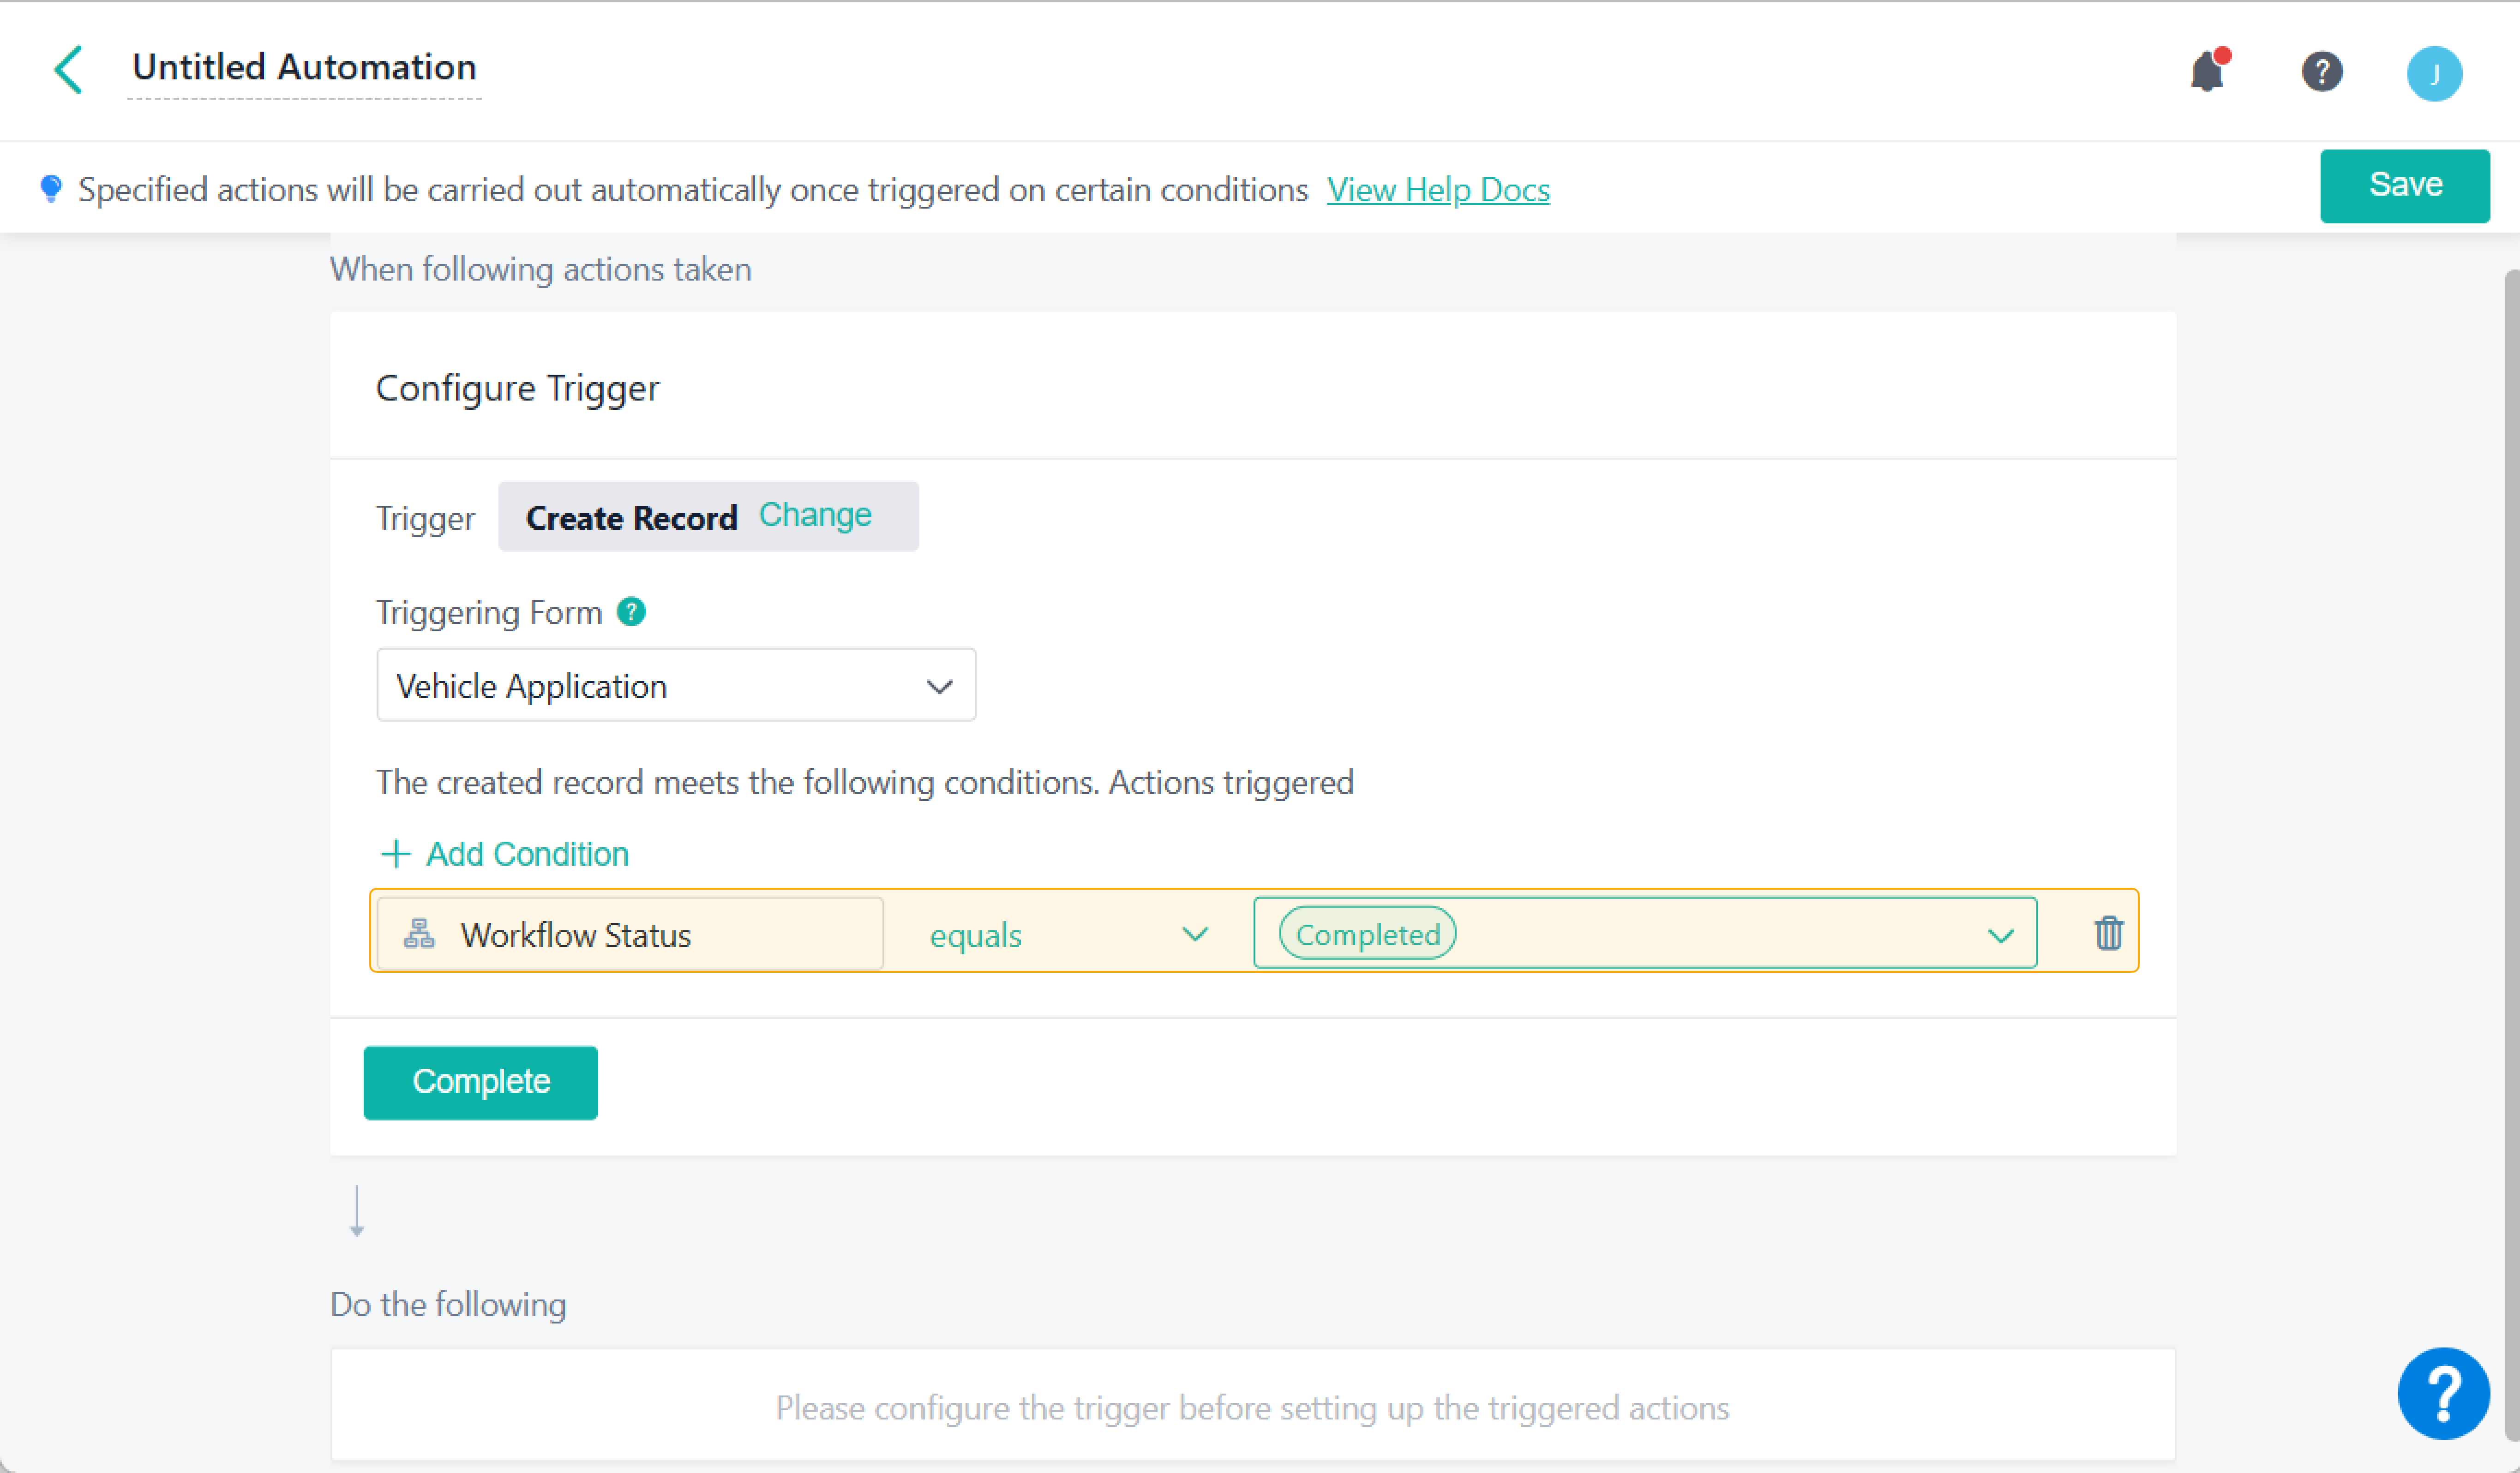
Configuring Trigger
This article walks you through what the trigger is and how to set it up.
What is a Trigger?
A trigger refers to the condition that triggers actions in Automations. When the condition is met, Automations will act accordingly. There are three procedures to set triggers, namely, configuring trigger, selecting triggering form, and adding condition.
What Triggers does Jodoo Support?
There are two kinds of triggers you can choose: trigger by record event and scheduled trigger.
1. Trigger by record event
- Create Record: When you create a record or the created record in the triggering form meets a condition, you will trigger an action.
- Update Record: When you update a record or the updated record meets a condition, you will trigger an action.
- Delete Record: When you delete a record or the deleted record meets a condition, you will trigger an action.
2. Scheduled Trigger
Schedule: trigger based on the specified schedule within a scheduled time.
One-time: trigger only once within a scheduled time.
How to Set up a trigger?
Step 1 Selecting a Triggering Form
Select a triggering form, which should be in the current app. You can only select and set one triggering form for each automation.
After the selection, will appear. If you need to view or modify the triggering form, click the button to jump to the Design page in the form.
Step 2 Adding a Condition
Add a condition after selecting a triggering form. Then Automations will act when the created, updated, or deleted record meets certain conditions. For details, see Adding Triggering Condition.
After finishing all the settings, click Complete to proceed.
FAQ(s)
Q: What actions can't be triggered?
A: Actions will not be triggered in Automations when you:
- Import data,
- Sync data from output forms to another form,
- Edit/delete data in batches.
Q: are Create Record and Update Record the same in the workflow form?
A: If the triggering form is a workflow form, you must differentiate Create Record from Update Record.
- Create Record: only refers to workflow initiating.
- Update Record: refers to the actions at other approval nodes. If you select Completed in Add Condition, most of the cases belong to Update Record.
- If a workflow ends immediately after it is initiated, it belongs to Create Record, and you can select Completed in Add Condition.
I have finished reading. 🏆
👉I can't wait to try it for myself.
👉I need more HELP in Discord Forum.


