Page Popup
Introduction
Plugin Introduction
The Page Popup plugin is used to access a pre-configured URL link in a pop-up window when you fill out a form.
Application Scenario(s)
The plugin is applicable to the scenarios where you should view data from other sources to confirm the filled information when filling out a form.
- For example, when filling out a recruitment plan, the HR department can open a dashboard in a pop-up window on the form page to confirm the current manpower requirements of each department.
- Similarly, when signing an agreement, open a document in a pop-up window on the signing page to review the specific terms of the agreement.
- When filling out an event registration form, open a form in a pop-up window on the registration page to check the detailed information of the event.
Preview
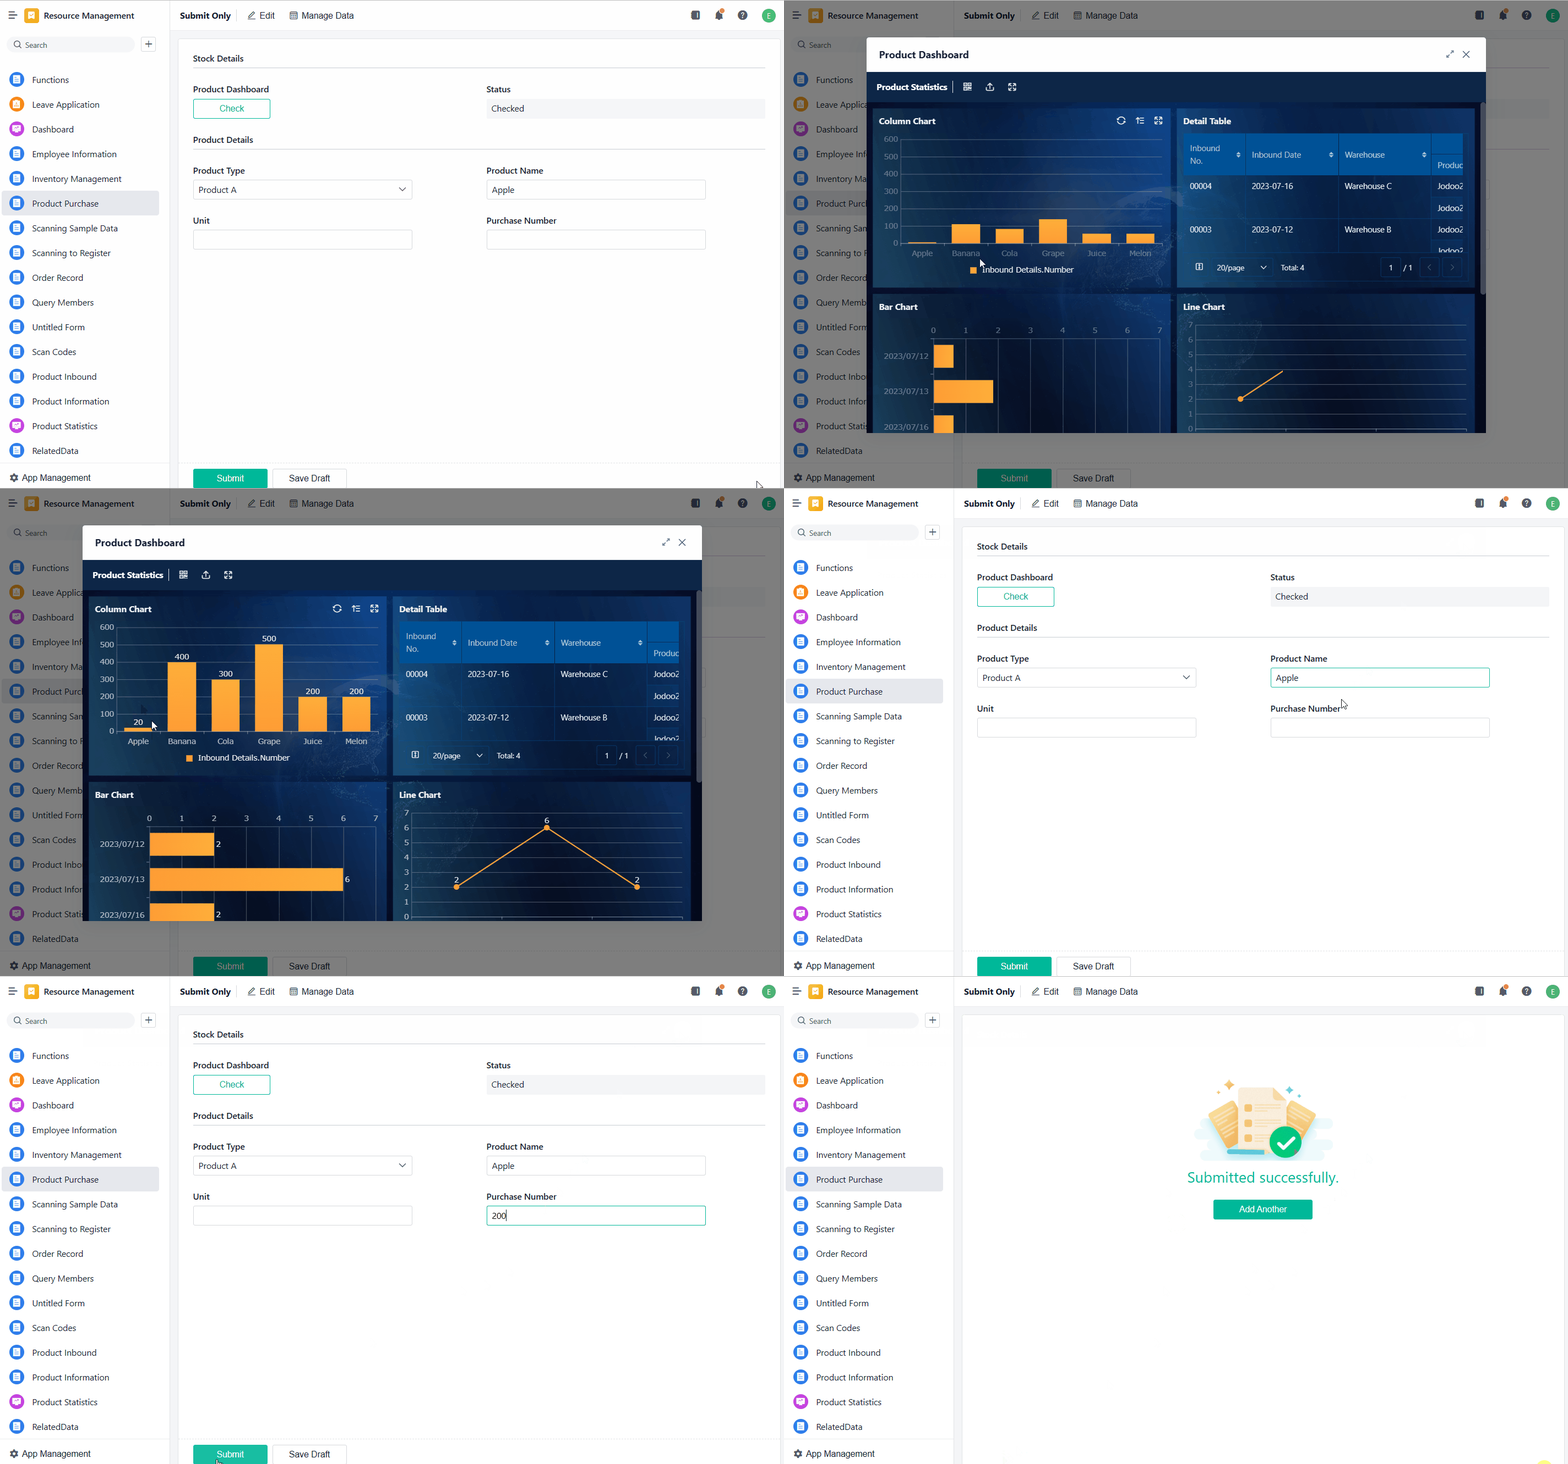
Take the Product Purchase form as an example: You need to check the quantity of products before confirming the number of the products you should purchase. To do so, you can open the dashboard in a popup window on the current page to check the available quantity.
2. Besides opening the dashboard in a popup window, you can also open it on a new page to check the available quantity.
Plugin Installation & Configuration
Installing the Plugin
1. Install the plugin directly.
- You can click the link on the right to install the plugin directly: Page Pop-up Plugin Installation.
- After successful installation, refer to the section "Enabling the Plugin" and go to Open Platform > Plugin to configure and enable the plugin.
2. Install the plugin in Market.
Go to Market and install the Page Popup plugin. For details, refer to the section "Installing Plugin(s)" in Plugin Market.
Enabling/Disabling the Plugin
In Plugin, click to enable/disable the plugin.
Creating a Form
1. Take filling out a product purchase form as an example: create a Product Purchase form and set the fields as follows:
Field Description | Field Name | Field Type |
Stock Details | Product Dashboard | Button |
Status | Single Line | |
Product Details | Product Type | Single Select |
Product Name | Single Line | |
Unit | ||
Purchase Number | Number |
2. Click the Status field, go to Field Properties > Field Permissions, and untick Edit.
Front-End Event Configuration
Creating Front-End Event(s)
Go to Form Properties > Front-End Event, and click Settings:
Setting Event Name & Description
After creating a front-end event, set the basic information of the event — that is, the event name and description— to distinguish the event from others:
Setting the Trigger
The front-end event (opening a dashboard in a popup window) will be triggered only when the Button field is clicked. Therefore, you need to select the Product Dashboard button as the Field that triggers the event.
Setting the Triggered Action
For the Page Popup plugin, there are two ways to access an URL: Open in a popup window and Open on a new page. Select one based on your needs. For different ways to access an URL, the triggered actions are different.
1. Set the triggered action.
a. If you select Open in a popup window, here are the settings for the triggered action:
- Select the plugin: go to Page Popup > Open in a popup window.
- Set Title: select Custom and fill in the title of the popup, such as Product Dashboard.
- Set URL: select Custom and fill in the URL link of the popup, such as the URL link for Product Dashboard.
- Set Return: select Custom and fill in the status that will be written back to the Status field after a popup is opened, such as "Checked".
b. If you select Open on a new page, here are the settings for the triggered action:
- Select the plugin: go to Page Popup > Open in a popup window.
- Set URL: select Custom and fill in the URL link of the popup, such as the URL link for Product Dashboard.
- Set Return: select Custom and fill in the status that will be written back to the Status field after a popup is opened, such as "Checked".
Note:
1. You should use a complete link, such as https://hc.jodoo.com, to ensure that the link is accurate and accessible.
2. It is recommended to use https links, because some browsers prohibit referencing http on https pages.
3. The filled link needs to allow iframe embedding display. If you are not sure whether the URL used supports it, consult the platform, to which the URL belongs.
When some errors concerning the popup window occur, such as the connection failure, white screen, or 404 error, check the above situations.
2. Select the field to which the status is written back.
Under Configure the storage mapping for the following contents and fields, click Add, select Status, and select the Status field for the box next to it. In this way, the status will be filled back into the Status field. Then click Save.


