


Subform Filler
Introduction
Feature(s)
Subform Filler contains the following two functions:
- Through the "Auto Add Rows" function, you can input the required number of rows in a field and the subform will automatically add the rows for you. Then you can enter the data in the subform without having to add rows frequently, which improves your efficiency.
- Through the "Split Multiple Options" function, you only need to select the required values from the Checkbox field, and they will be filled in the subform automatically. Therefore, you do not need to enter data repeatedly, which avoids errors during form-filling.
Application Scenario(s)
You can use this plugin to input multiple data in the subform.
- For example, in the case of inventory management, you can use this plugin to add the corresponding number of subform rows according to the total supply categories. You can also select items from Checkbox so the items will be filled in the subform automatically.
- In the case of product management, you can input the number of product series, and the subform will add the corresponding rows automatically. You can also select the products from Checkbox, and the product names will be filled in the subform automatically.
Preview
In the case of inventory management, you can use this plugin to add the corresponding number of subform rows according to the total supply categories. You can also select items from Checkbox so the items will be filled in the subform automatically.

Installing & Enabling the Plugin
Installing the Plugin
1. Install the plugin directly.
- Click the link to install Subform Filler.
- After installing the plugin, refer to the section "Enabling the Plugin" and go to Open Platform > Plugin to configure and enable the plugin.
2. Install the plugin in Market.
Go to Market and install the Subfom Filler plugin. For details about installing a plugin in Market, refer to the section "Installing Plugin(s)" in Plugin Market.

Enabling the Plugin
In Plugin, click the icon to enable the plugin.

Designing a Form
Take inventory management as an example: You need to create an Inventory Management form with the following fields:
Field Description | Field Name | Field Type |
Item Category | Department | Department |
Number of Categories | Number | |
Item Details | SubForm | |
Number | Single Line | |
Item Name | ||
Unit Price | ||
Quantity | Number | |
Select Items | Item Name | Checkbox |
Select Items | SubForm | |
Item Name | Single Line | |
Unit Price | ||
Quantity | Number |

Configuring Front-End Event(s)
Auto Add Rows
1. Add a front-end event.
Go to Form Properties > Front-End Event, and click Settings to add a front-end event.

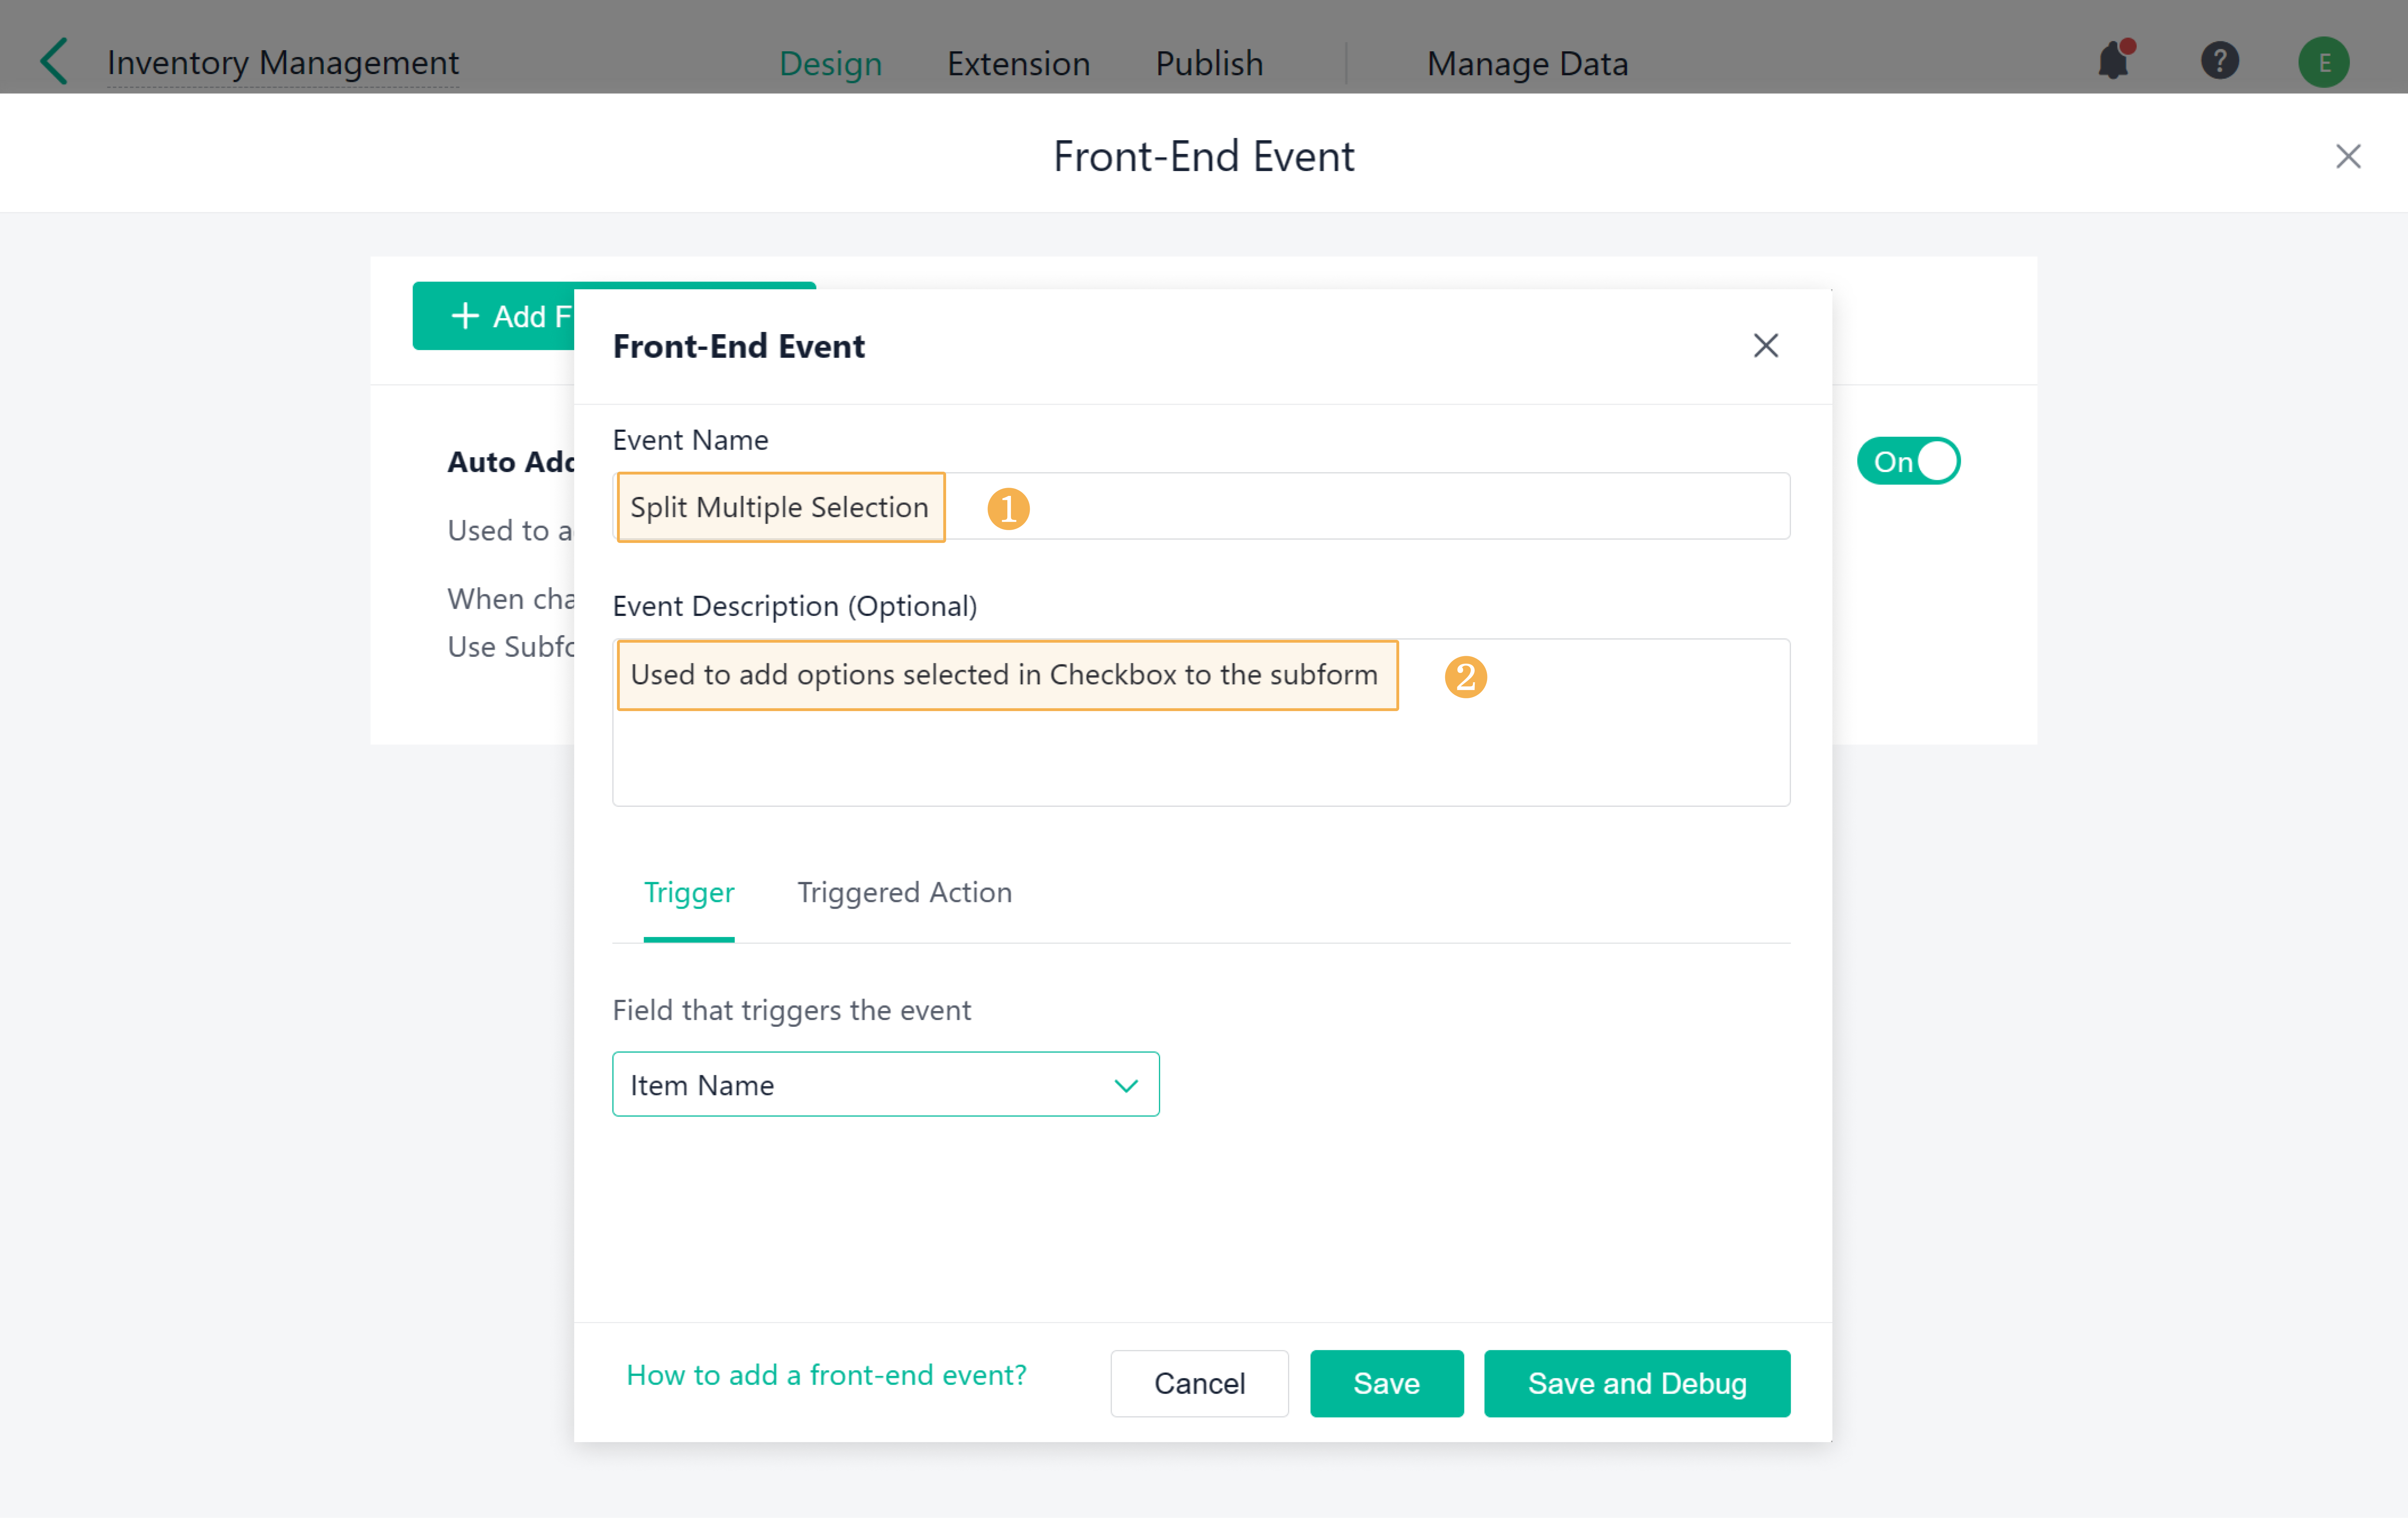
2. Set the event name and description.
After adding a front-end event, you need to enter basic information about the event, such as the event name and description.

3. Set the trigger.
This plugin will add the corresponding number of rows to the subform according to the value entered in the Number of Categories field. Therefore, you need to select Number of Categories from the drop-down list under Field that triggers the event.

4. Set the triggered action.
a. Set the triggered action as follows:
- Select the plugin: select Subform Filler > Add rows automatically.
- Set the number of added rows: select Field Value > Number of Categories.

b. Set storage mapping rules. Click Add, and set the rule as saving SubForm.Order to the Item Details.Number field. Click Save after the settings.

Note:
If you do not need the Number field, untick View in Field Properties > Field Permissions.
Split Multiple Selection
1. Add a front-end event.
On the Front-End Event page, and click Add Front-End Event.

2. Set the event name and description.
After adding a front-end event, you need to enter basic information about the event, such as the event name and description.
3. Set the trigger.
This plugin will enter data into the subform according to the selected options in the Checkbox field. Therefore, you need to select Item Name (Checkbox) from the drop-down list under Field that triggers the event.

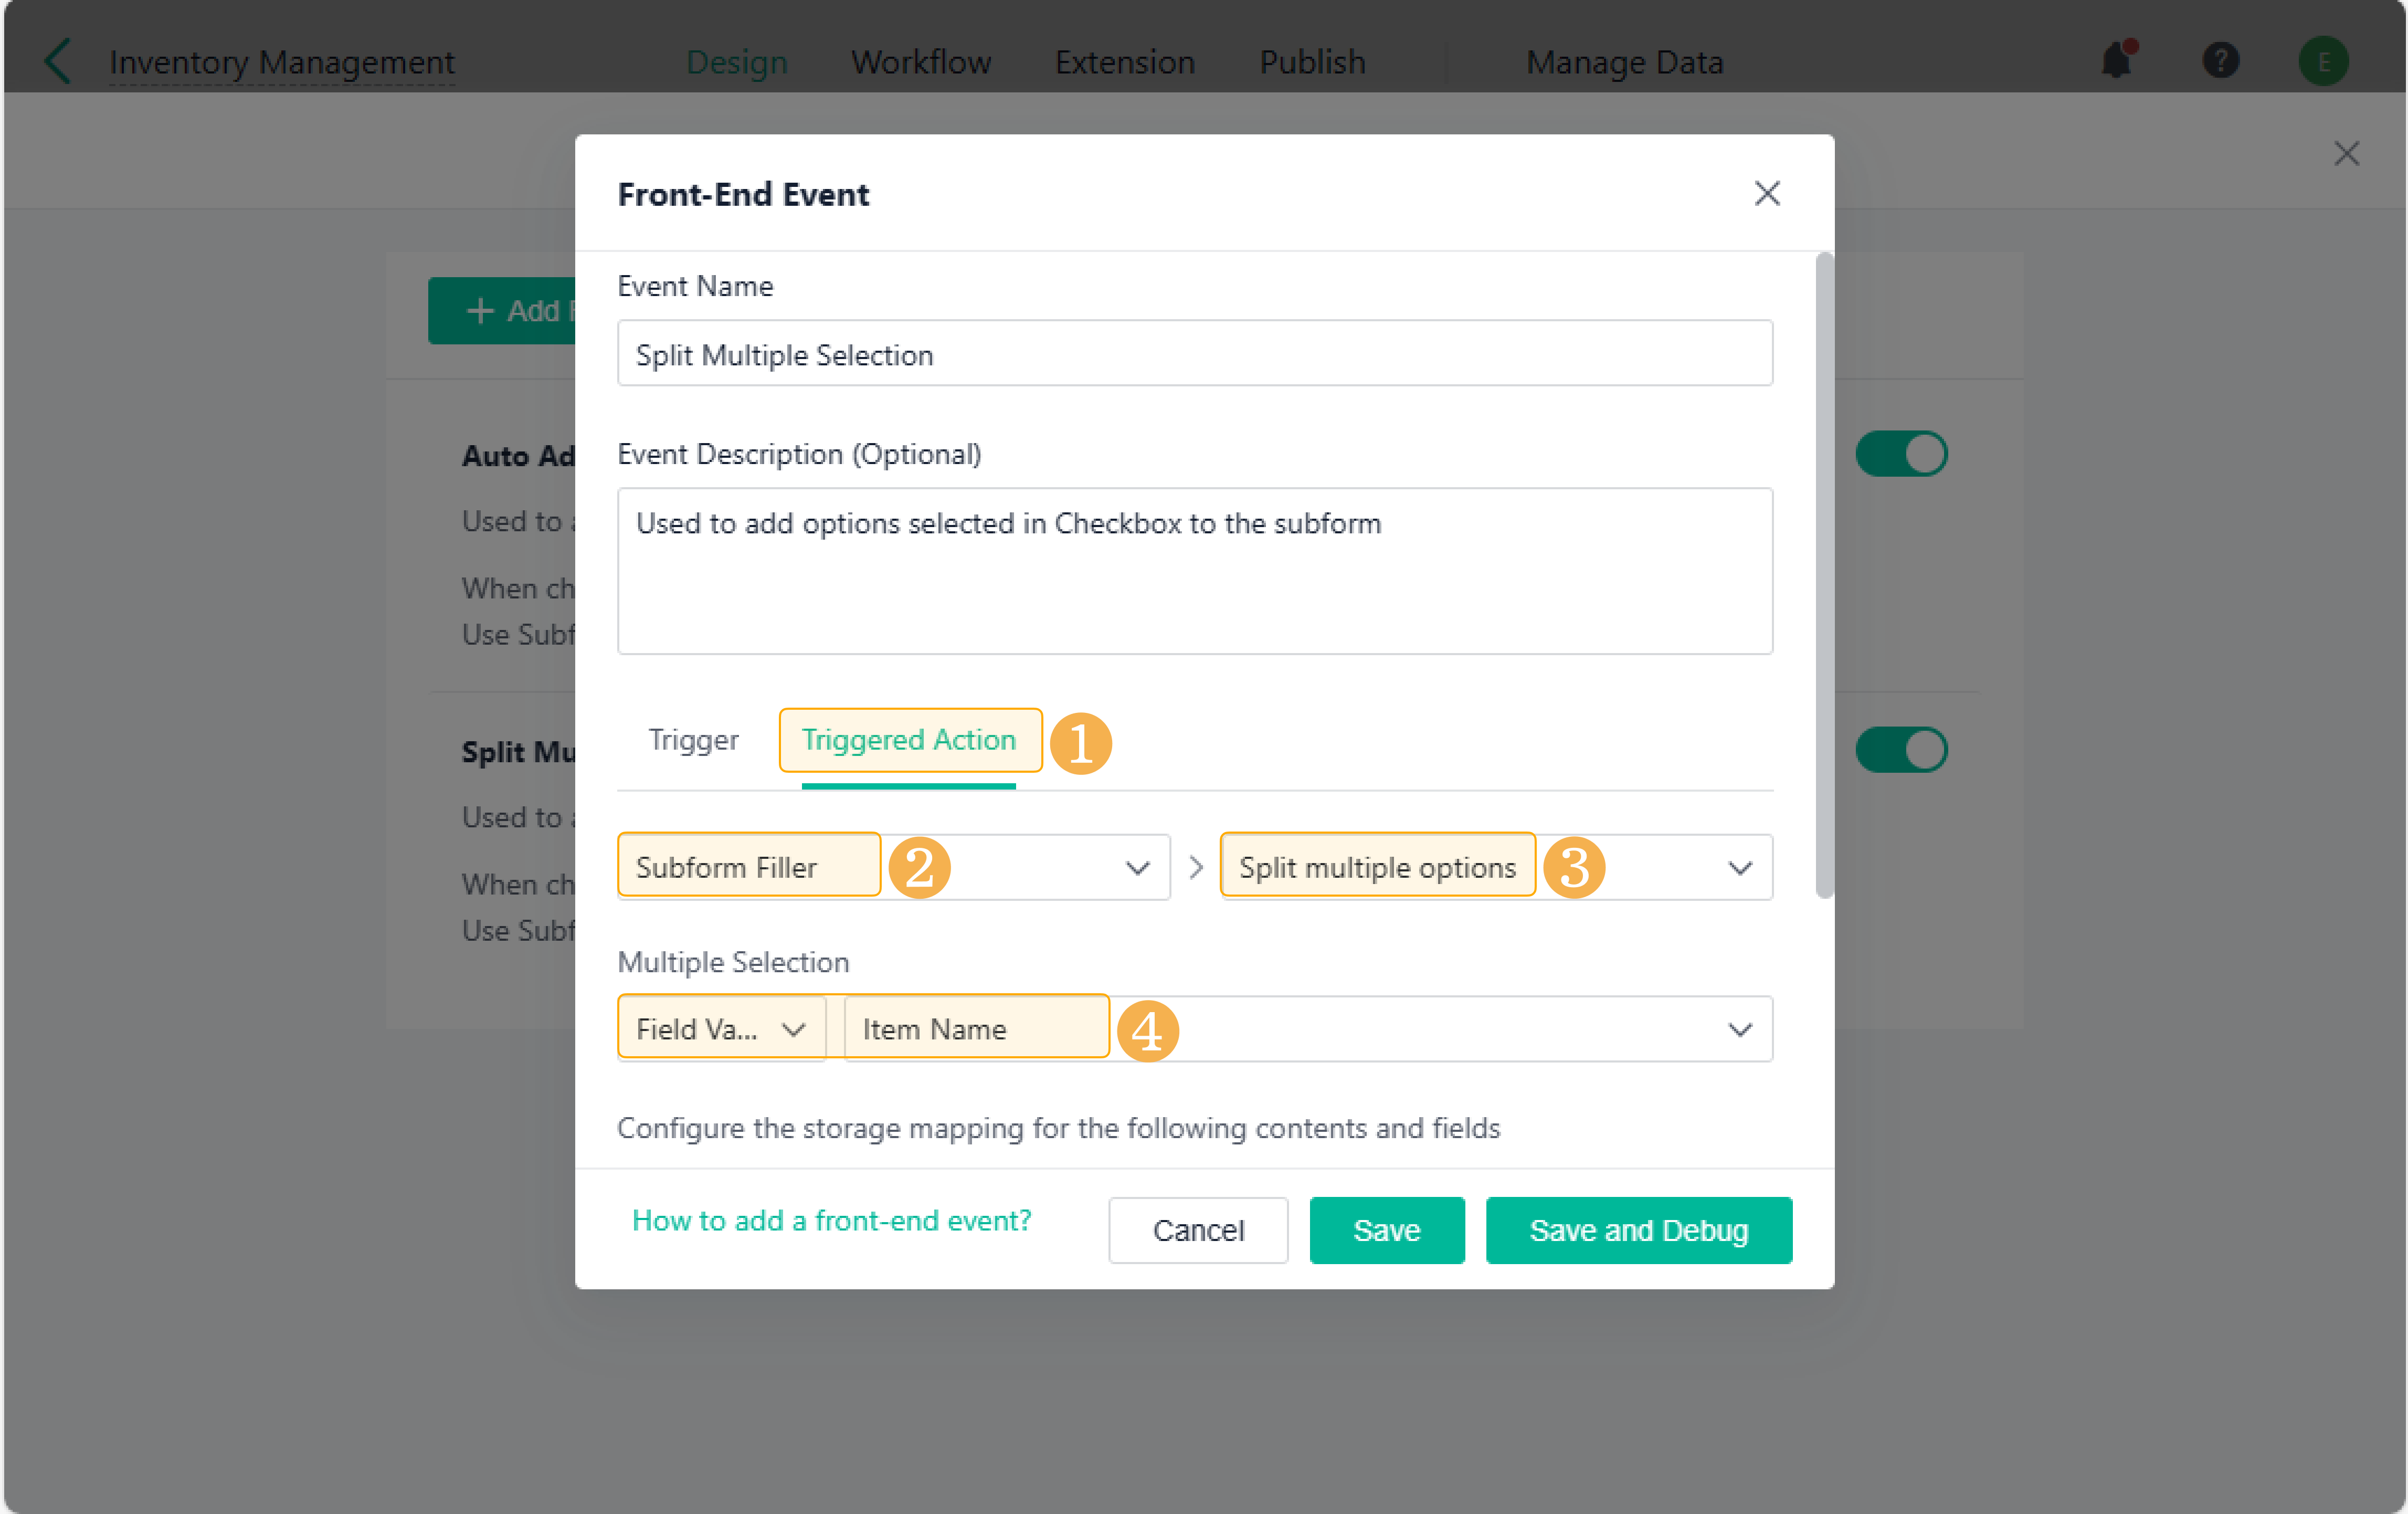
4. Set the triggered action.
a. Set the triggered action as follows:
- Select the plugin: go to Subform Filler > Split Multiple Options.
- Select a multi-select-type field (Checkbox/Multi Select field supported) under Multiple Selection : select Field Value > Item Name.
b. Set storage mapping rules. Click Add, and set the rule as saving SubForm.Option to the Item Details.Item Name field. Click Save after the settings.
