


Record Title
Introduction
Feature(s)
A record title is a short identifier for each record in a form. It allows you to quickly identify records so that you can manage and apply them more efficiently.
You can use it to distinguish data in Select Data, Webhook, Calendar, and so on.
Application Scenario(s)
- In a student information form, use the student number and name as the record title to filter out useless information when searching for student information.
- In a complaint form, use the complaint type, phone number, and time as the record title to identify customer needs and provide timely feedback.
- In a job application form, use the intended position and applicant name as the record title to grasp the basic information about the hiring process quickly.
Preview
If there are multiple records in a form and each one has several pieces of information, a record title can help you better manage and apply them.

Setting Procedure
Where to Set
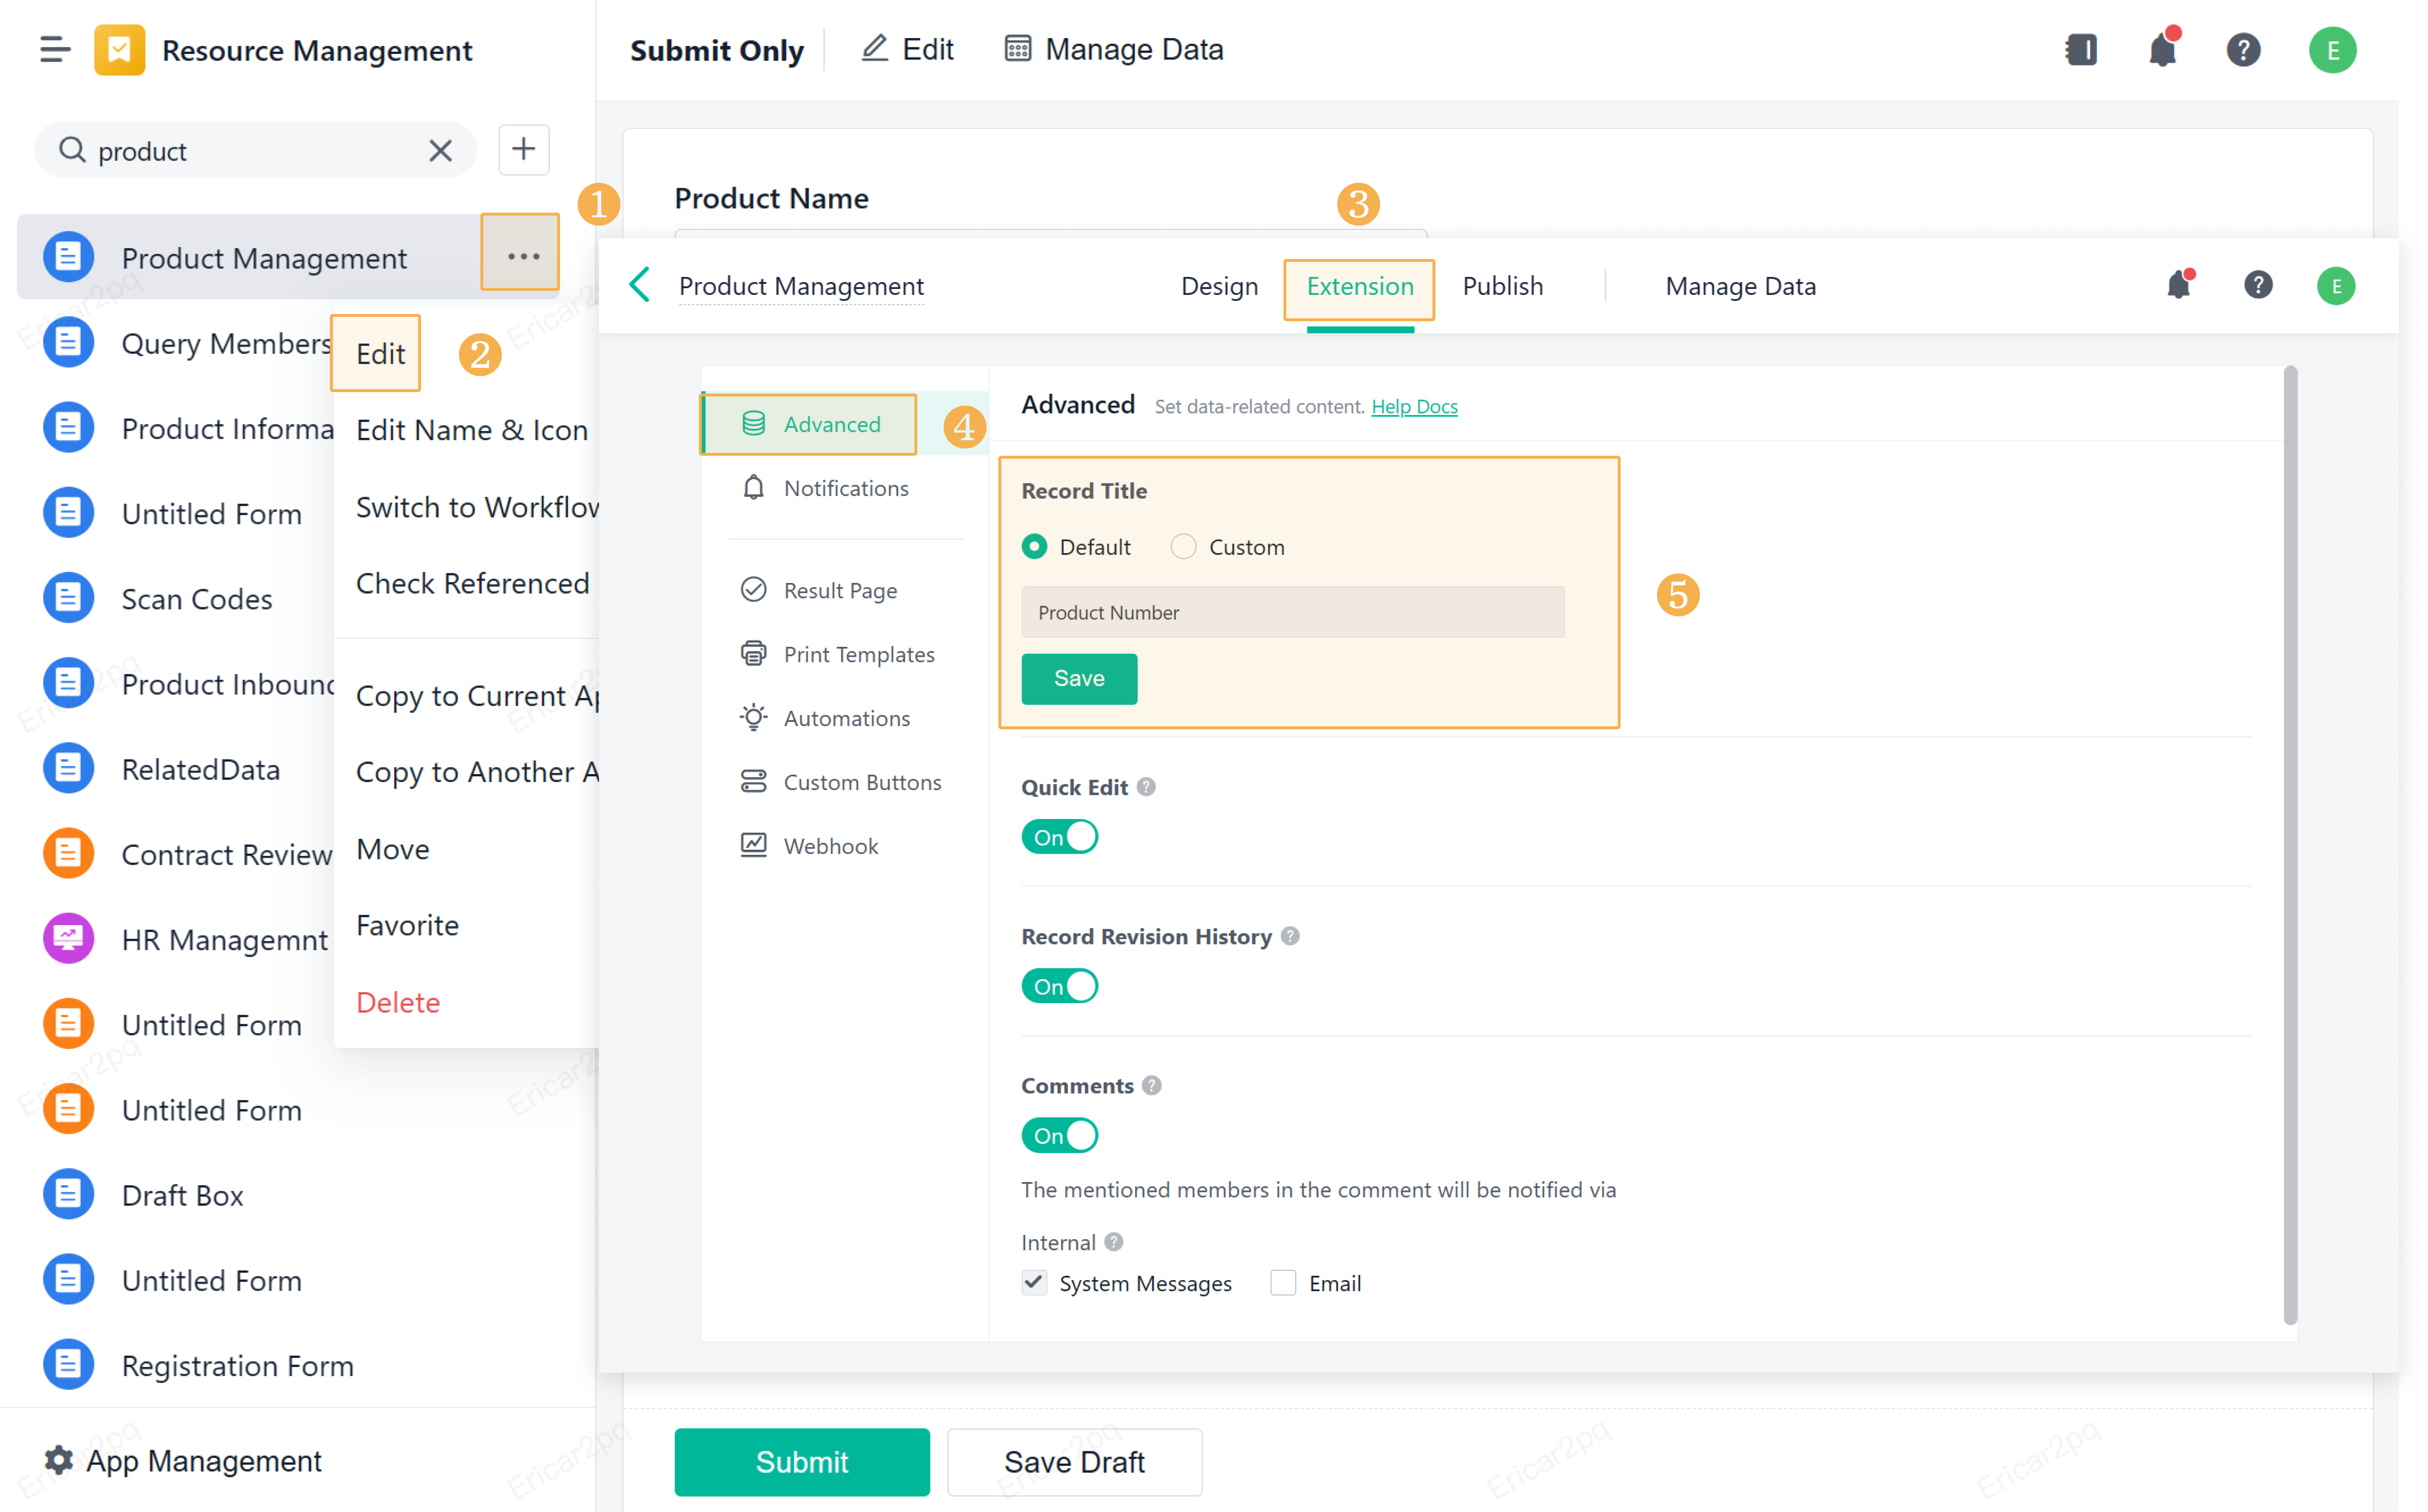
1. Set a record title.
Select a form, click Edit, and go to Extension > Advanced > Record Title to set the record title.
2. Display the record title.
Go to Manage Data > Display Fields, and tick Title.

How to Set
You can set the record title to Default and Custom.
1. Default
If you select Default, the title will be the first field of the form.
For example, if the first field is Product Name, the record title will be Product Name.

2. Custom
If you select Custom, you can add text, symbols, spaces, and form fields to customize the record title.
For example, input Product Management and select Product Number.

3. Note(s)
a. Fields including Divider, Image, Attachment, SubForm, Query Data, Selecxt Data, and Signature cannot be used as the record title. If any of them is the first field in the form, the default record title will be the supported field after it.
For example, if Product Attachment is the first field in the form, the record title will be Product Name.

b. If all the fields are unsupported, the default record title will be Created User.
For example, because both Product Image and Product Attachment cannot be used as the record title, the default title will be Created User.

Where to Apply
1. Use the record title when printing QR codes in batches.
Printing QR codes in batches will display the record titles under the generated QR codes so that you do not need to check the records repeatedly.

2. Use the record title in Select Data.
On the form design page, if you tick Show Record Title when selecting fields for Select Data, the record titles will be displayed.

3. Use the record title in Notifications.
If you select Choose a Date&Time field or When a record is updated when setting the Notifications, the record title will be displayed as the content of Data in the notification. In this way, the recipient can easily search for and check records.

4. Use the record title in the Calendar component of the dashboard.
Add a Calendar component, and the record title will be displayed in the calendar.
