


Basic Settings & Toolbar of Workflow
To help you design a workflow with speed and ease, this article describes some basic settings during the workflow design process, such as adding, copying, and connecting nodes. In addition, you will also learn how to use tools in the toolbar.
What Settings are Available for Configuring a Workflow?
Adding Node(s)
For some complex workflows, the initial workflow may not meet your needs. Then you can add or modify nodes manually through the following two ways.
1. Drag nodes from the toolbar to the design space and move them to any position.

2. Add nodes through connections or by clicking around the node.

Deleting Node(s)
1. Delete one node.
Select the node to be deleted, click , and click Delete Node.

2. Batch delete nodes.
Select the nodes to be deleted and click in the upper left corner of the toolbar.

Note:
You can also press the Enter key on your keyboard to delete them after selecting them
Batch Setting Nodes
By selecting multiple process nodes at once, you can batch-set field permissions and node operations, improving the efficiency of process setup. For nodes that require special adjustments, you can make individual settings after completing the batch setup.

Cloning Node(s)
If you want to add a node, whose properties are the same as or similar to those of an existing node, clone the node and modify it to finish the node configuration quickly.

Note:
The name and properties of the node will also be cloned.
Connecting Nodes
A node connection is the arrow line between two workflow nodes. It determines which direction a workflow flows to and how nodes are related to each other.
1. Add node connections.
There are hollow circles around each node. You can drag and drop connections from these circles. If you need to modify the relationship between two nodes, drag the connection from one node to the hollow circle of the other.

Note:
When configuring the workflow, it is recommended to use the workflow returning feature instead of the upward connections, so as to avoid failed workflow submission caused by loops. For details, see Problems of Failed Workflow Submission.
2. Add notes for connection lines.
When setting workflows, if you need to add notes for users to better understand workflow design principles and flow rules, double-click the connection line:

Note:
You can change lines by pressing the Enter key. The number of characters in notes are at most 100.
What features are Included in the Toolbar?
The toolbar includes Undo/Redo, Task Node, CC Node, Child Workflow, Align, Layout, Zoom in/out, Navigator, the delete button, Hotkeys, Summary View/Detailed View, and so on.

Undo&Redo
- Undo: If you need to undo an action you have done, click Undo on the leftmost side of the toolbar.
- Redo: If you need to redo an action that you have undone, click Redo on left side of the toolbar.

Node Type(s)
There are four kinds of workflow nodes that can be added currently:
- Task Node: It can be used to approve workflow. It is between the start node and the end node. You can add multiple approval nodes and use connection lines to connect them.
- Child Workflow: The workflow in another workflow form can be circulated as a child workflow of the whole workflow. After the child workflow is finished, the current workflow will continue.
- CC Node: It can be used to notify relevant members to view the progress or the result of workflows.
- Plugin Node: It is a node processed by external plugins, which can be used to transform, process, and validate workflow data, as well as send notifications.
You can add nodes according to your need when designing a workflow.

Align
There are six ways to align nodes:
Align | Type | Rule |
Align in Horizontal Direction | Left | Align to the left with the leftmost node in all selected nodes as the origin. |
Center | Align to the center with the middle position of the leftmost and rightmost nodes in all selected nodes as the origin. | |
Right | Align to the right with the rightmost node in all selected nodes as the origin. | |
Align in Vertical Direction | Top | Align to the top with the highest node in all selected nodes as the origin. |
Middle | Align to the middle with the middle position of the top and bottom nodes in all selected nodes as the origin. | |
Bottom | Align to the bottom with the lowest node in all selected nodes as the origin. |

Select nodes that need to be aligned (at least two nodes) and click Align in the toolbar to set alignment.

Layout
There are two types of layouts:
- Horizontal: make the horizontal distance between each node equal.
- Vertical: make the vertical distance between each node equal.
Select three or more nodes, click Layout in the toolbar, and select Horizontal or Vertical to make nodes be equidistant in horizontal or vertical directions.

Note:
Making nodes horizontally or vertically equidistant means the spacing between nodes is equal in a horizontal or vertical direction. This is different from horizontal or vertical alignment. To arrange nodes properly, you can drag nodes to maintain horizontal or vertical alignment and then click Horizontal or Vertical in Layout.
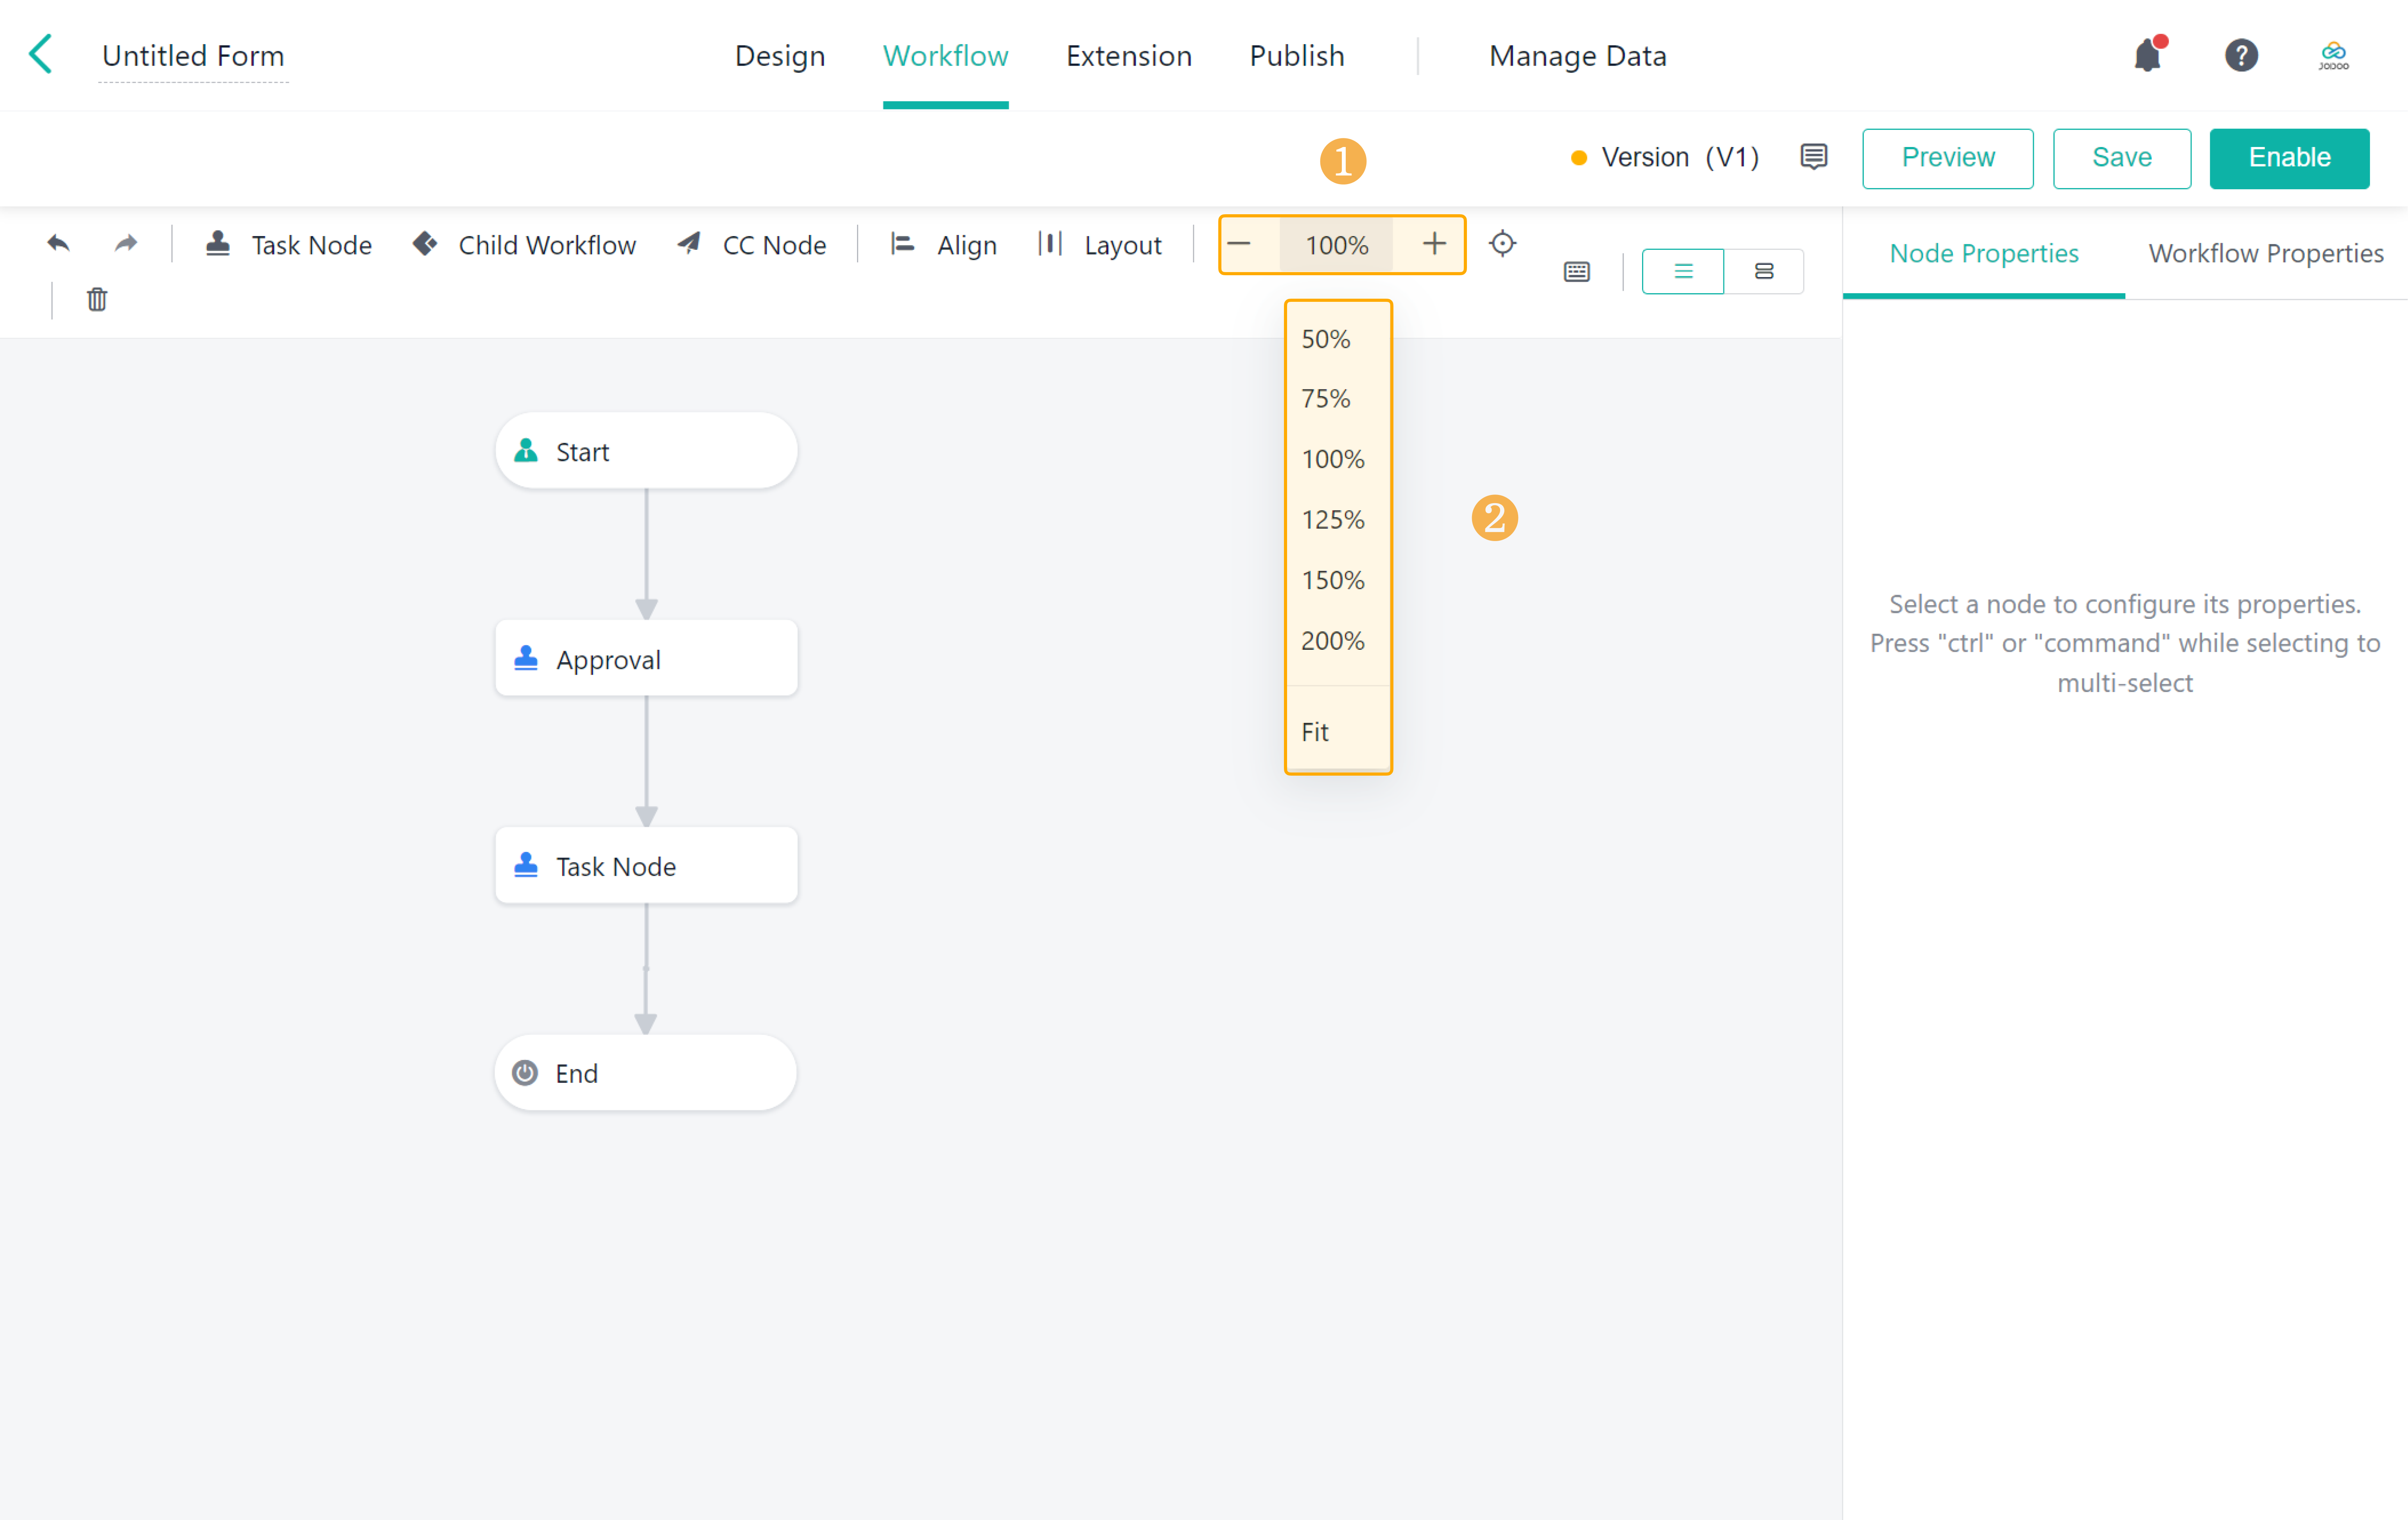
Zoom in/out
Zoom in/out changes the display scale and size of the panel of designing workflows. It supports scaling to 50%, 75%, 100%, 125%, 150%, and 200%. You can also select Fit to show all nodes and connections in the panel.
Navigator
Navigator is used to display the position and details of the workflow. You can drag the display box to move the view.

Hotkeys
You can design a workflow quickly through hotkeys:

View
You can switch between views:
- Summary View: only display node names.
- Detailed View: display approvers, CC members, and so on.


I have finished reading. 🏆
👉I can't wait to CREATE MY JODOO ACCOUNT.
👉I need more HELP in Discord Forum.