Methods of Linking Image/Attachment
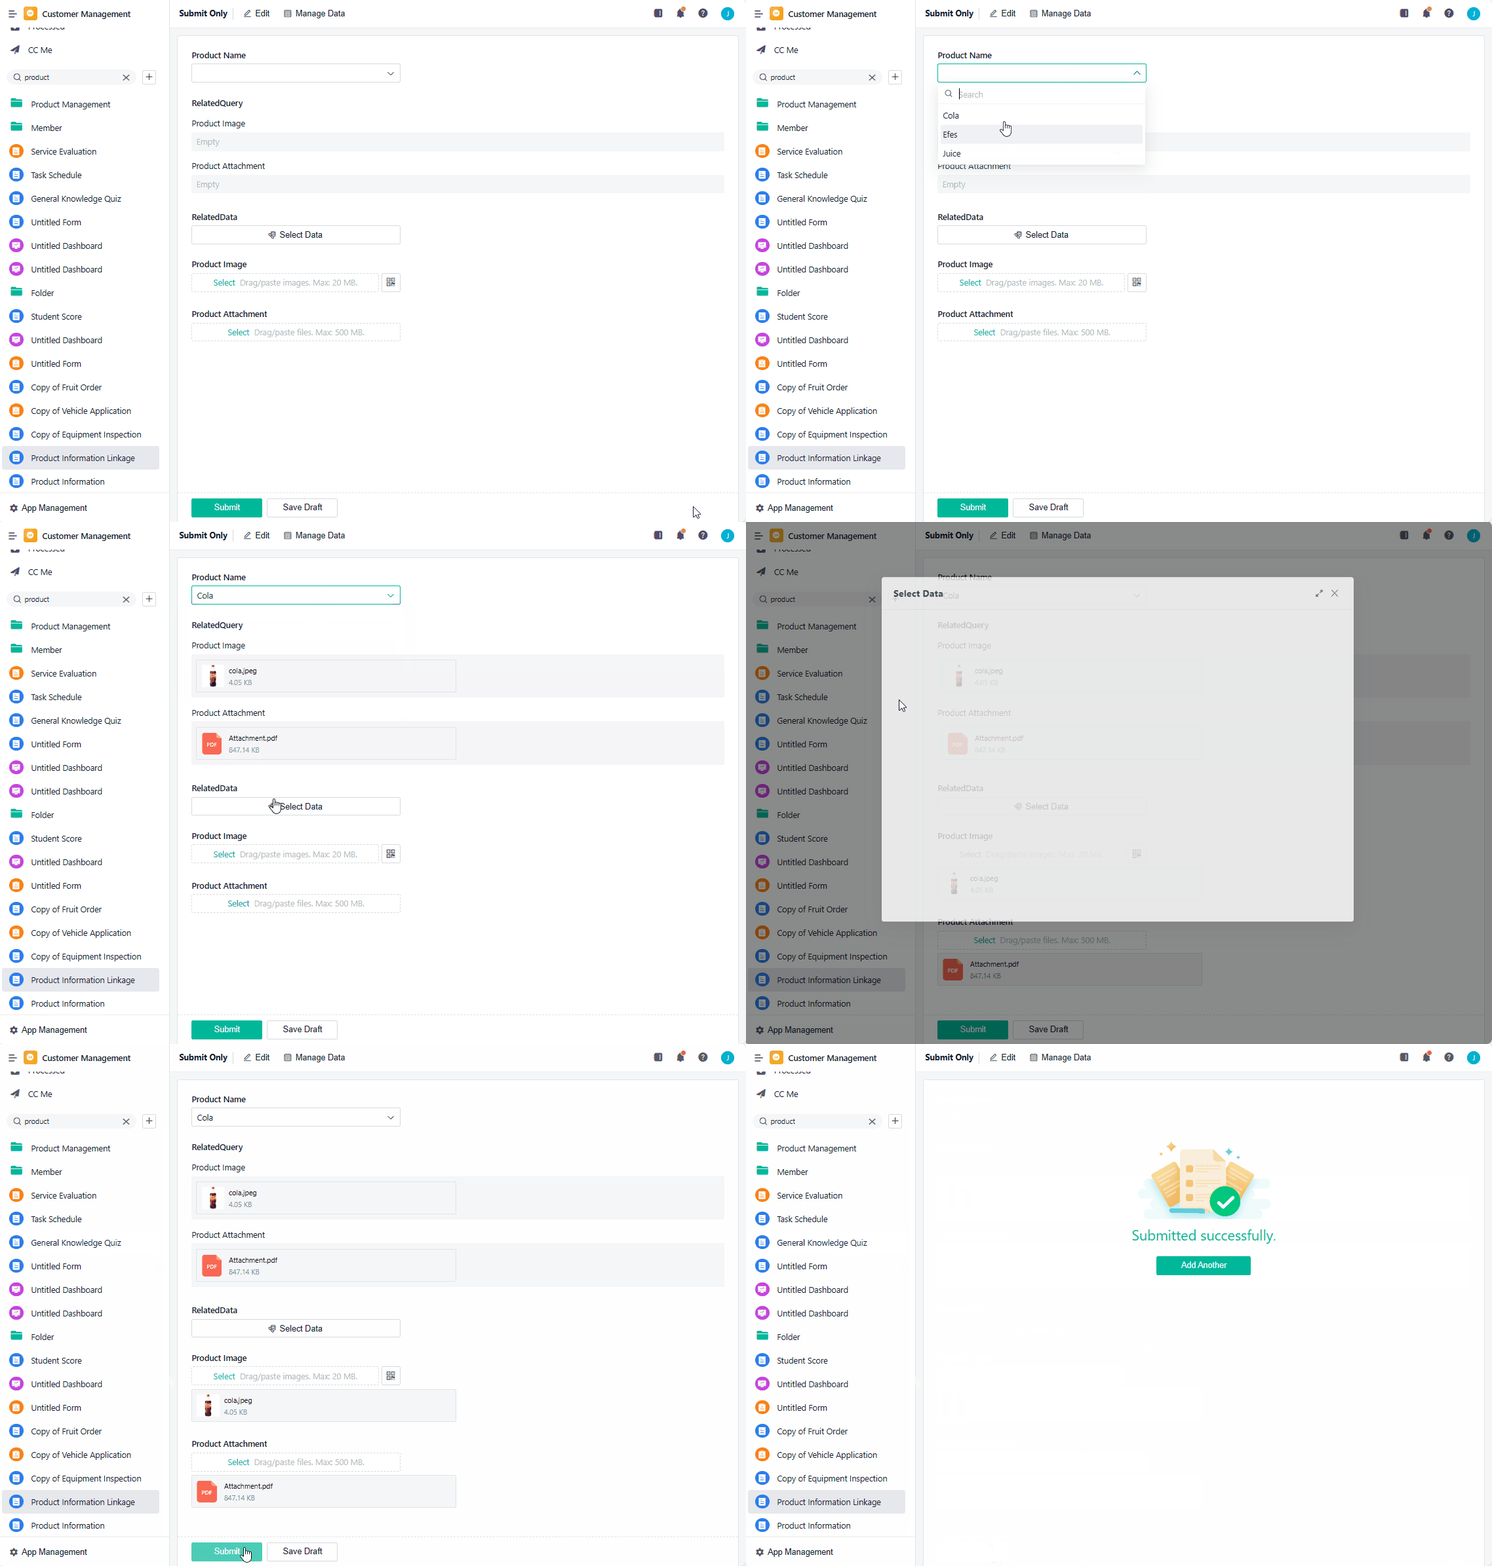
Jodoo provides three ways for you to link data of the Image and Attachment fields in different forms together: Select Data fields, Query Data fields and Data Linkage. Once you link data in two forms, the image or attachment in one form can be automatically retrieved and filled in the other form. Here is the demonstration.
Demonstration
How to Set
Method 1. Linking Image/Attachment According to Its Corresponding Name
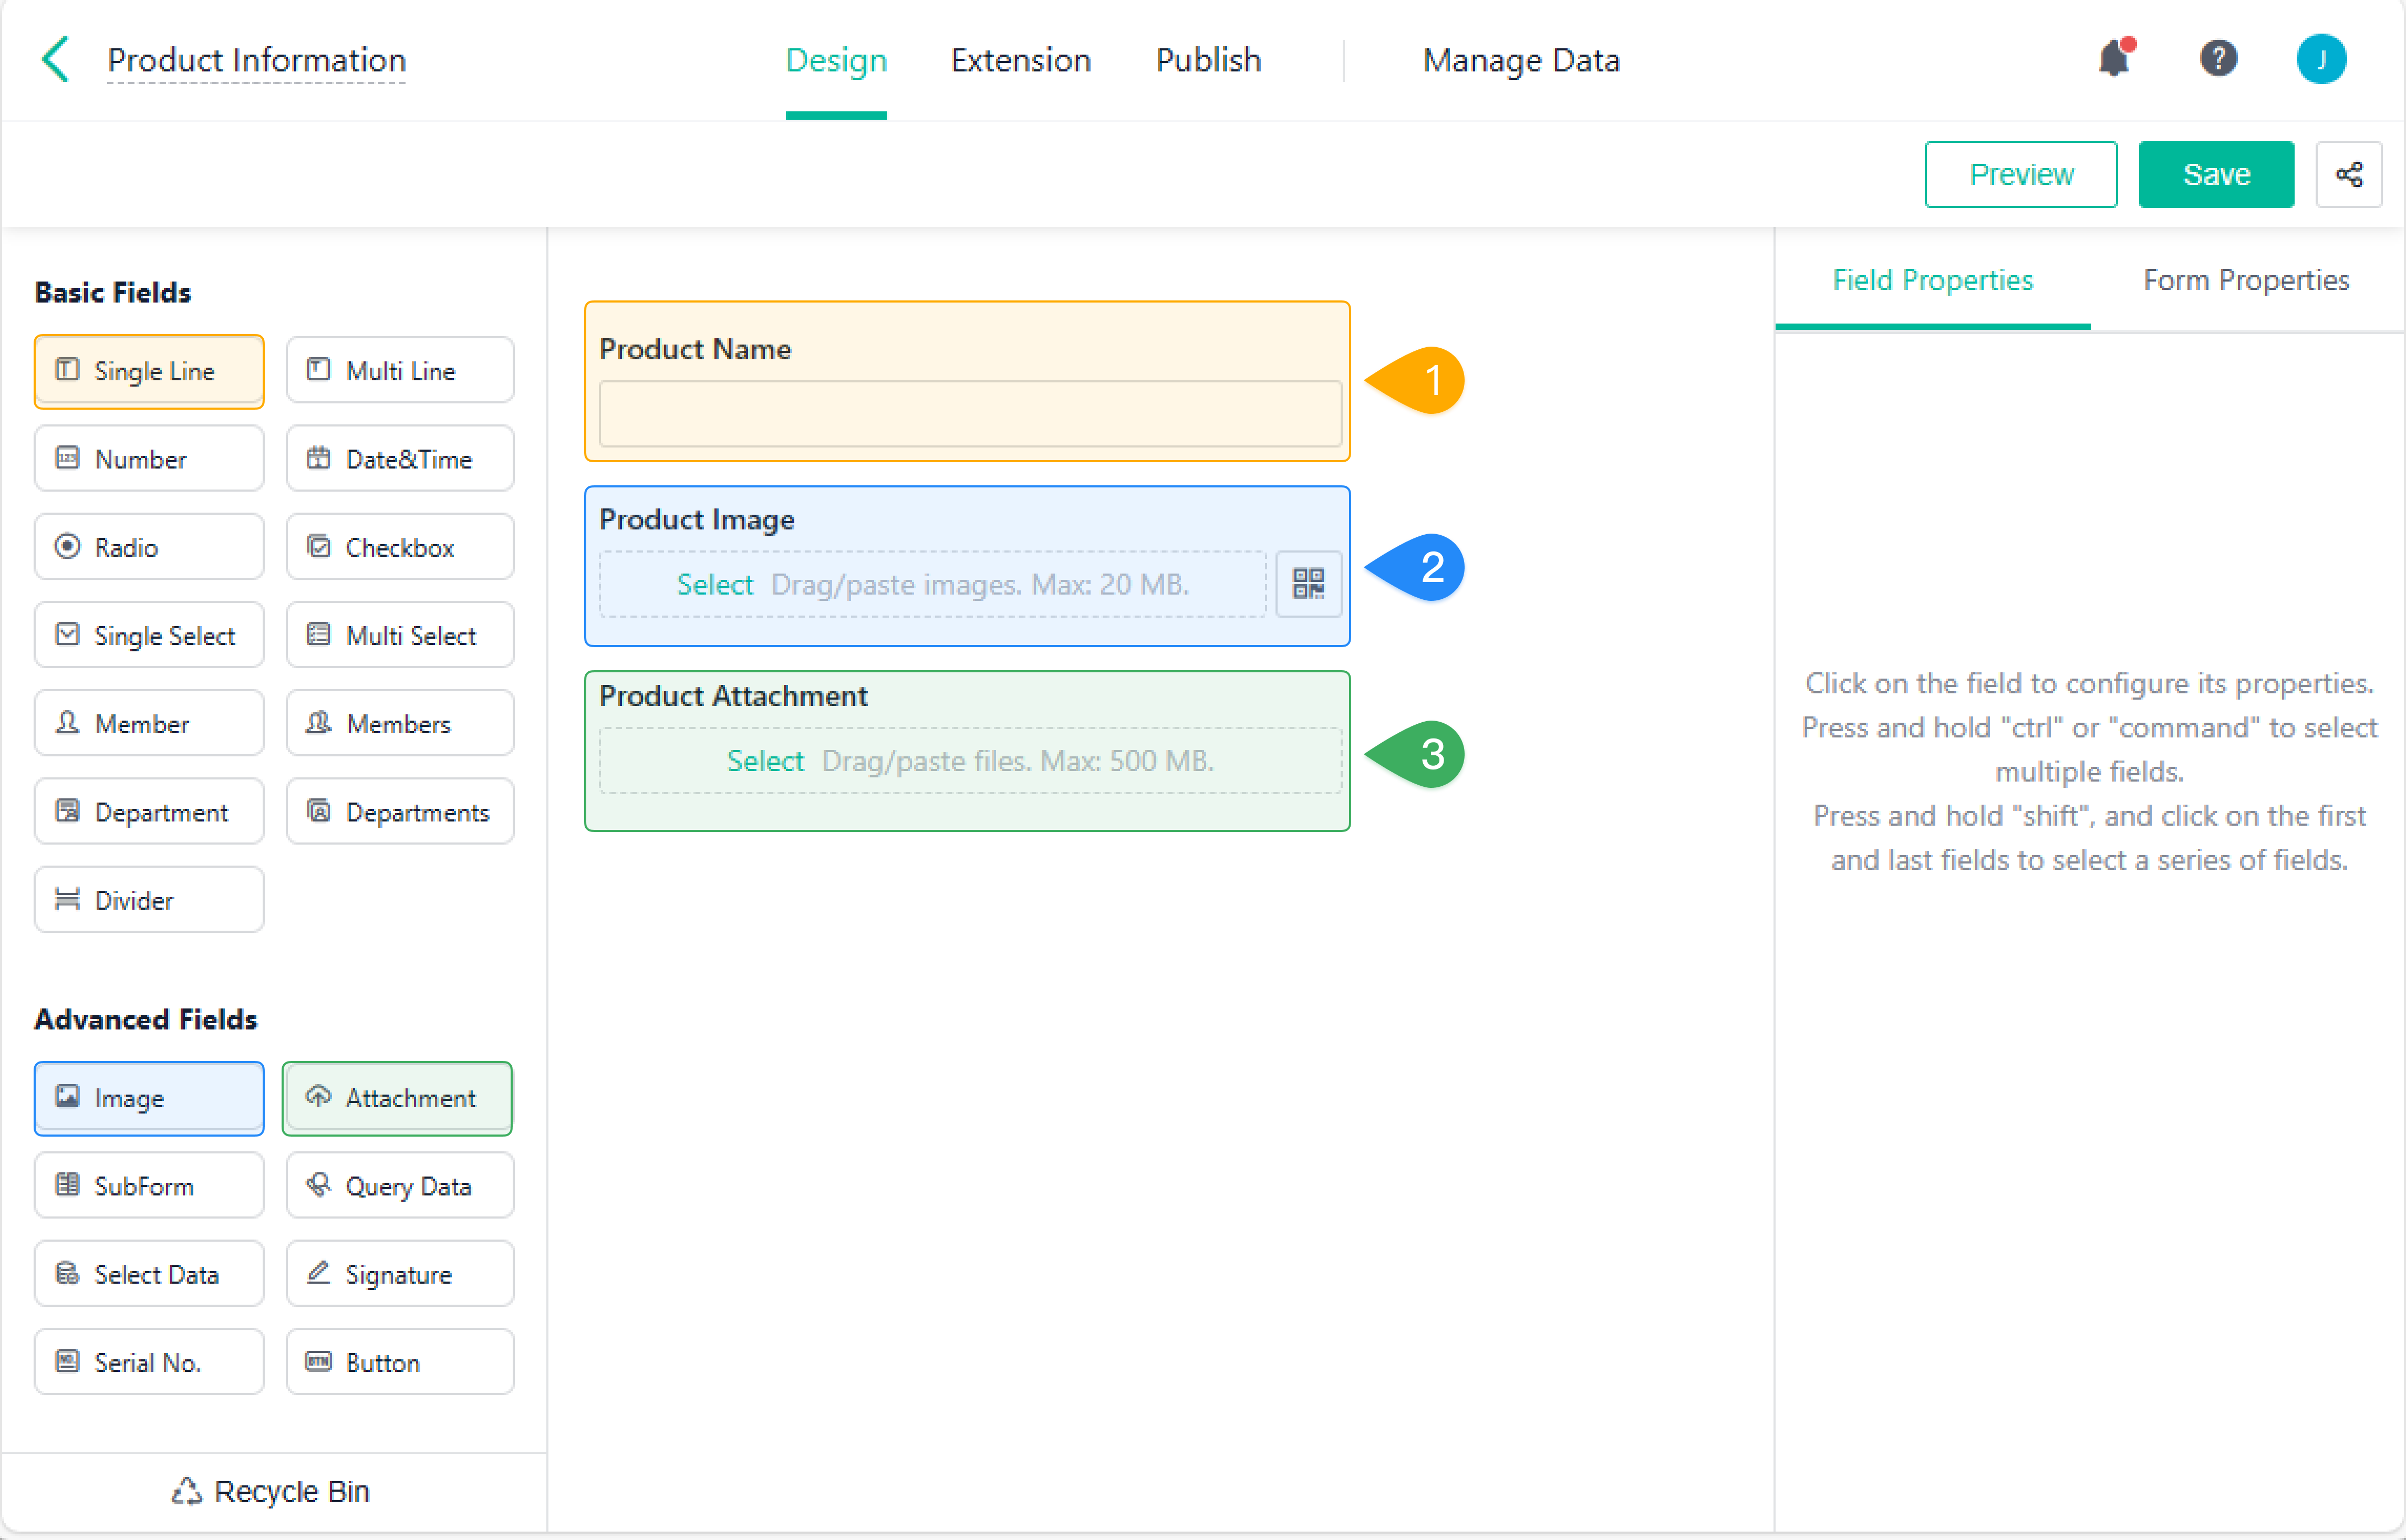
1. Create a Product Information form. Use the Single Line field to record the product name, the Image field to record the linked image, and the Attachment field to record the linked attachment.
2. On the Manage Data page, click Add to submit data. Then fill in the product name, image, and attachment.
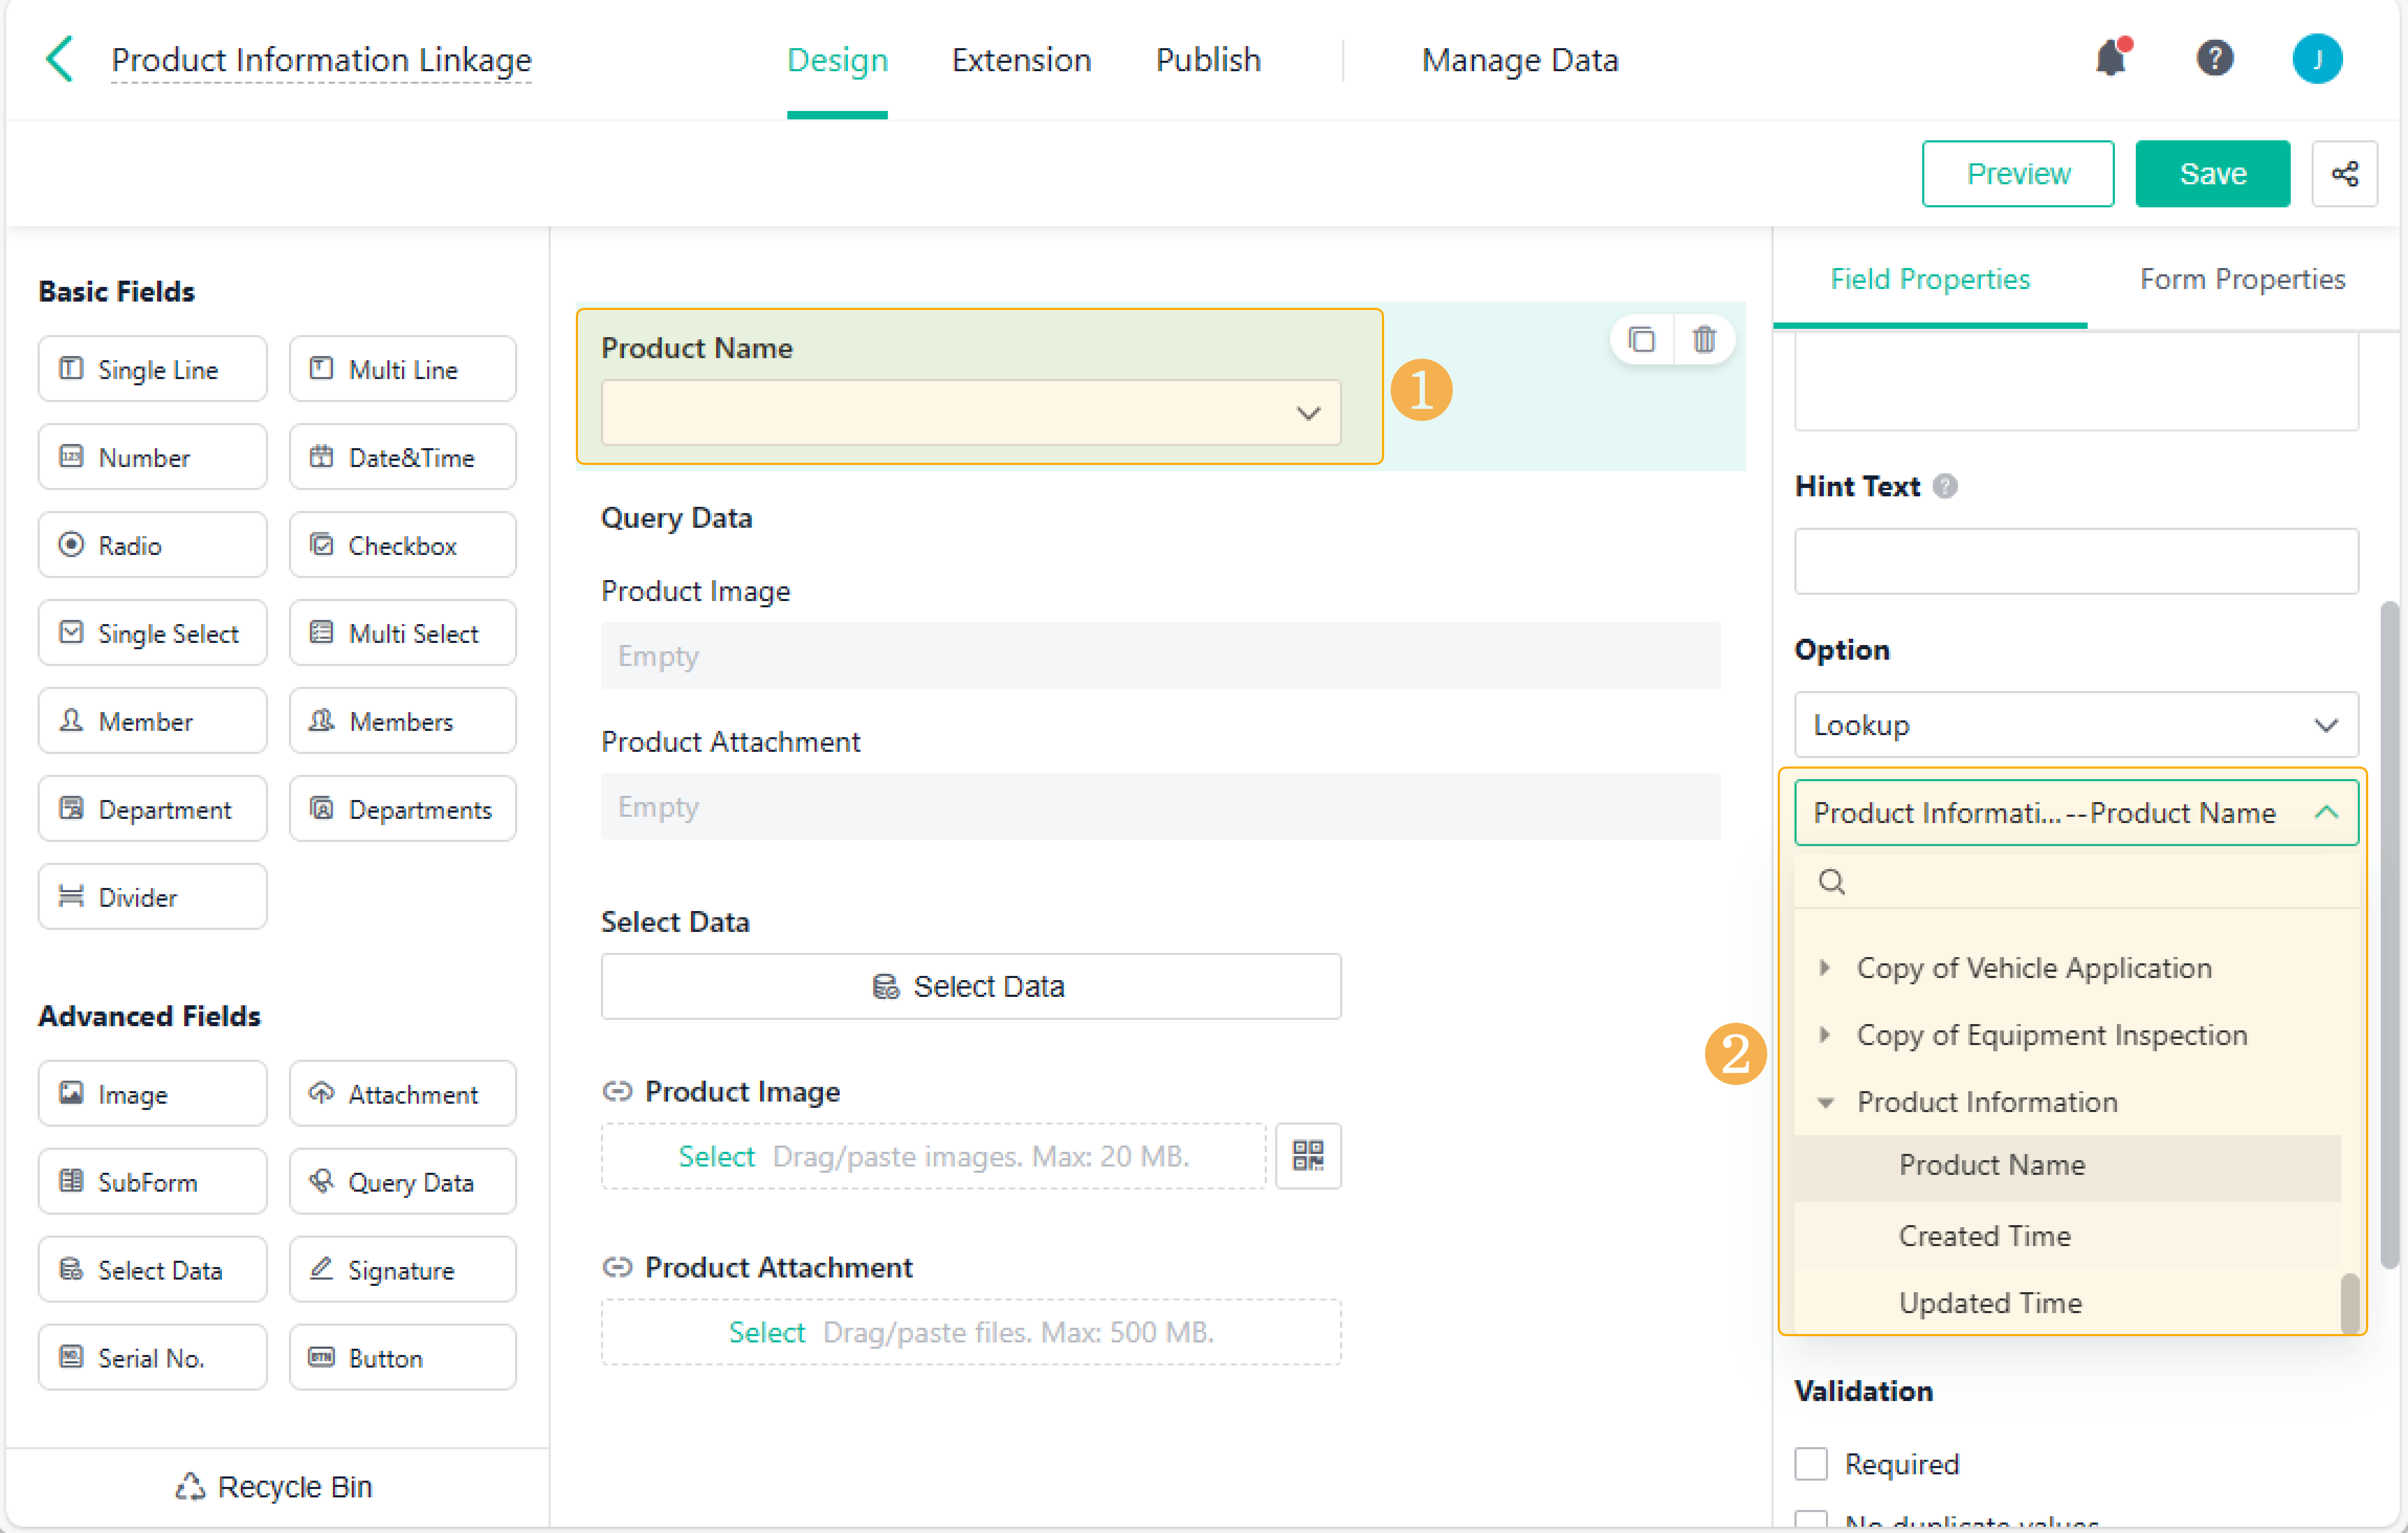
3. Create a Product Information Linkage form. You can either select the Single Line field and manually enter the product name, or select the Single Select field and select Lookup under Option. If you choose the latter, then select Product Information > Product Name.
4. If you just need to view the image or attachment, choose Query Data. If you need to retrieve images and attachments, or submit them to the system, choose Select Data.
- You can set Query Data as follows:
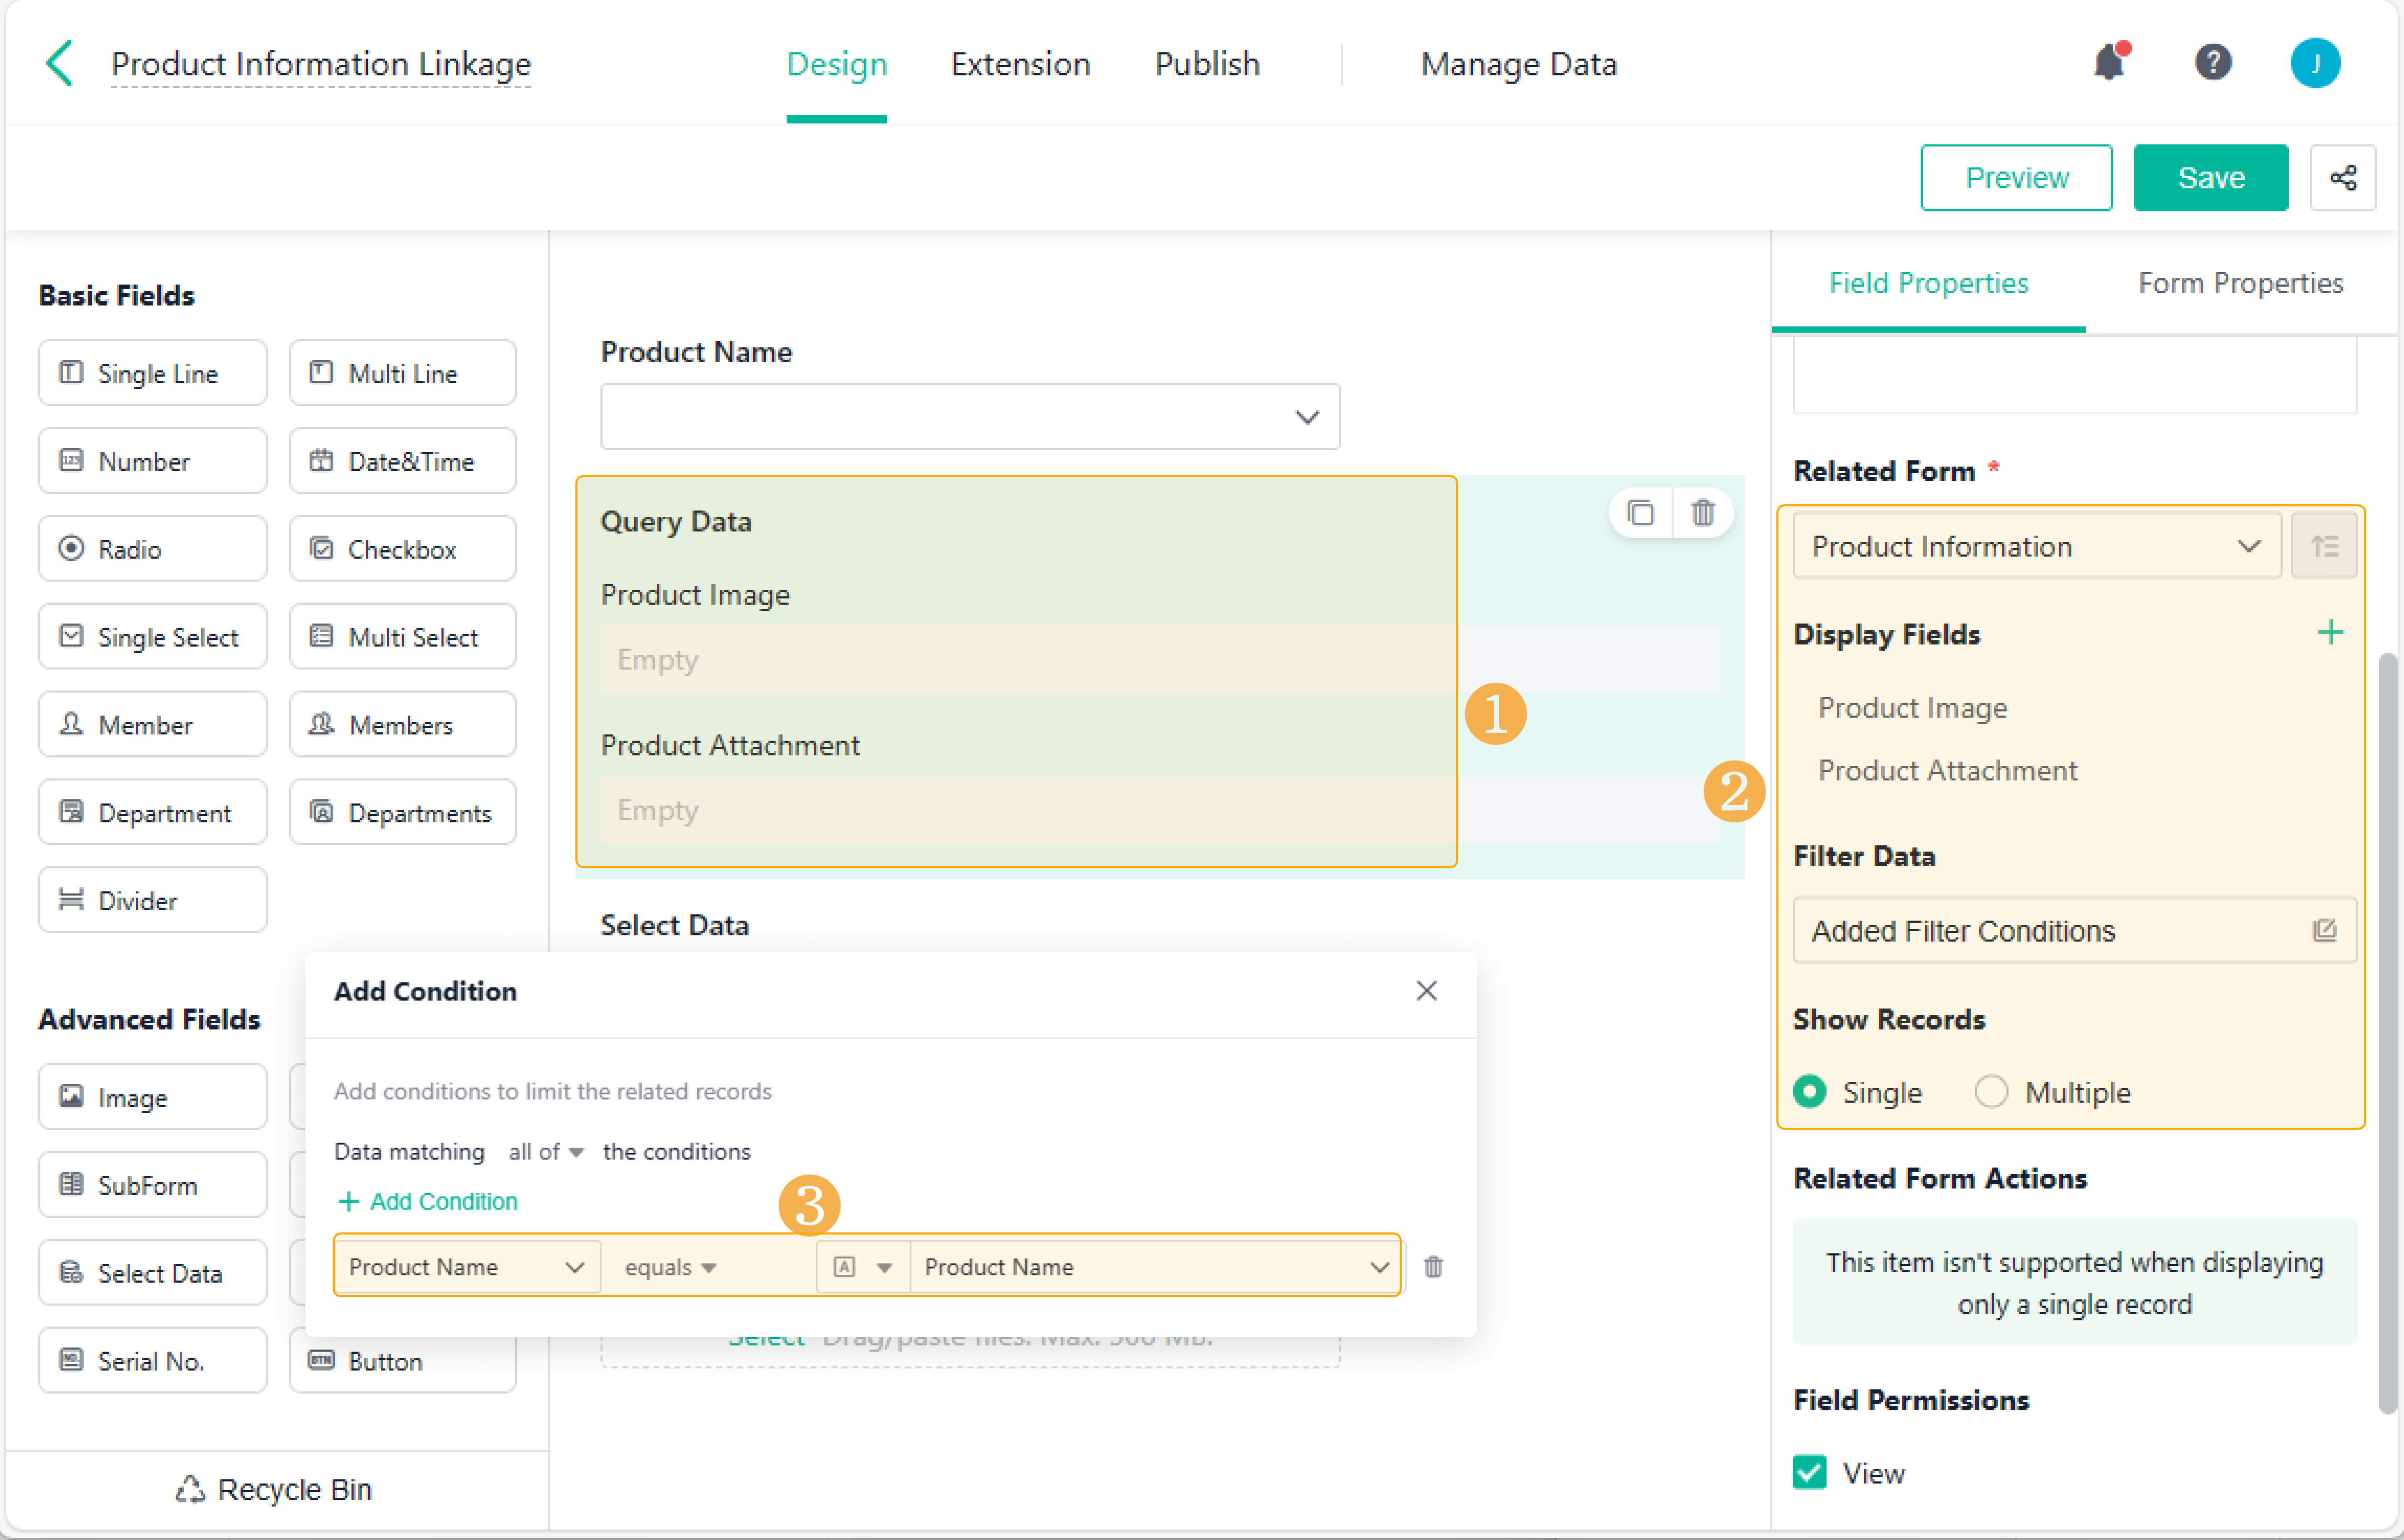
Select Product Information from the drop-down list of Related Form, and set Product Image and Product Attachment as display fields. Then add a filter condition: Product Name in the product information linkage form equals Product Name in the product information form. After that, tick Single in Show Records.
- You can set Select Data as follows:
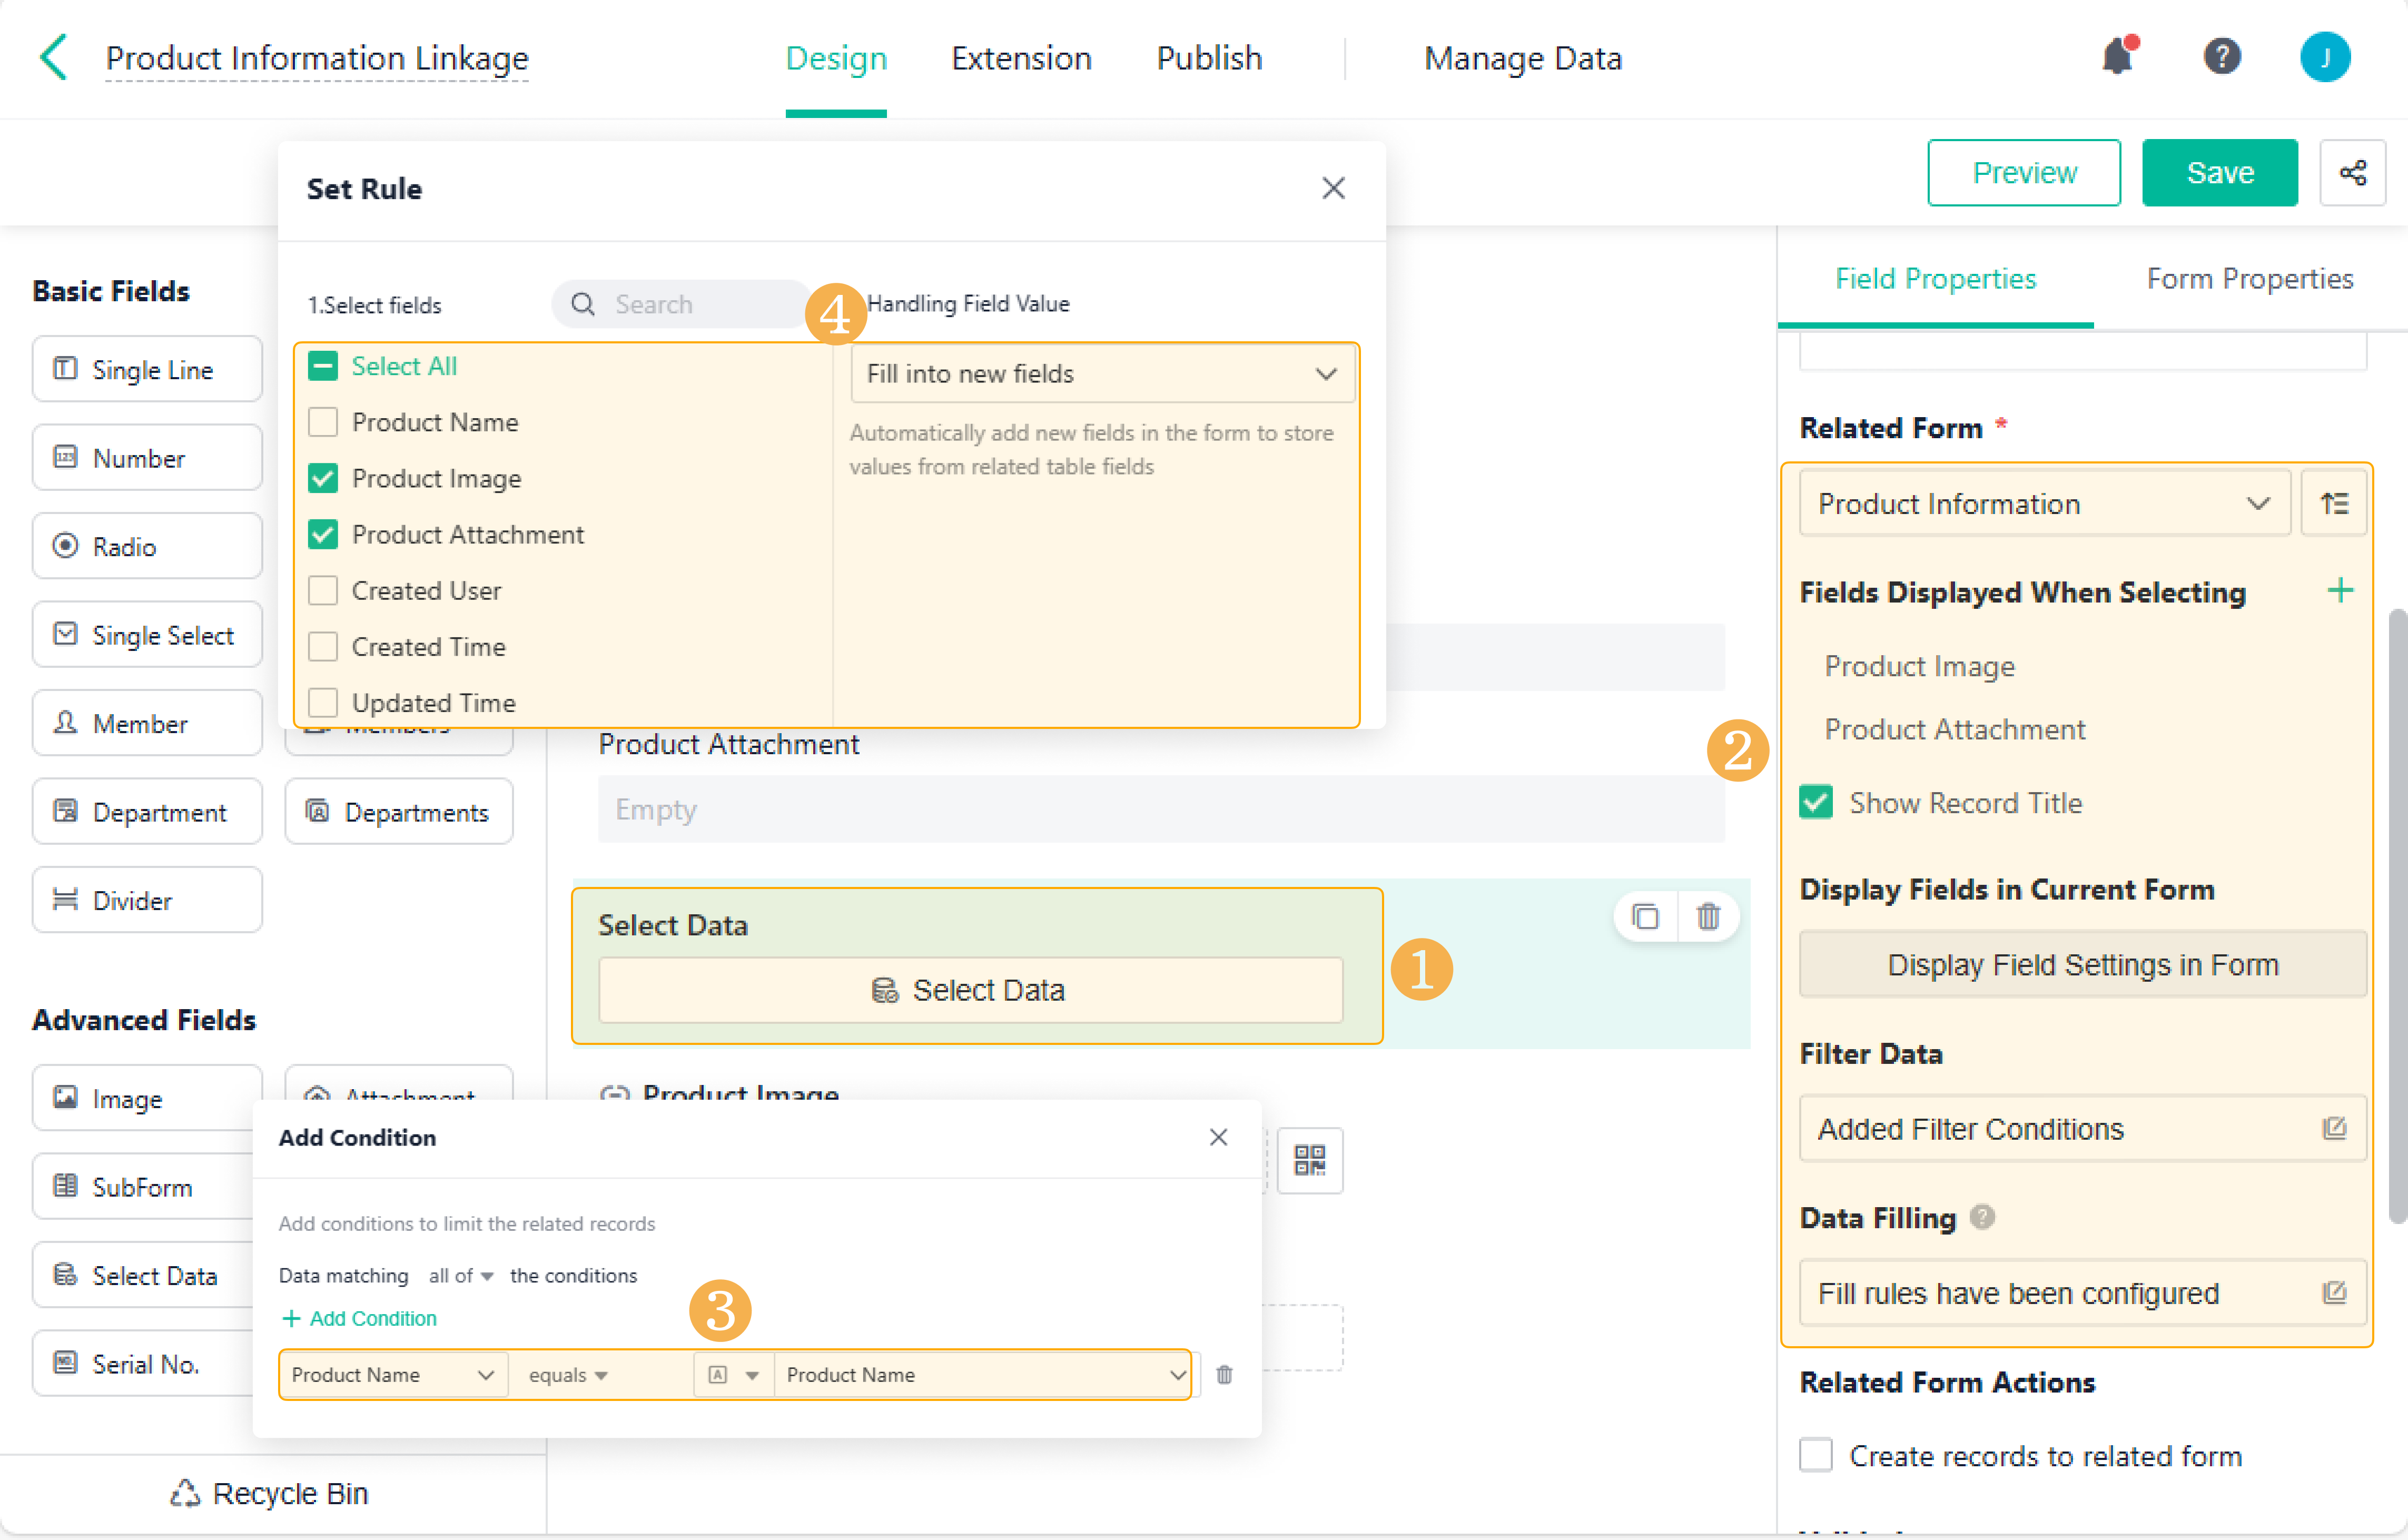
Select Product Information from the drop-down list of Related Form and tick Show Record Title. Then add a filter condition: Product Name in the product information linkage form equals Product Name in the product information form. After that, in Data Filling, tick Product Image and Product Attachment, and select Fill into new fields.
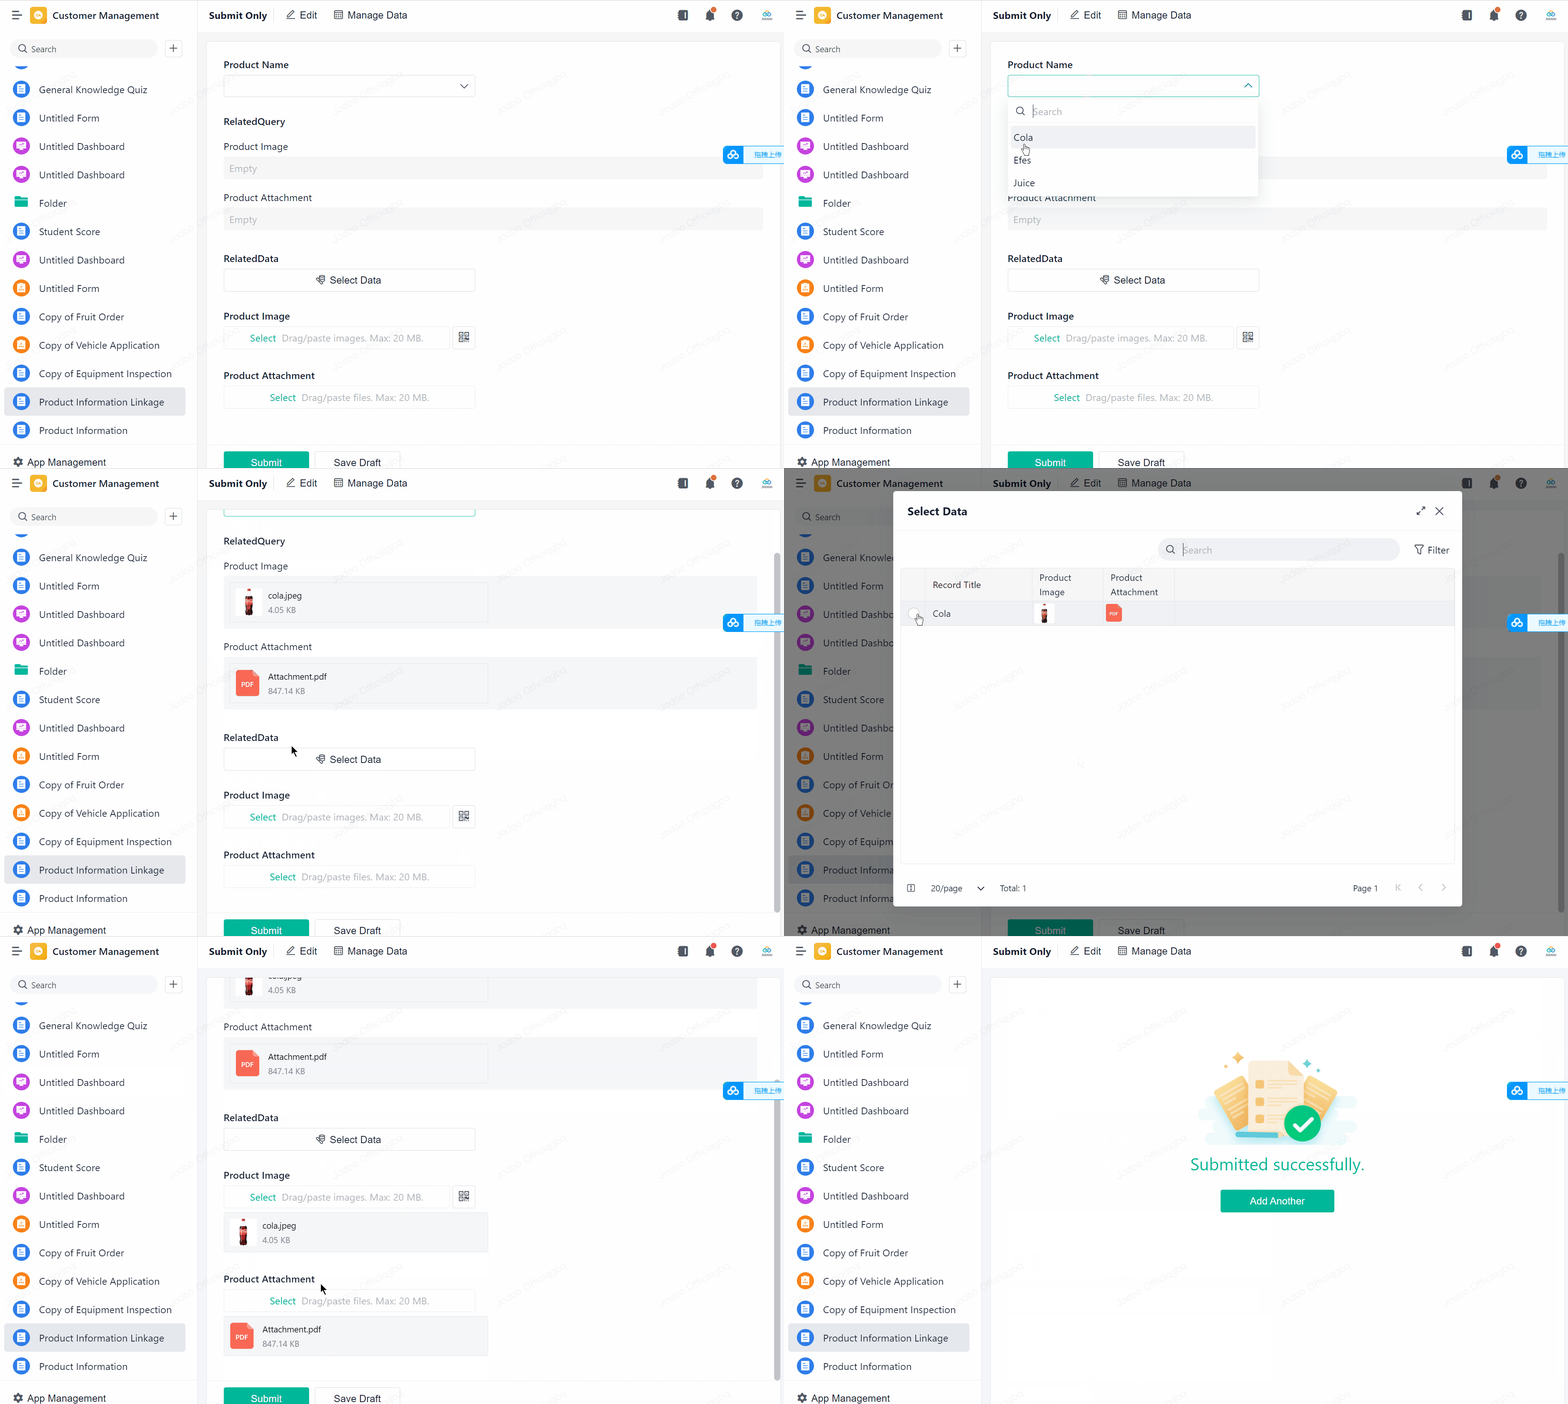
5. Demonstration
Method 2. Linking Image/Attachment Directly
In the scenarios where image(s) or attachment(s) should be displayed for filling and downloading by default, you can use Query Data.
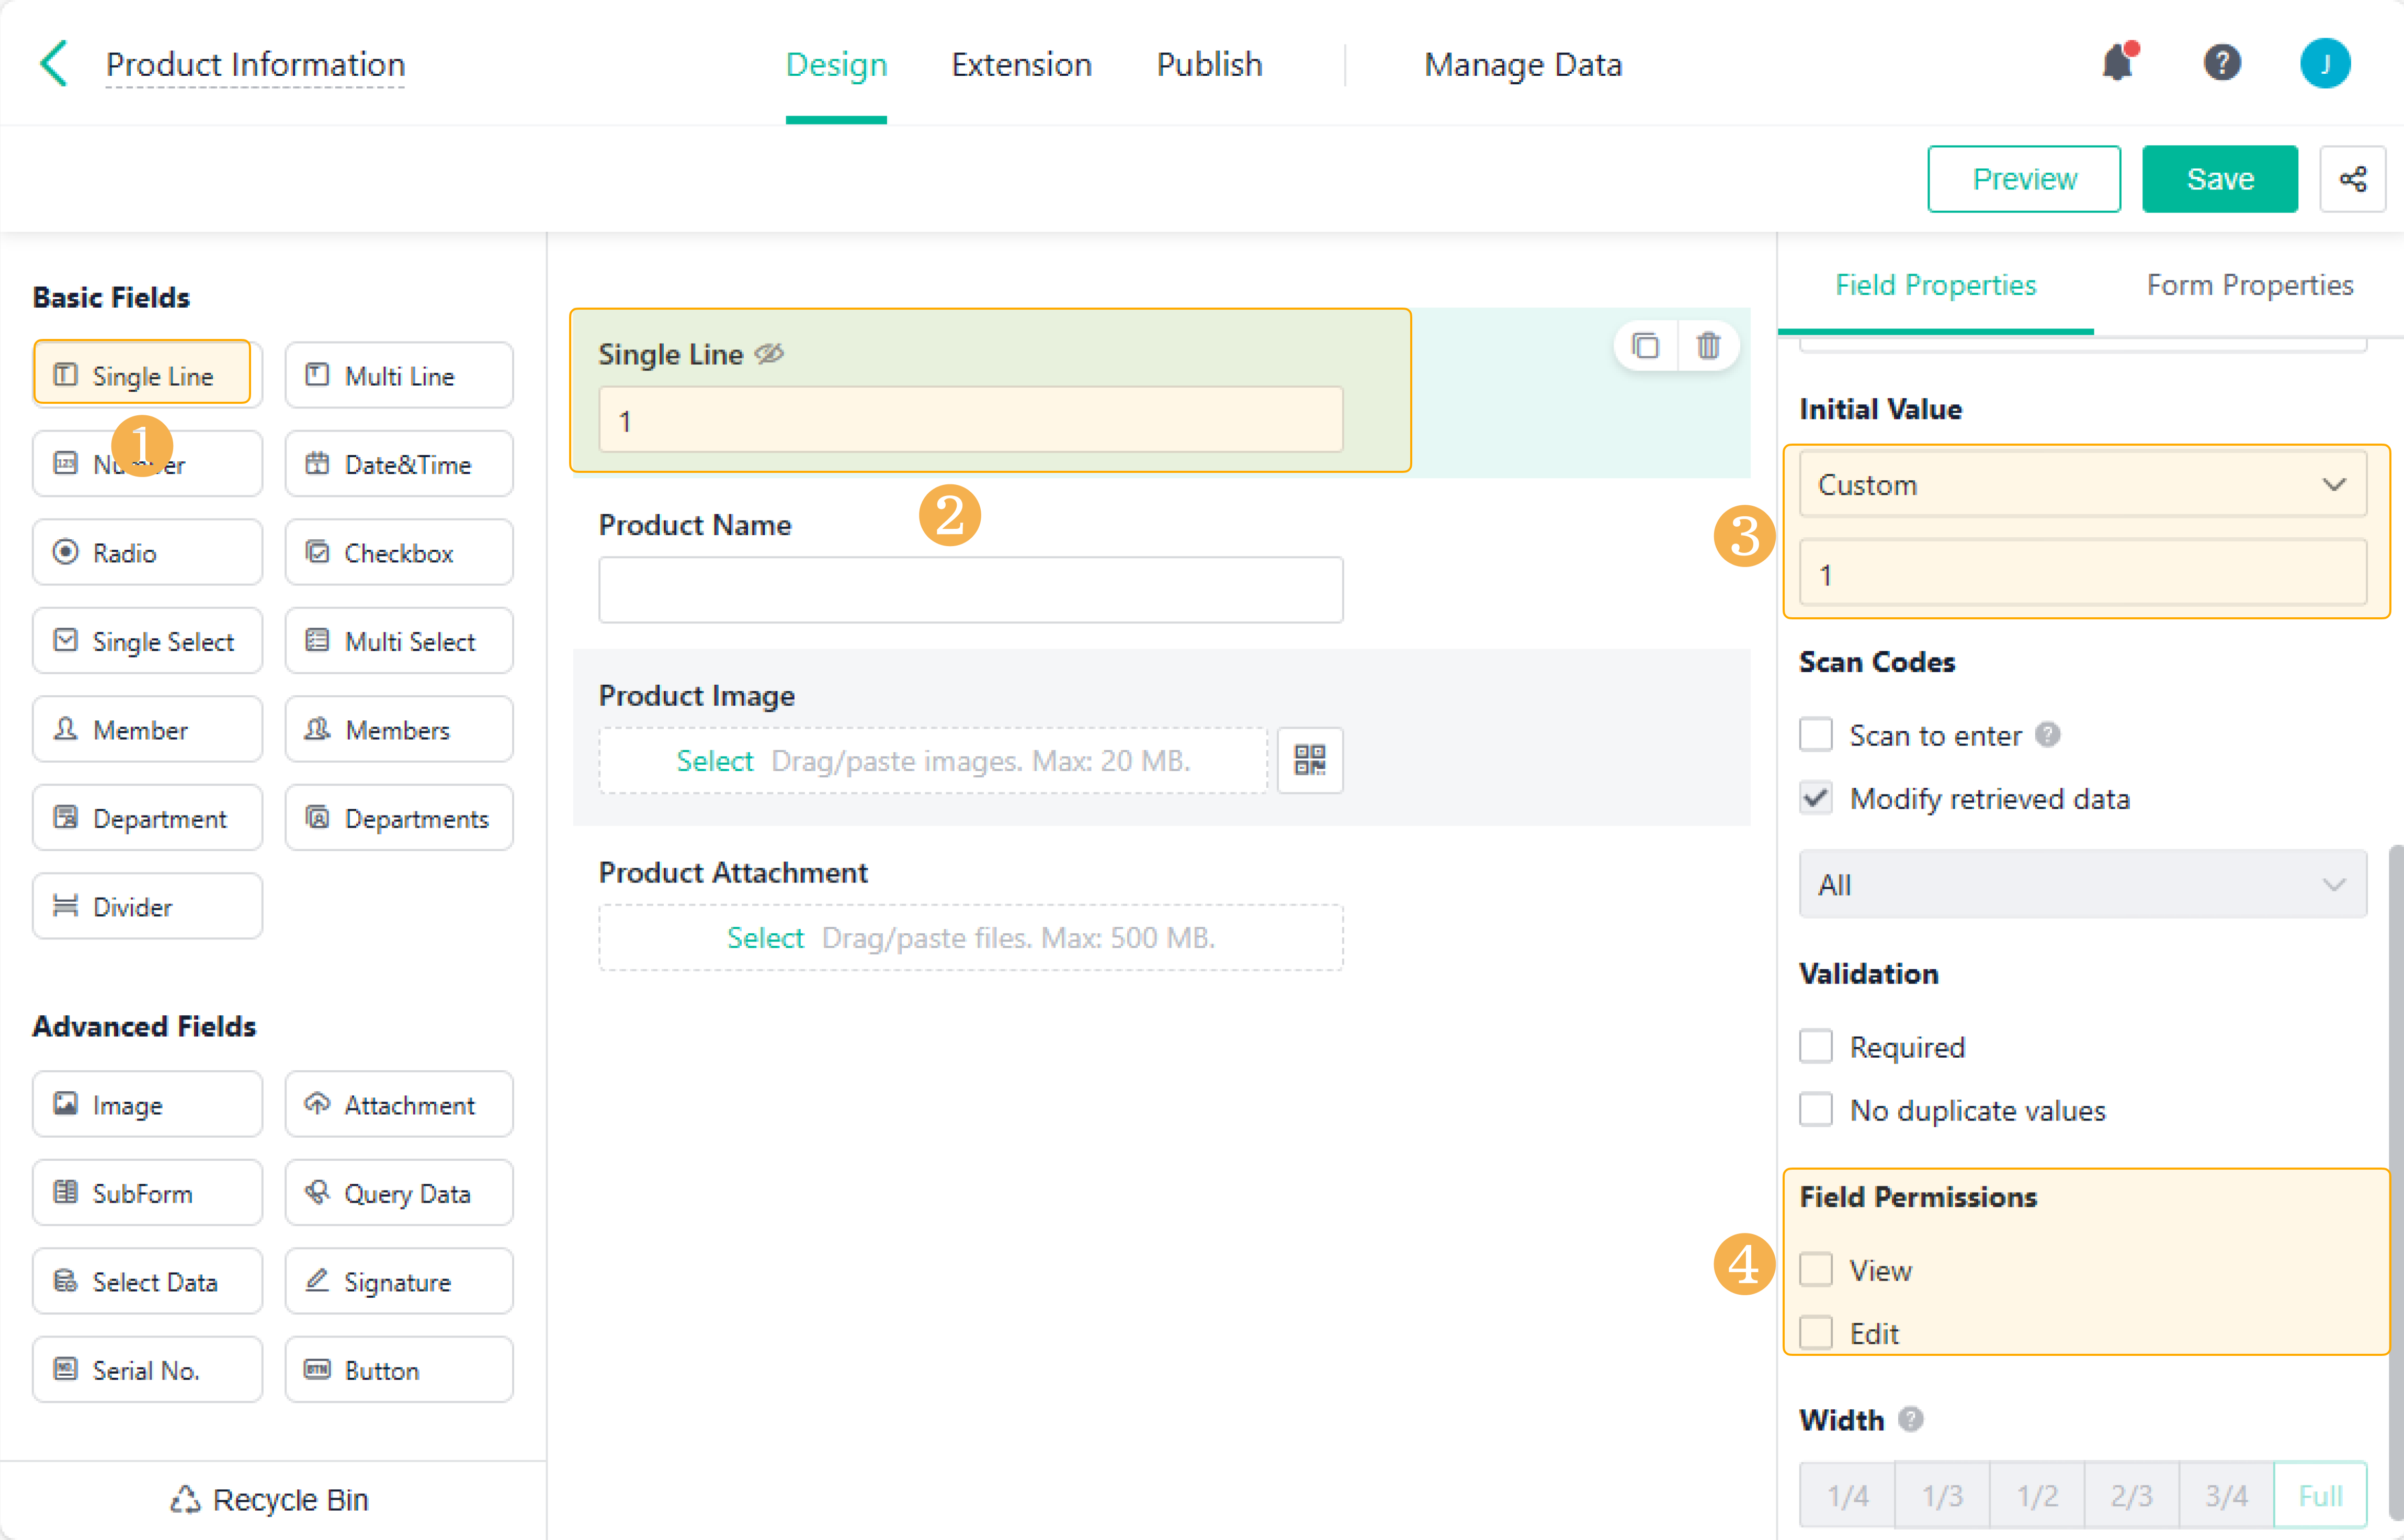
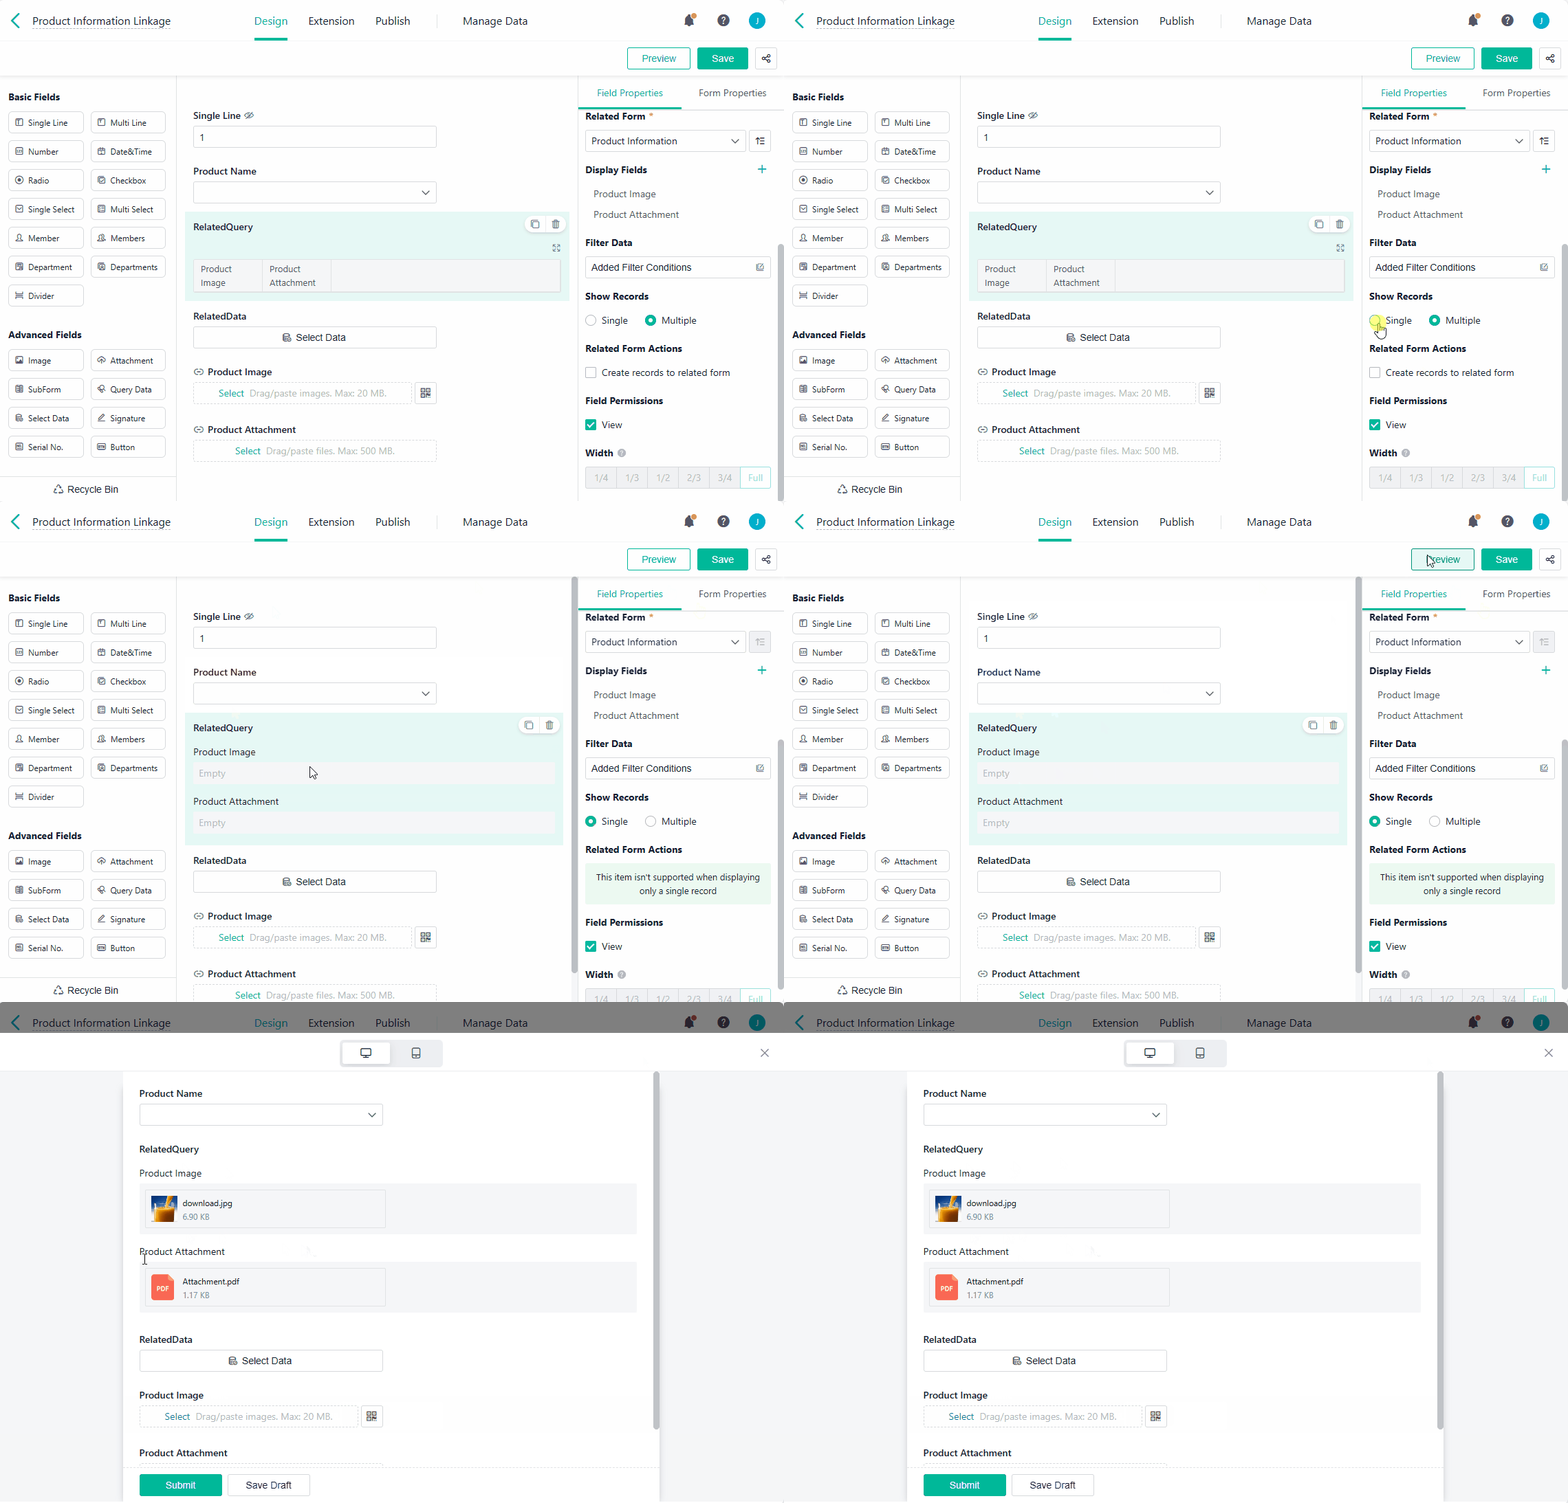
1. In the Product Information form, drag the Single Line field to the form, enter 1 into the field under Initial Value, and untick View under Field Permissions. Then go to Manage Data, and create data (including the product name, image, and attachment).
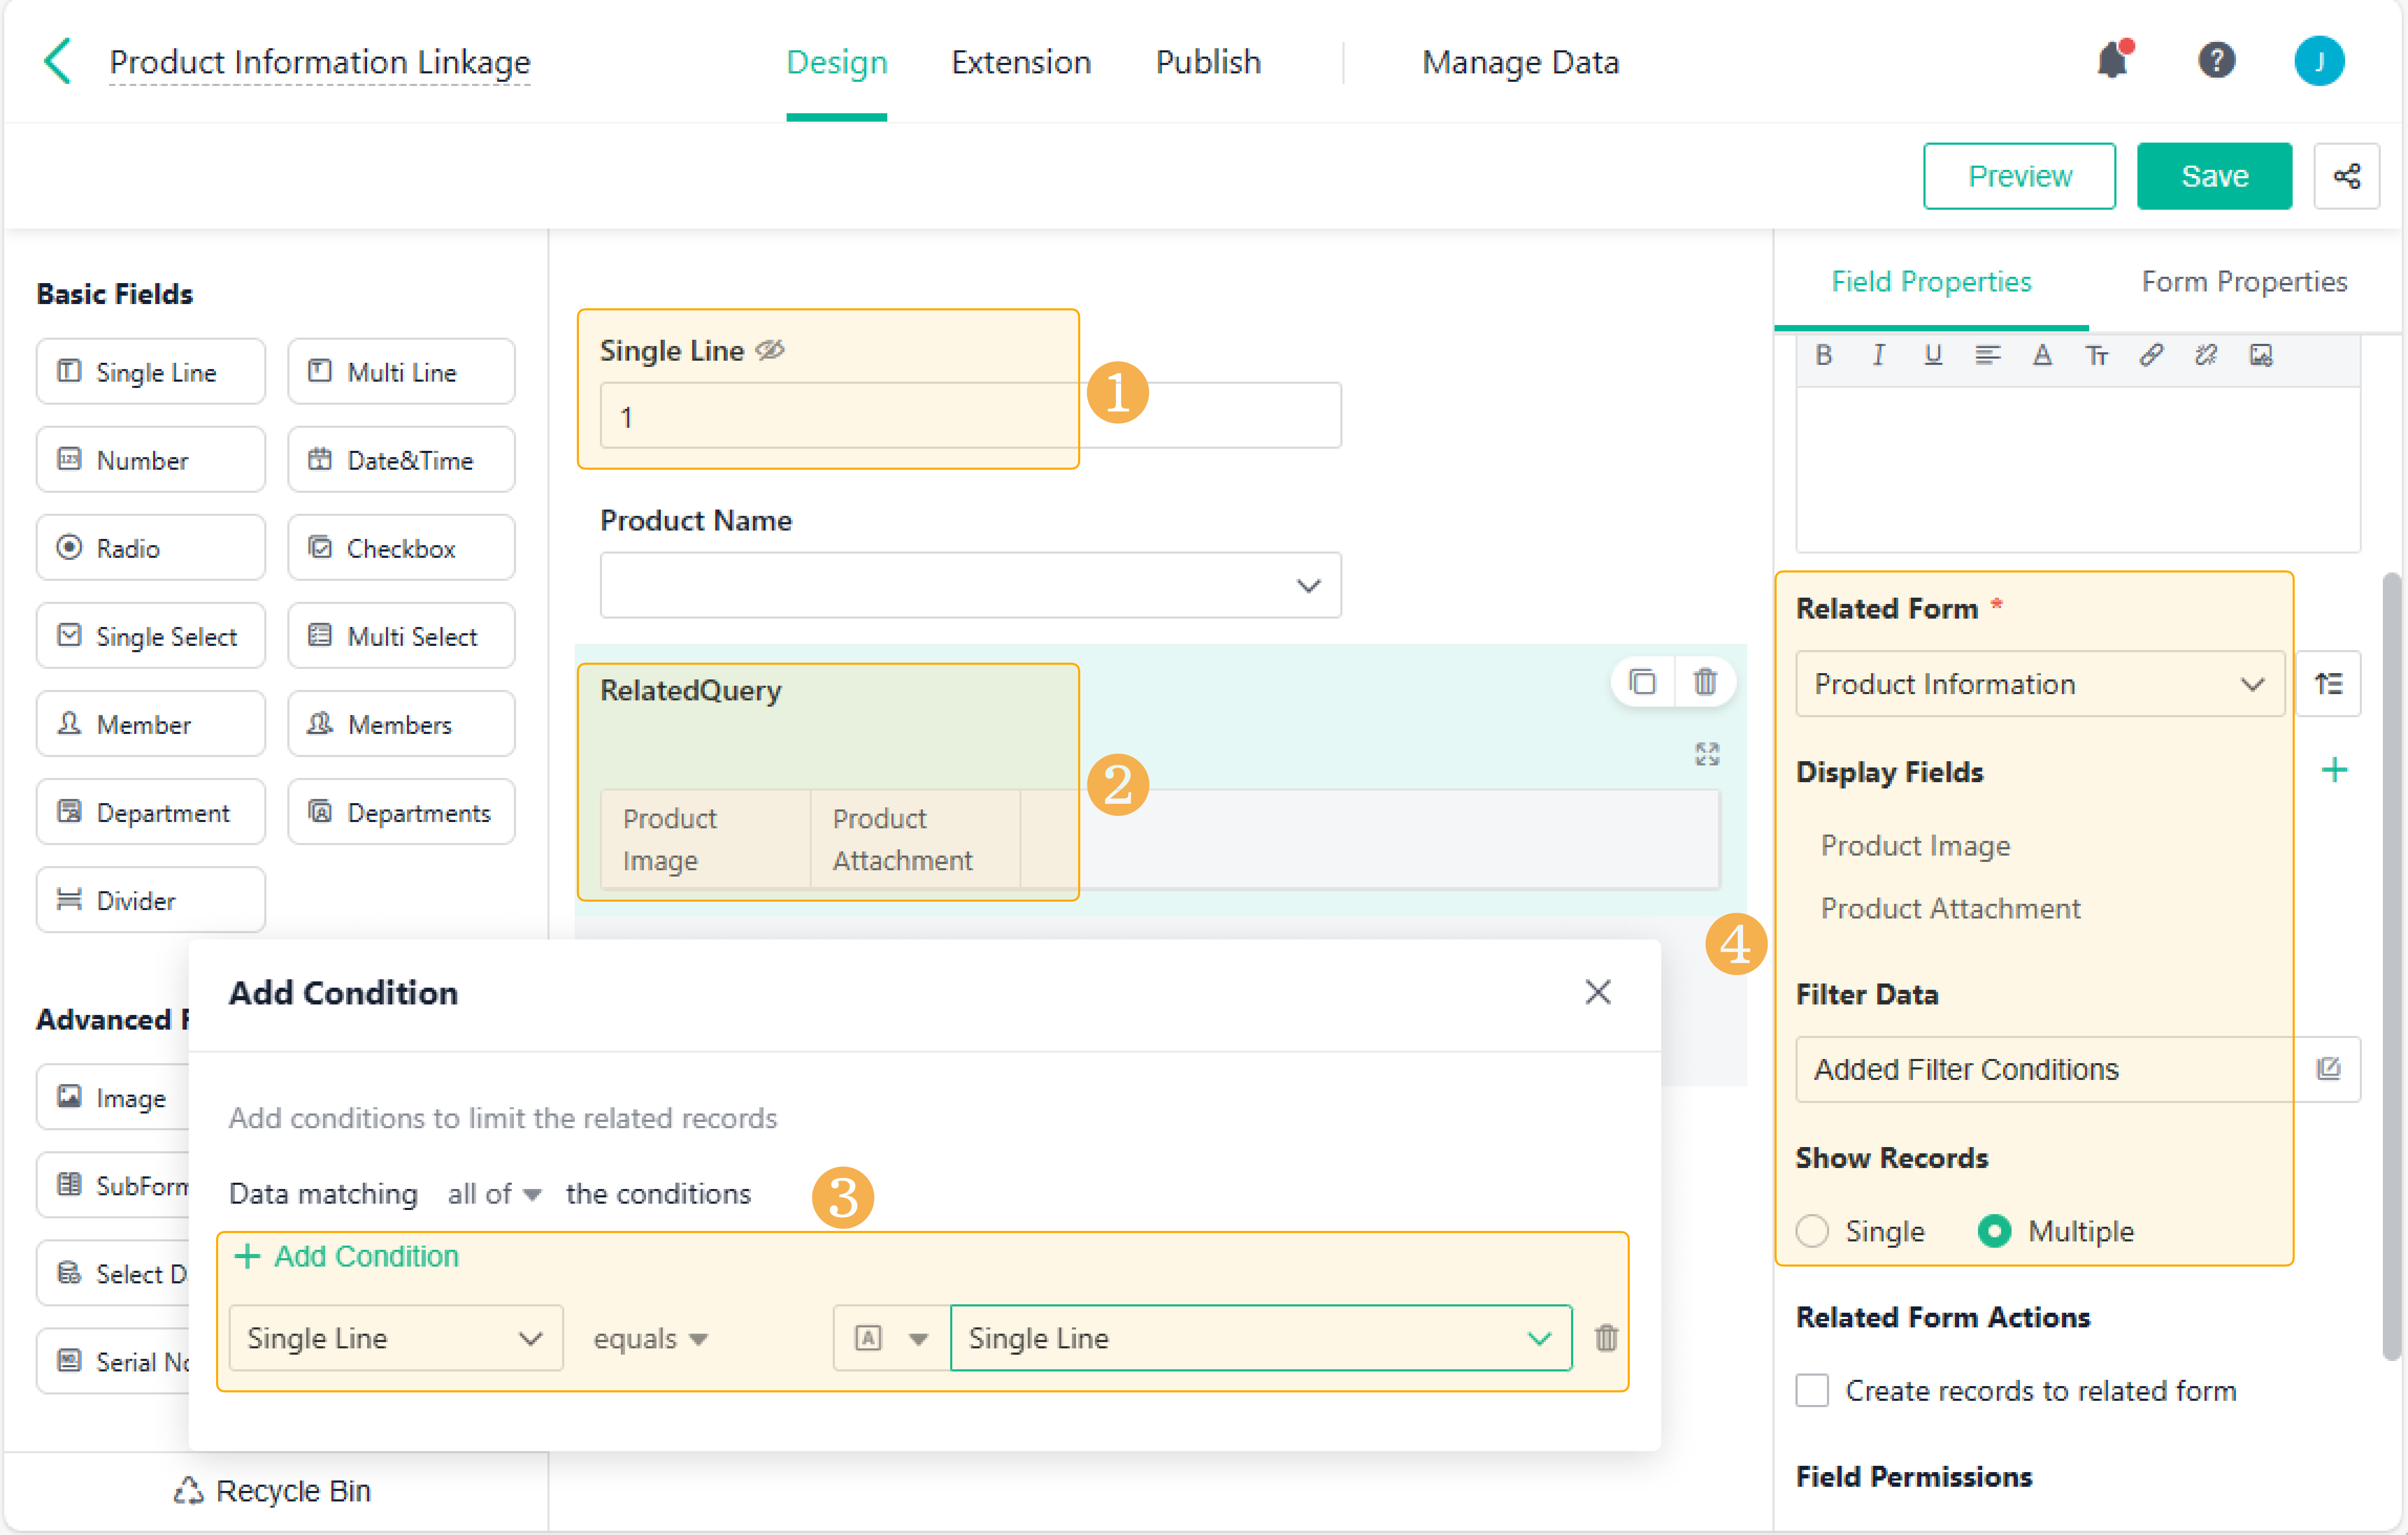
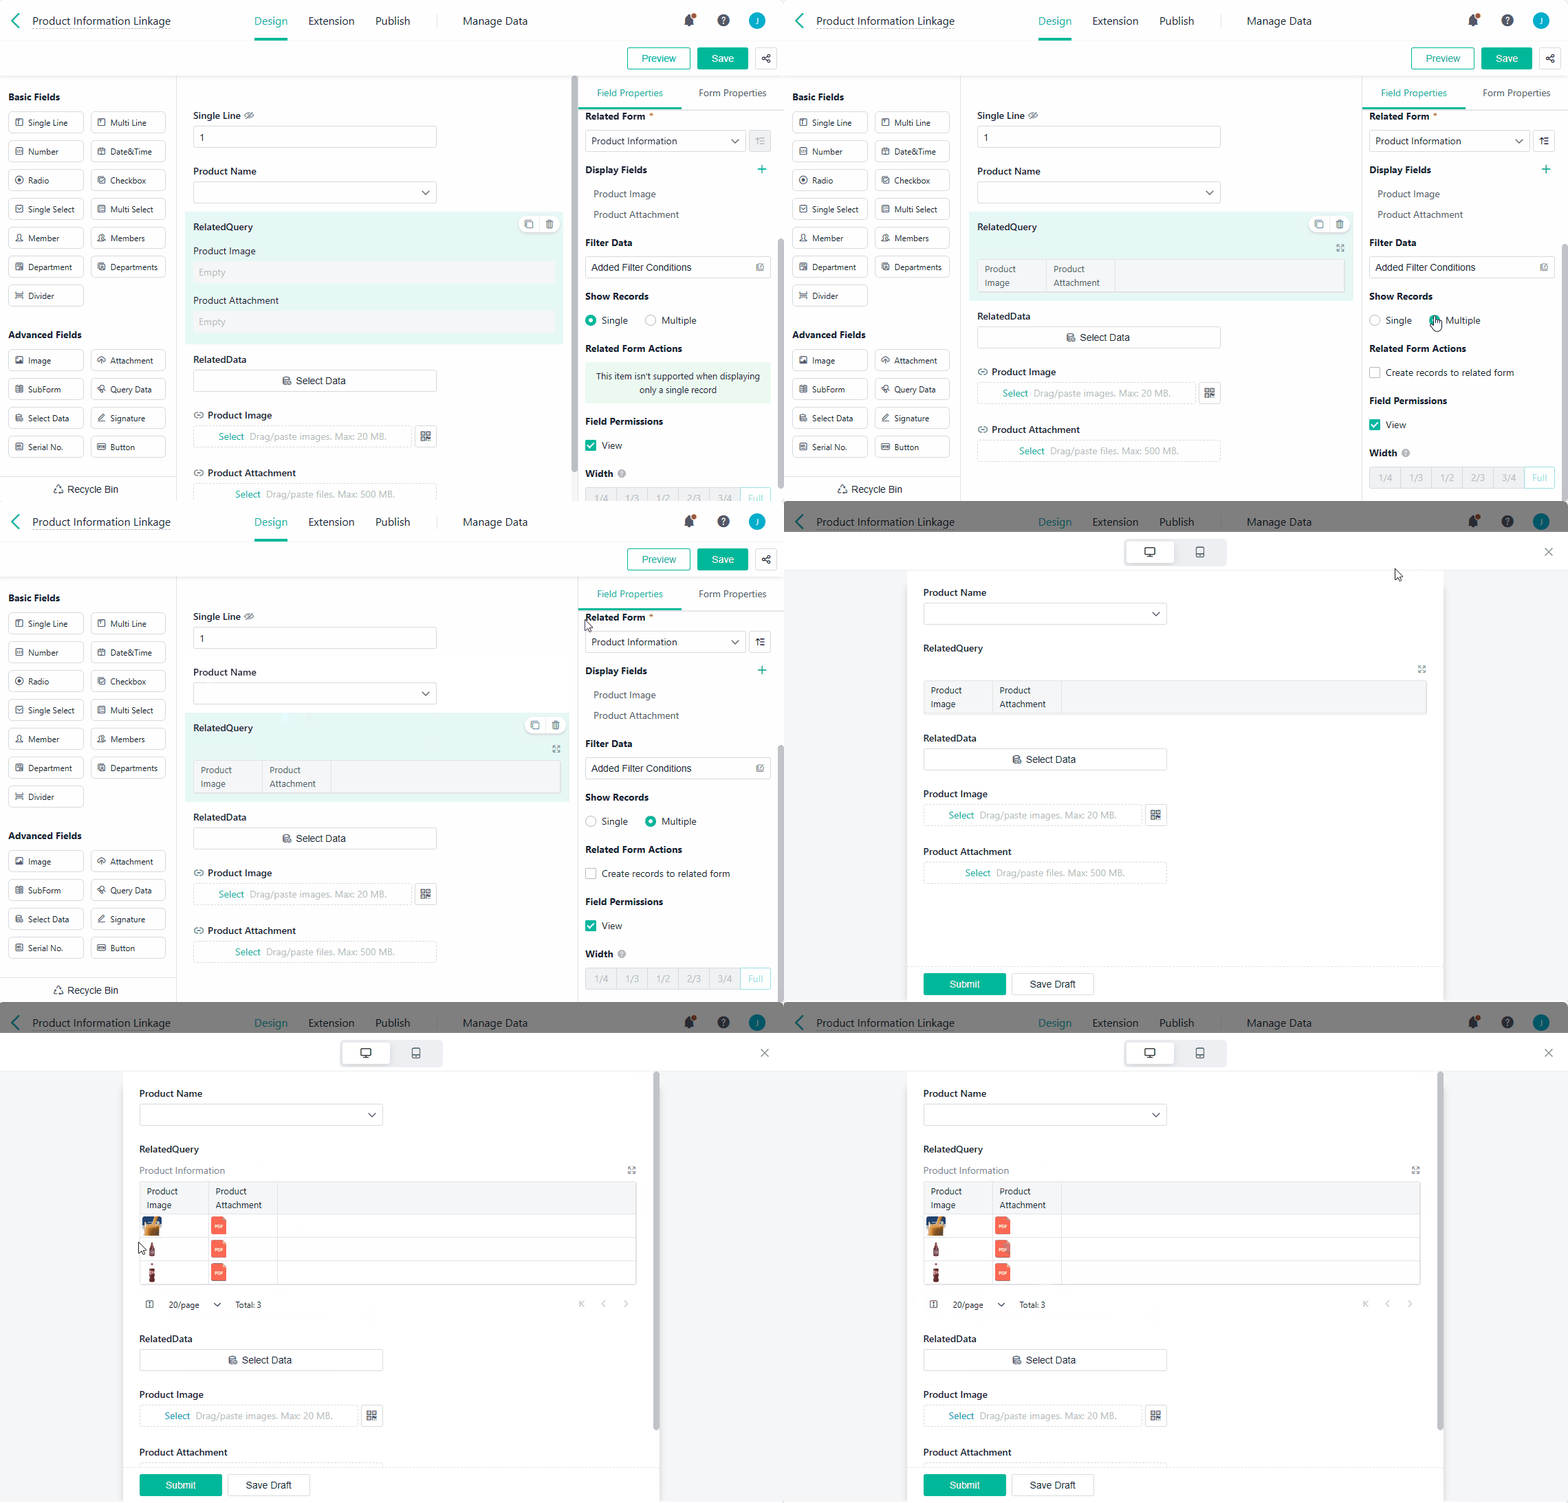
2. In the Production Information Linkage form, drag the Single Line field to the form, and enter 1 into the field under Initial Value. For Query Data, add a filter condition: Single Line in the product information linkage form equals Single Line in the product information form.
3. Demonstration
Tick Single under Show Records.
Tick Multiple under Show Records.
Method 3. Linking Image/Attachment through Data Linkage
In Method 1, we've already created a product information form and added data to it. For Method 3, we still use this production information form as our data source. We will create another form named the product information linkage form and use data linkage to link the two forms together. Here is how.
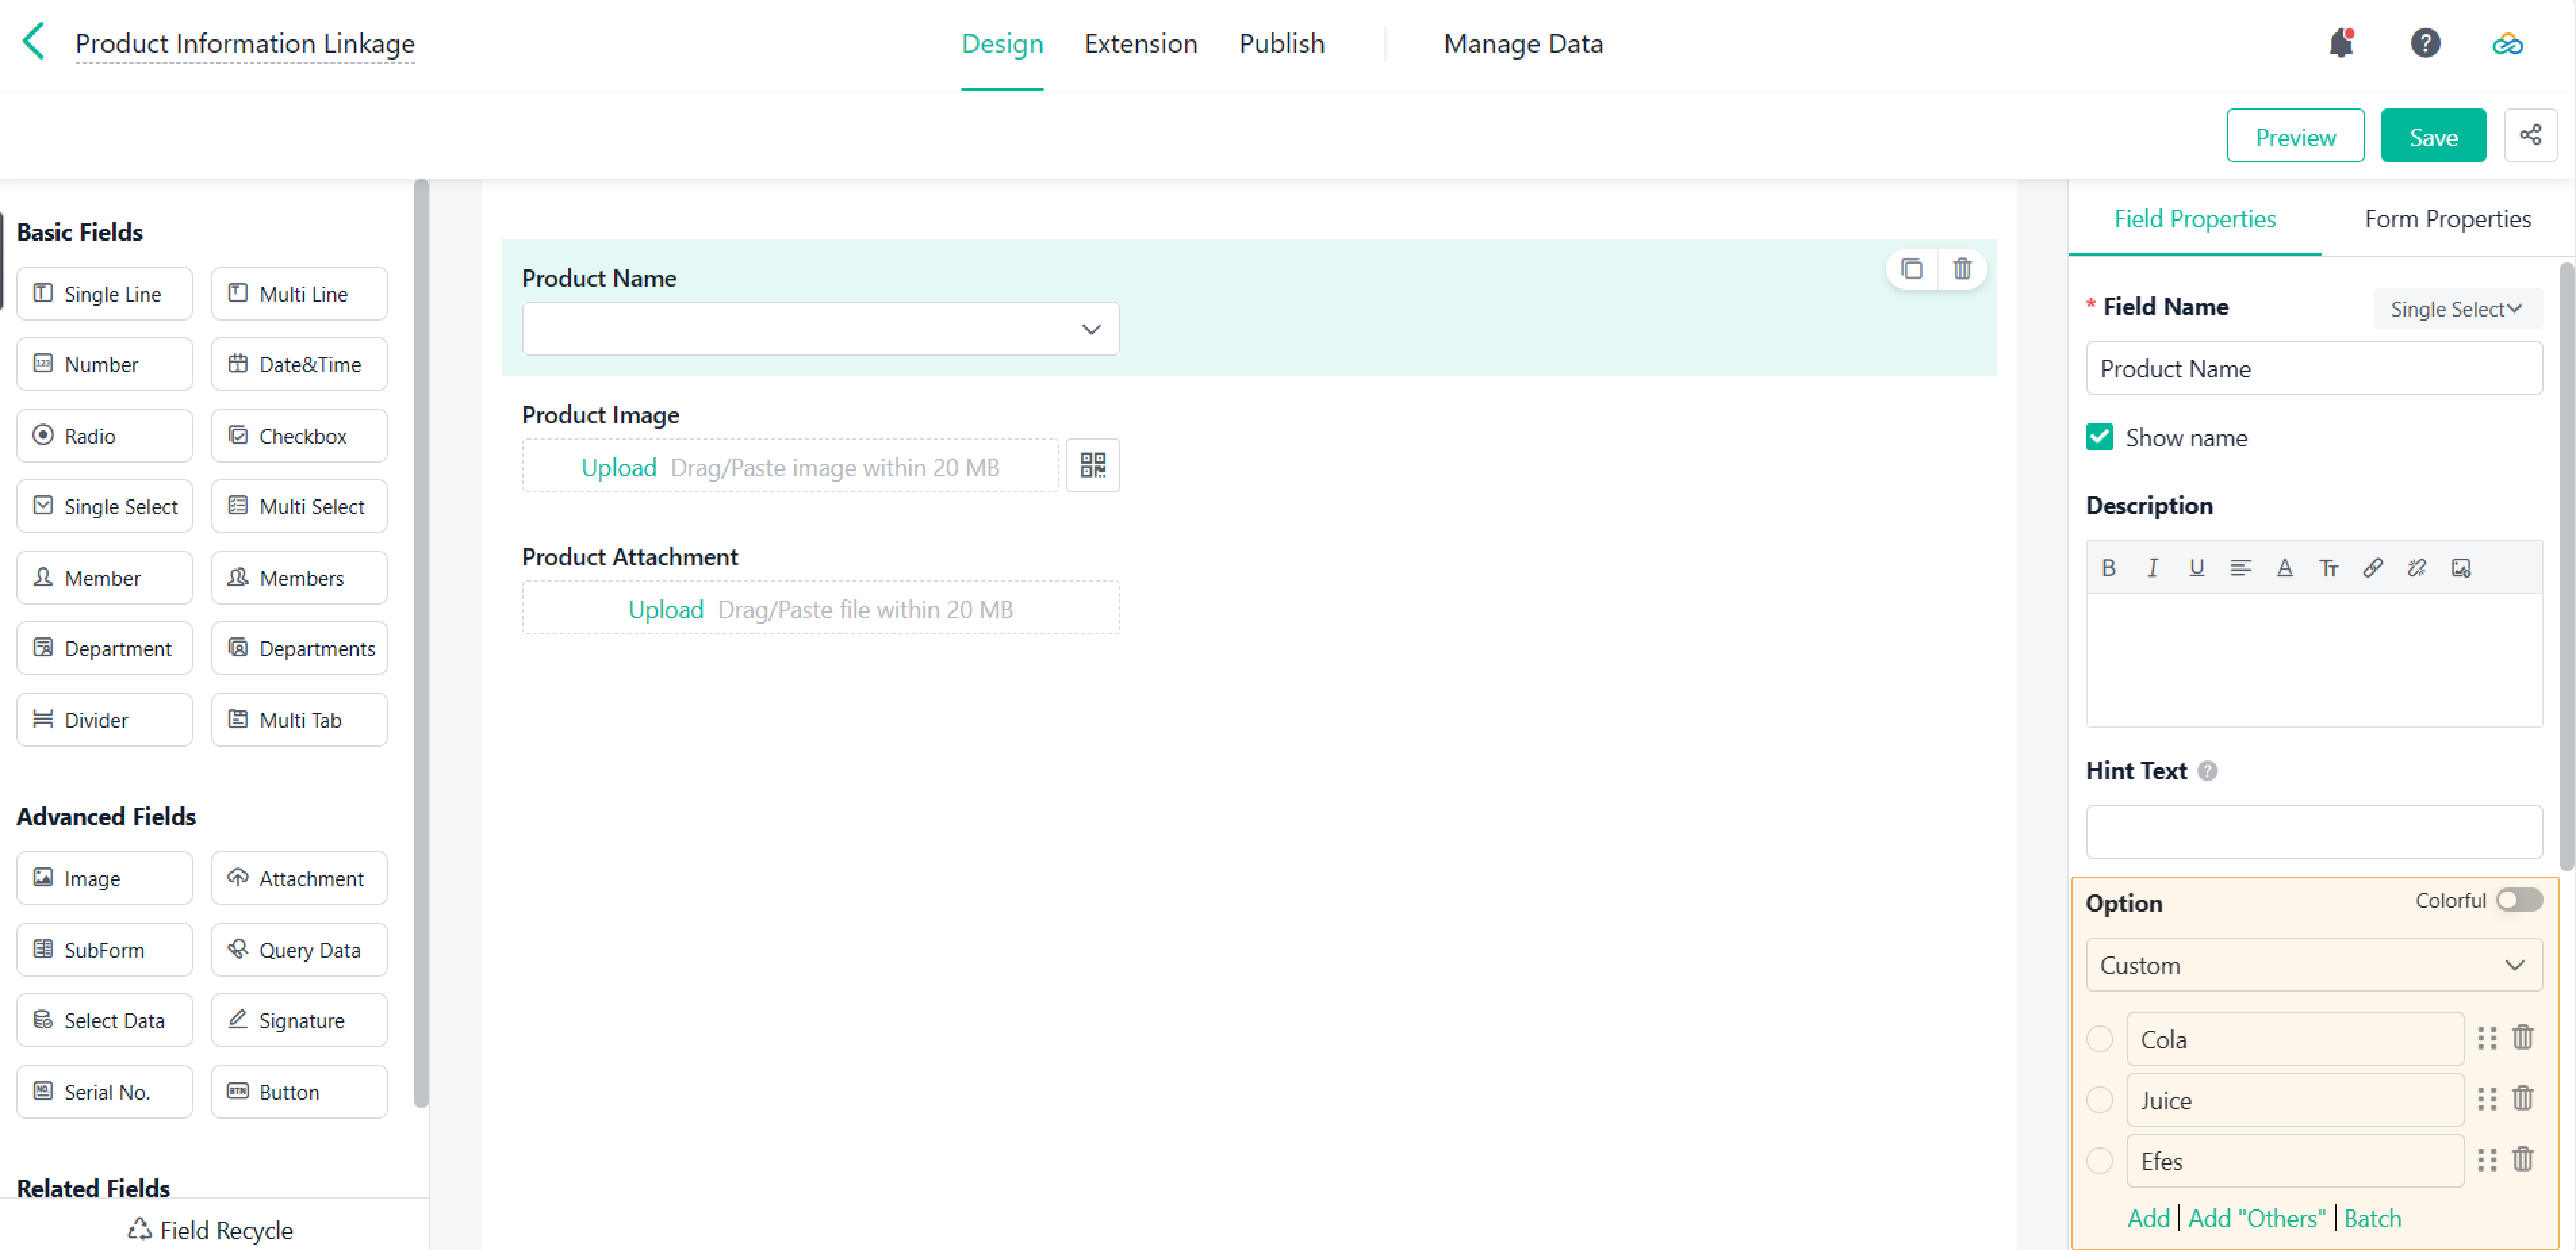
1. Create a Product Information Linkage form. Drag Single Line, Image, and Attachment fields to the form and name them Product Name, Product Image and Product Attachment. In the Single Line field, you can manually enter the product name.
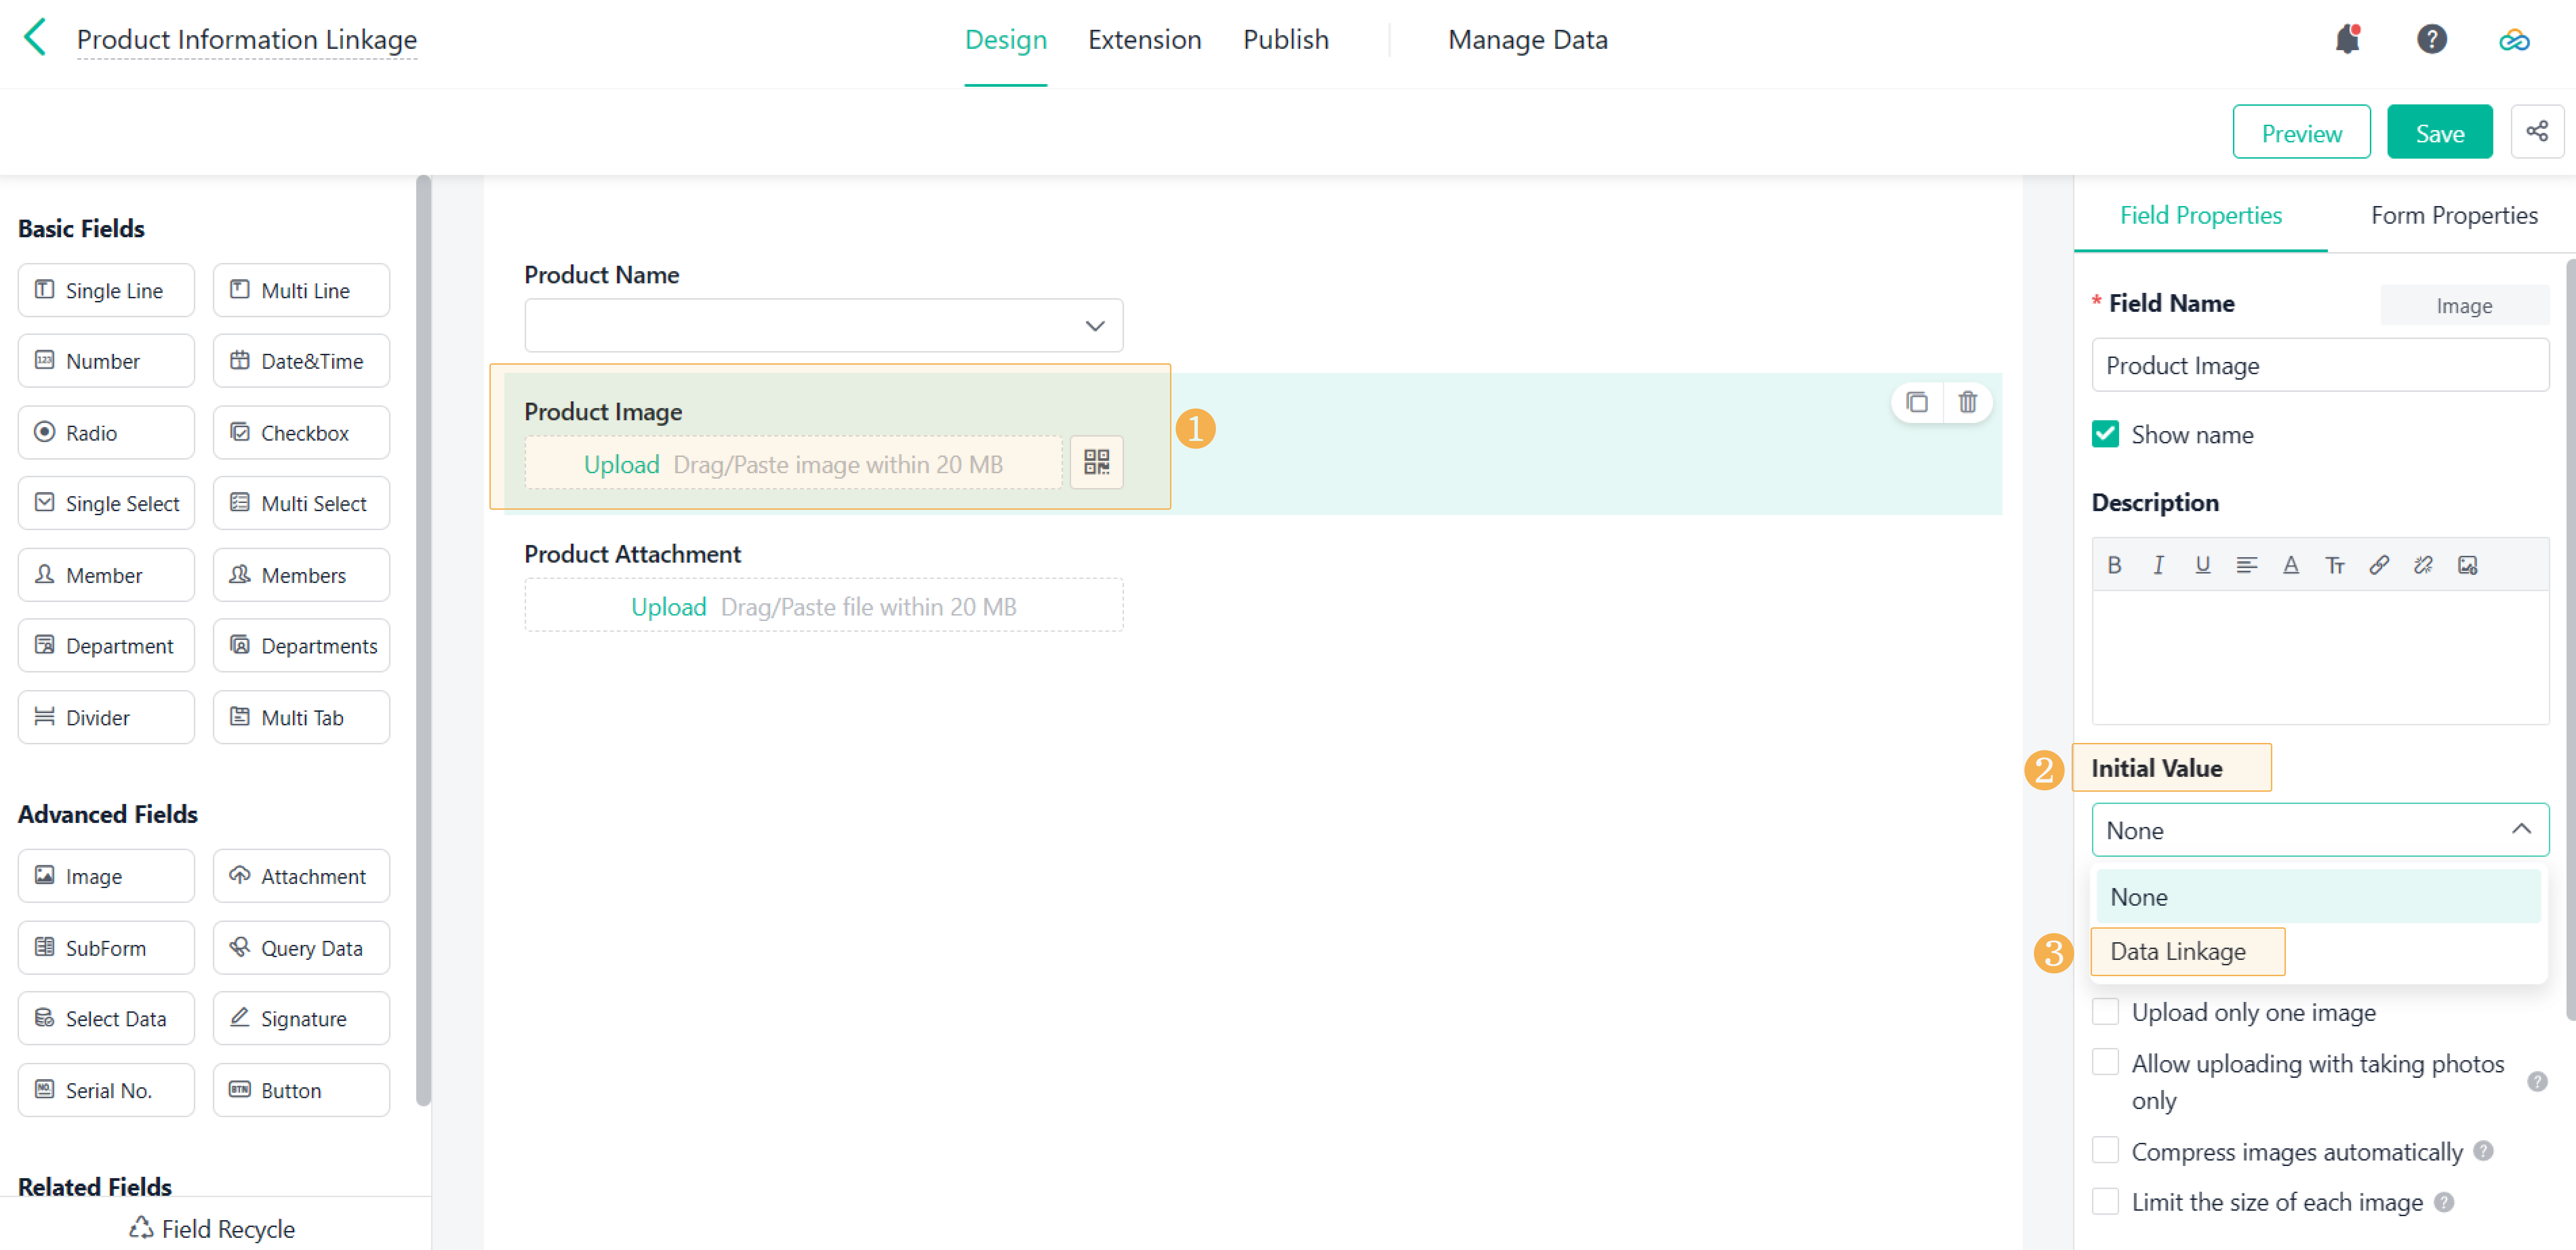
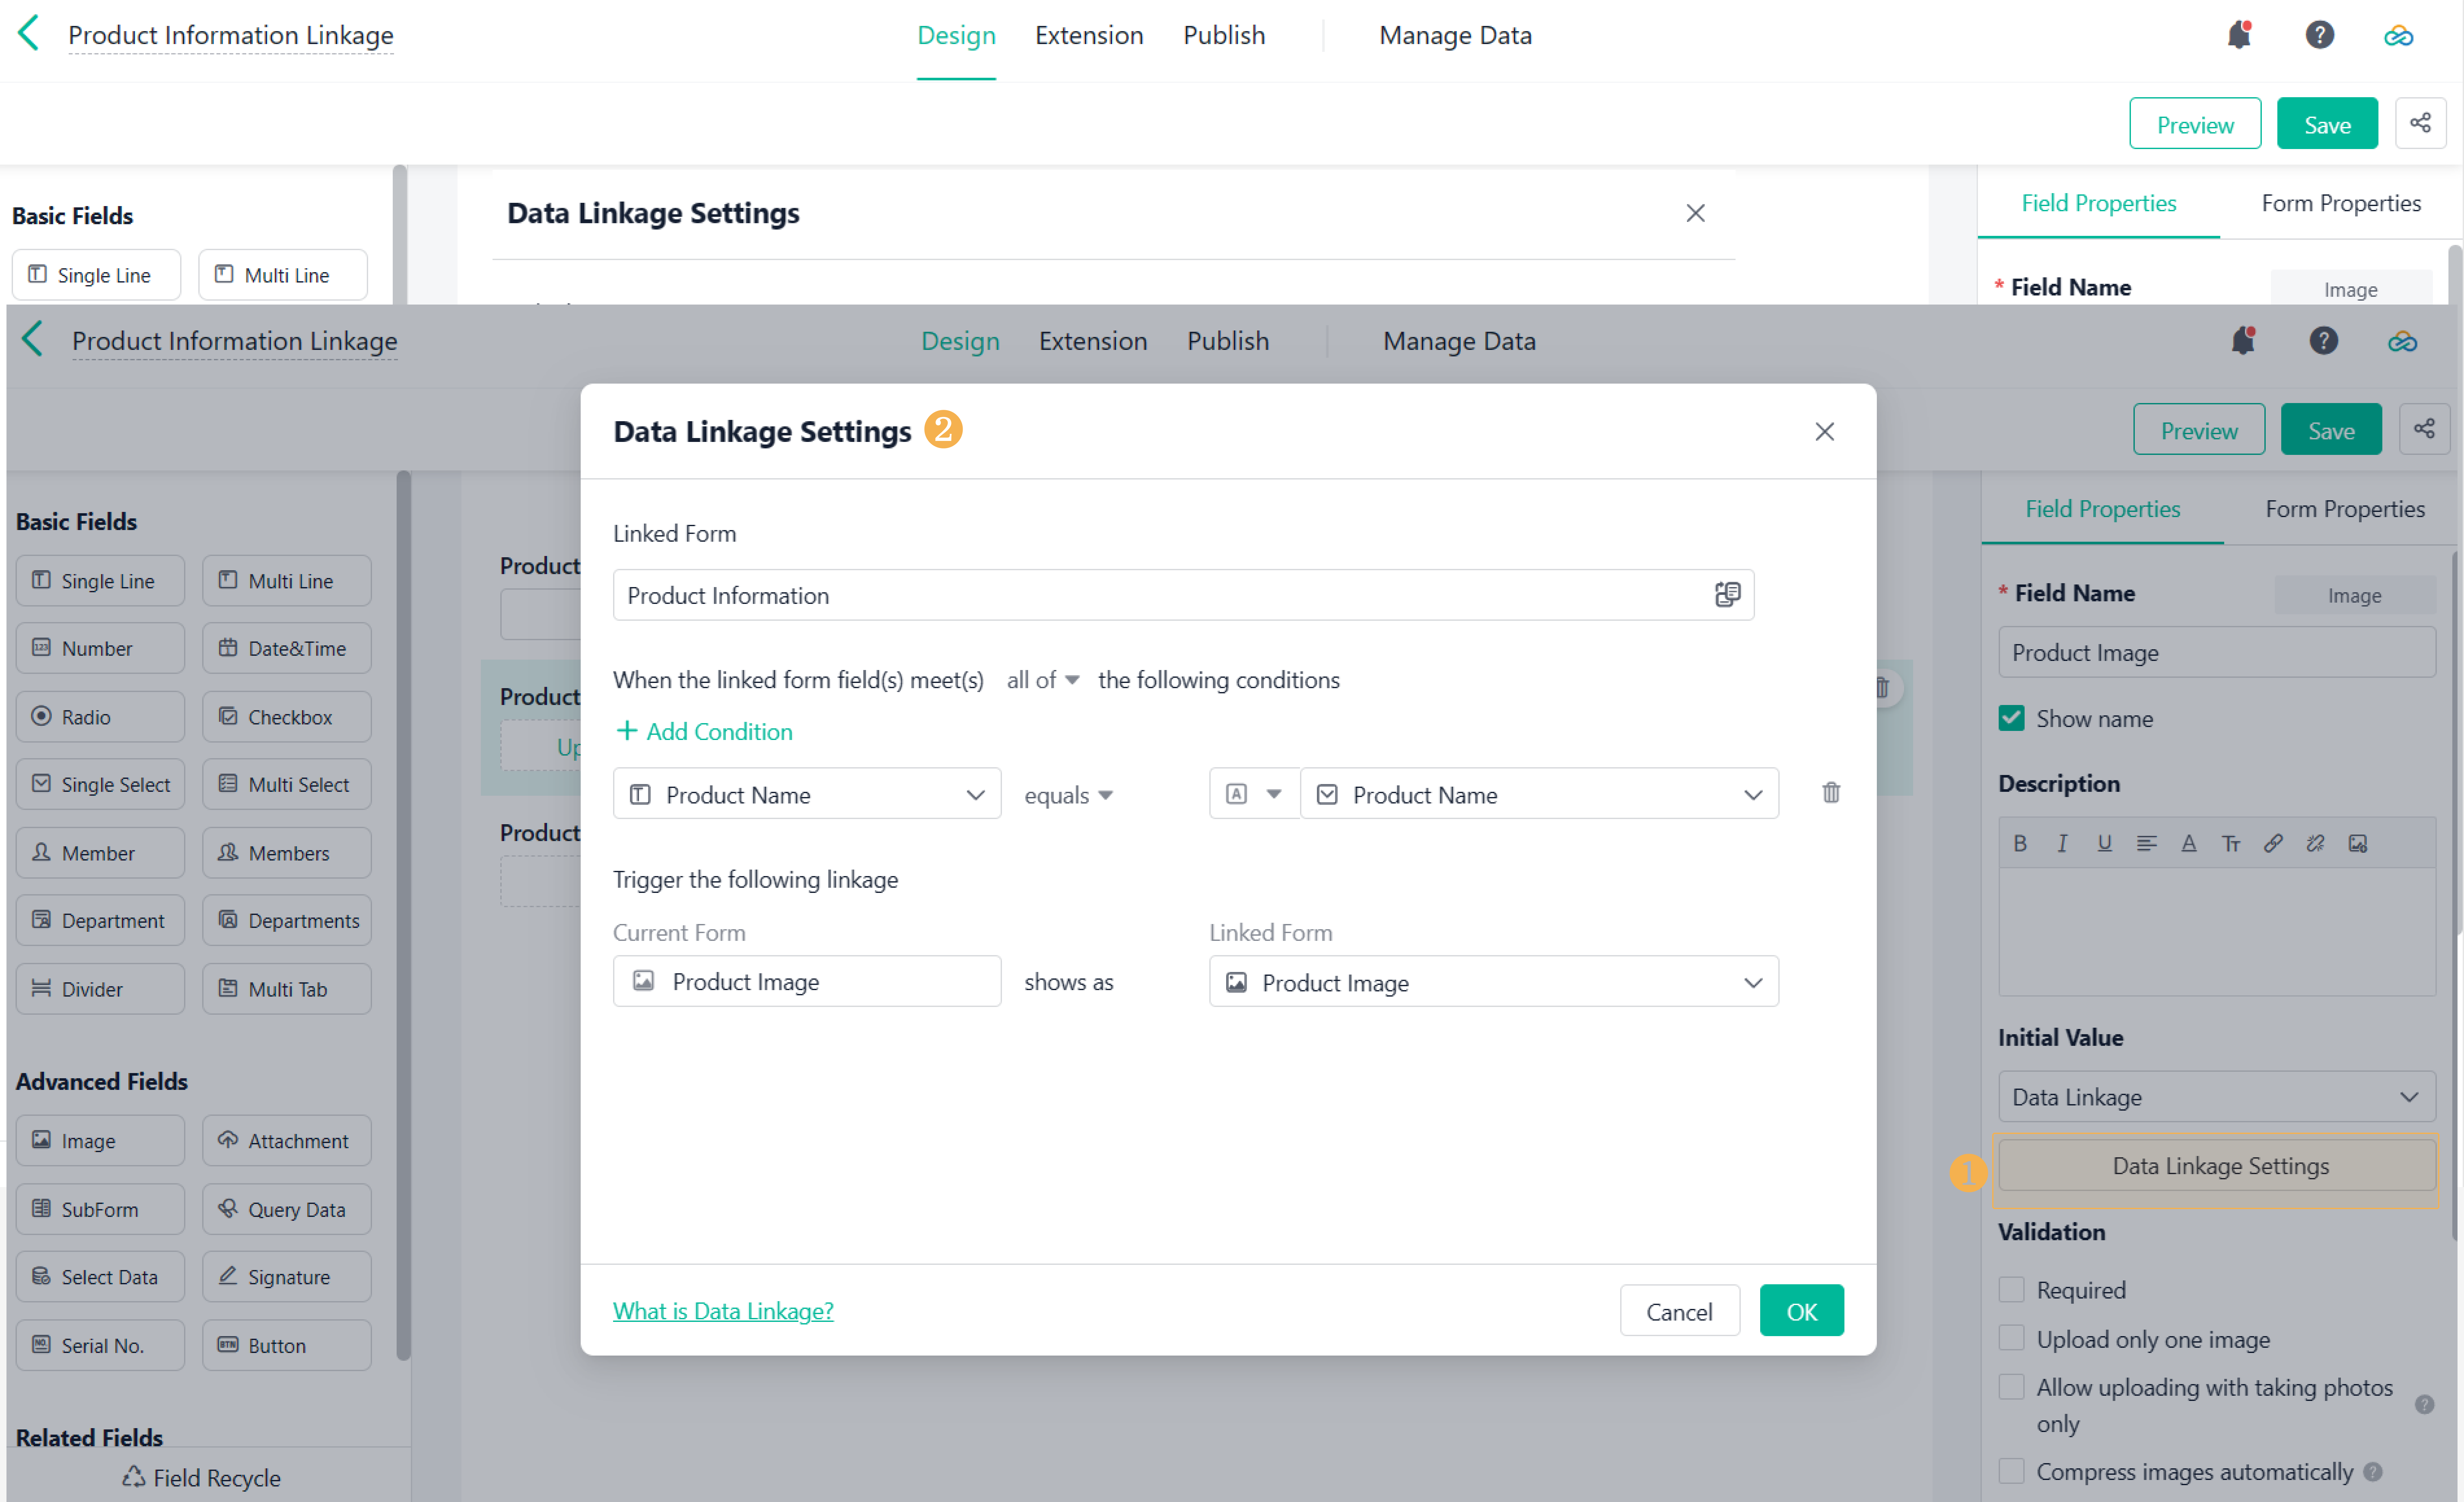
2. Then, we begin to set Data Linkage for the Product Image field. Click Product Image and select Data Linkage from the drop-down list of Initial Value.
3. Click Data Linkage Settings. Choose Product Information form as Linked Form and configure the condition according to the following picture:
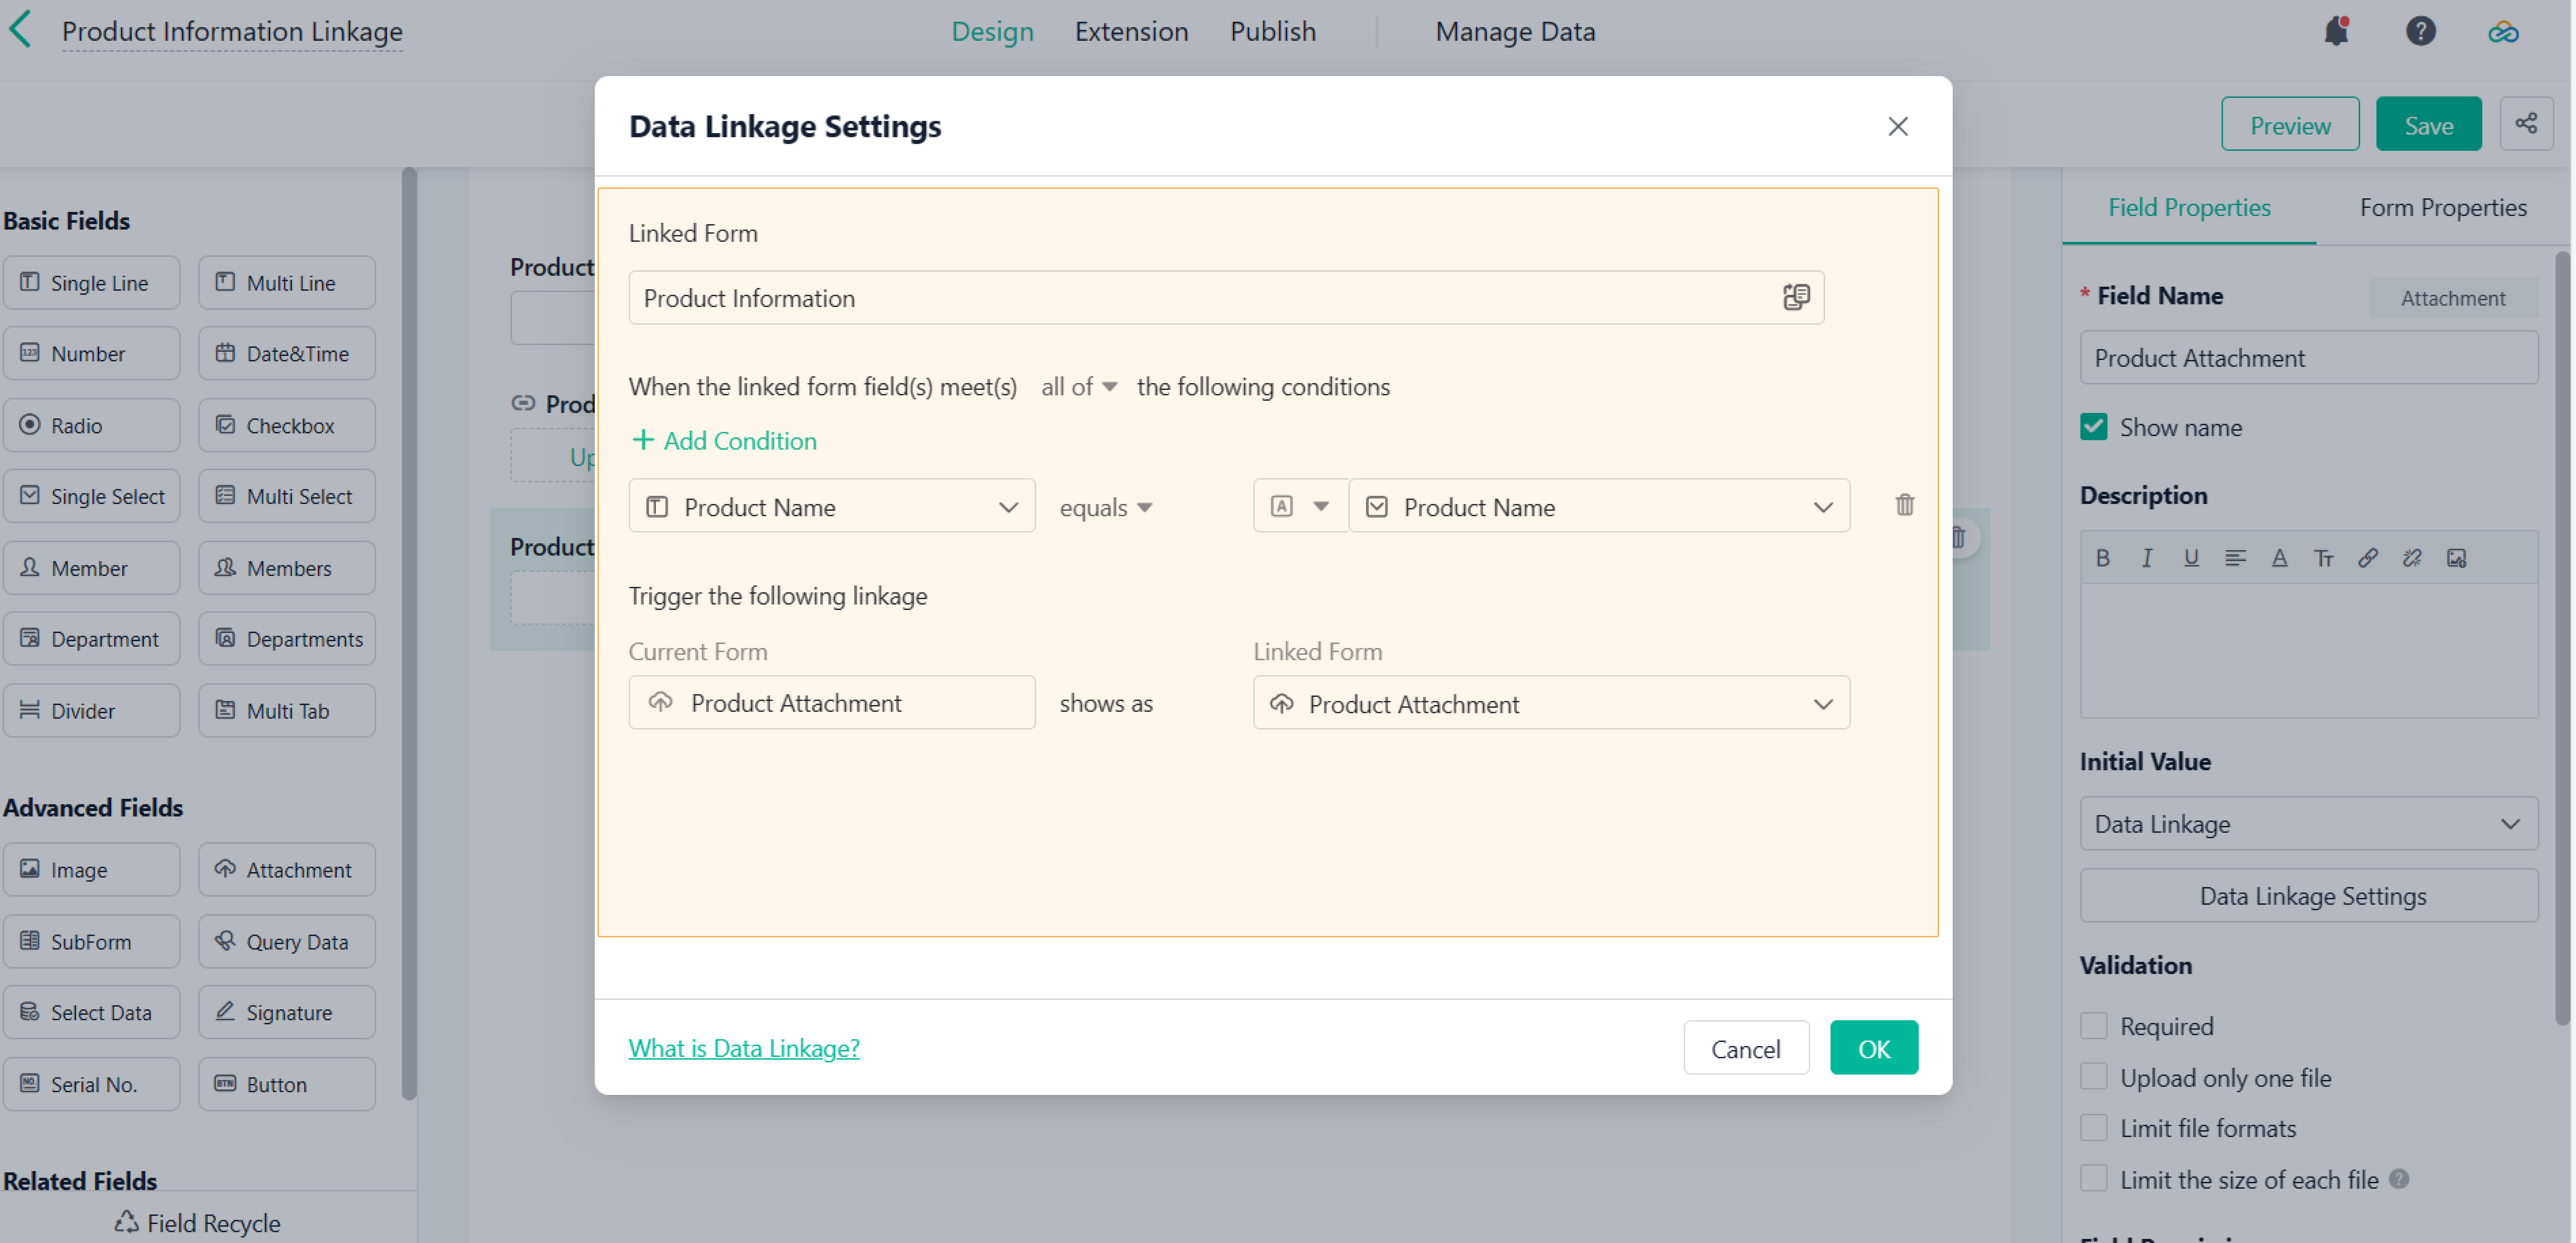
4. The steps for setting up Data linkage for Product Attachment field are the same as those for Product Image field. Therefore, you can repeat the Step 2 and 3, and configure the condition according to the following picture:
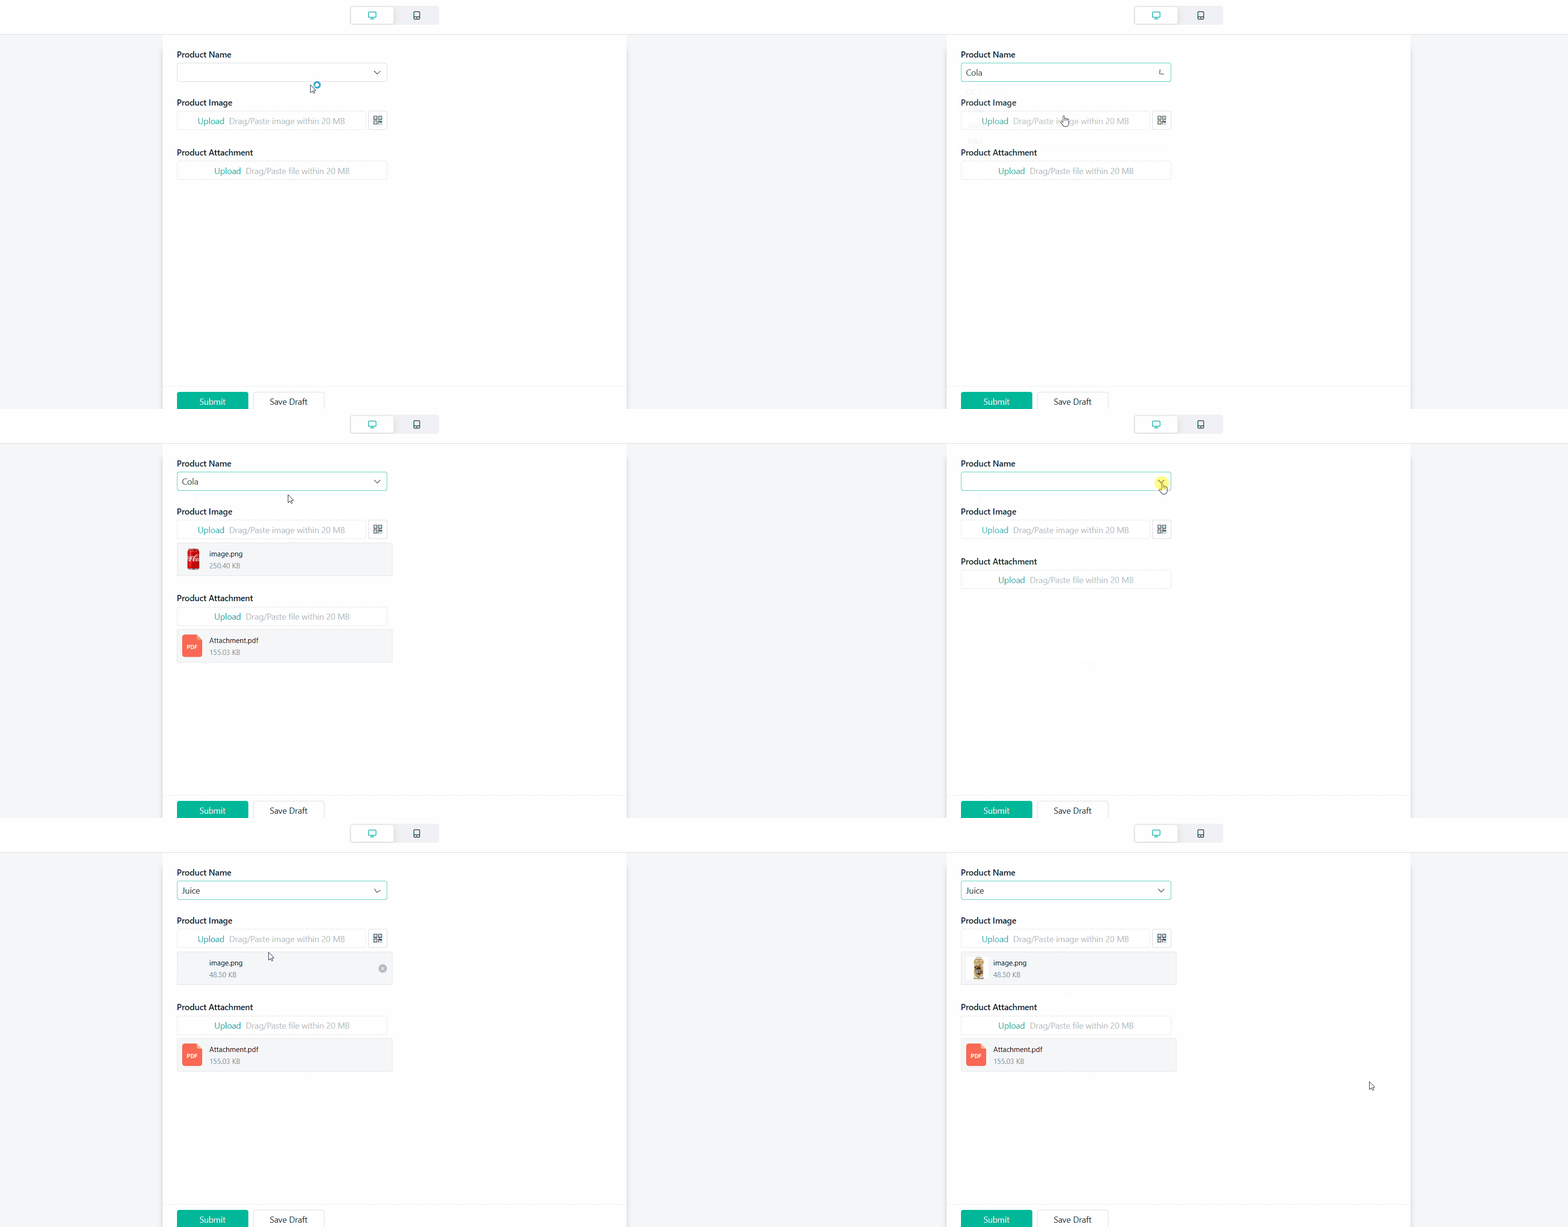
5. Demonstration
I have finished reading. 🏆
👉I can't wait to CREATE MY FIRST FORM.
👉I need more HELP in Discord Forum.


