


August 21, Version 7.4.0
Current Version: 7.4.0
Form Management
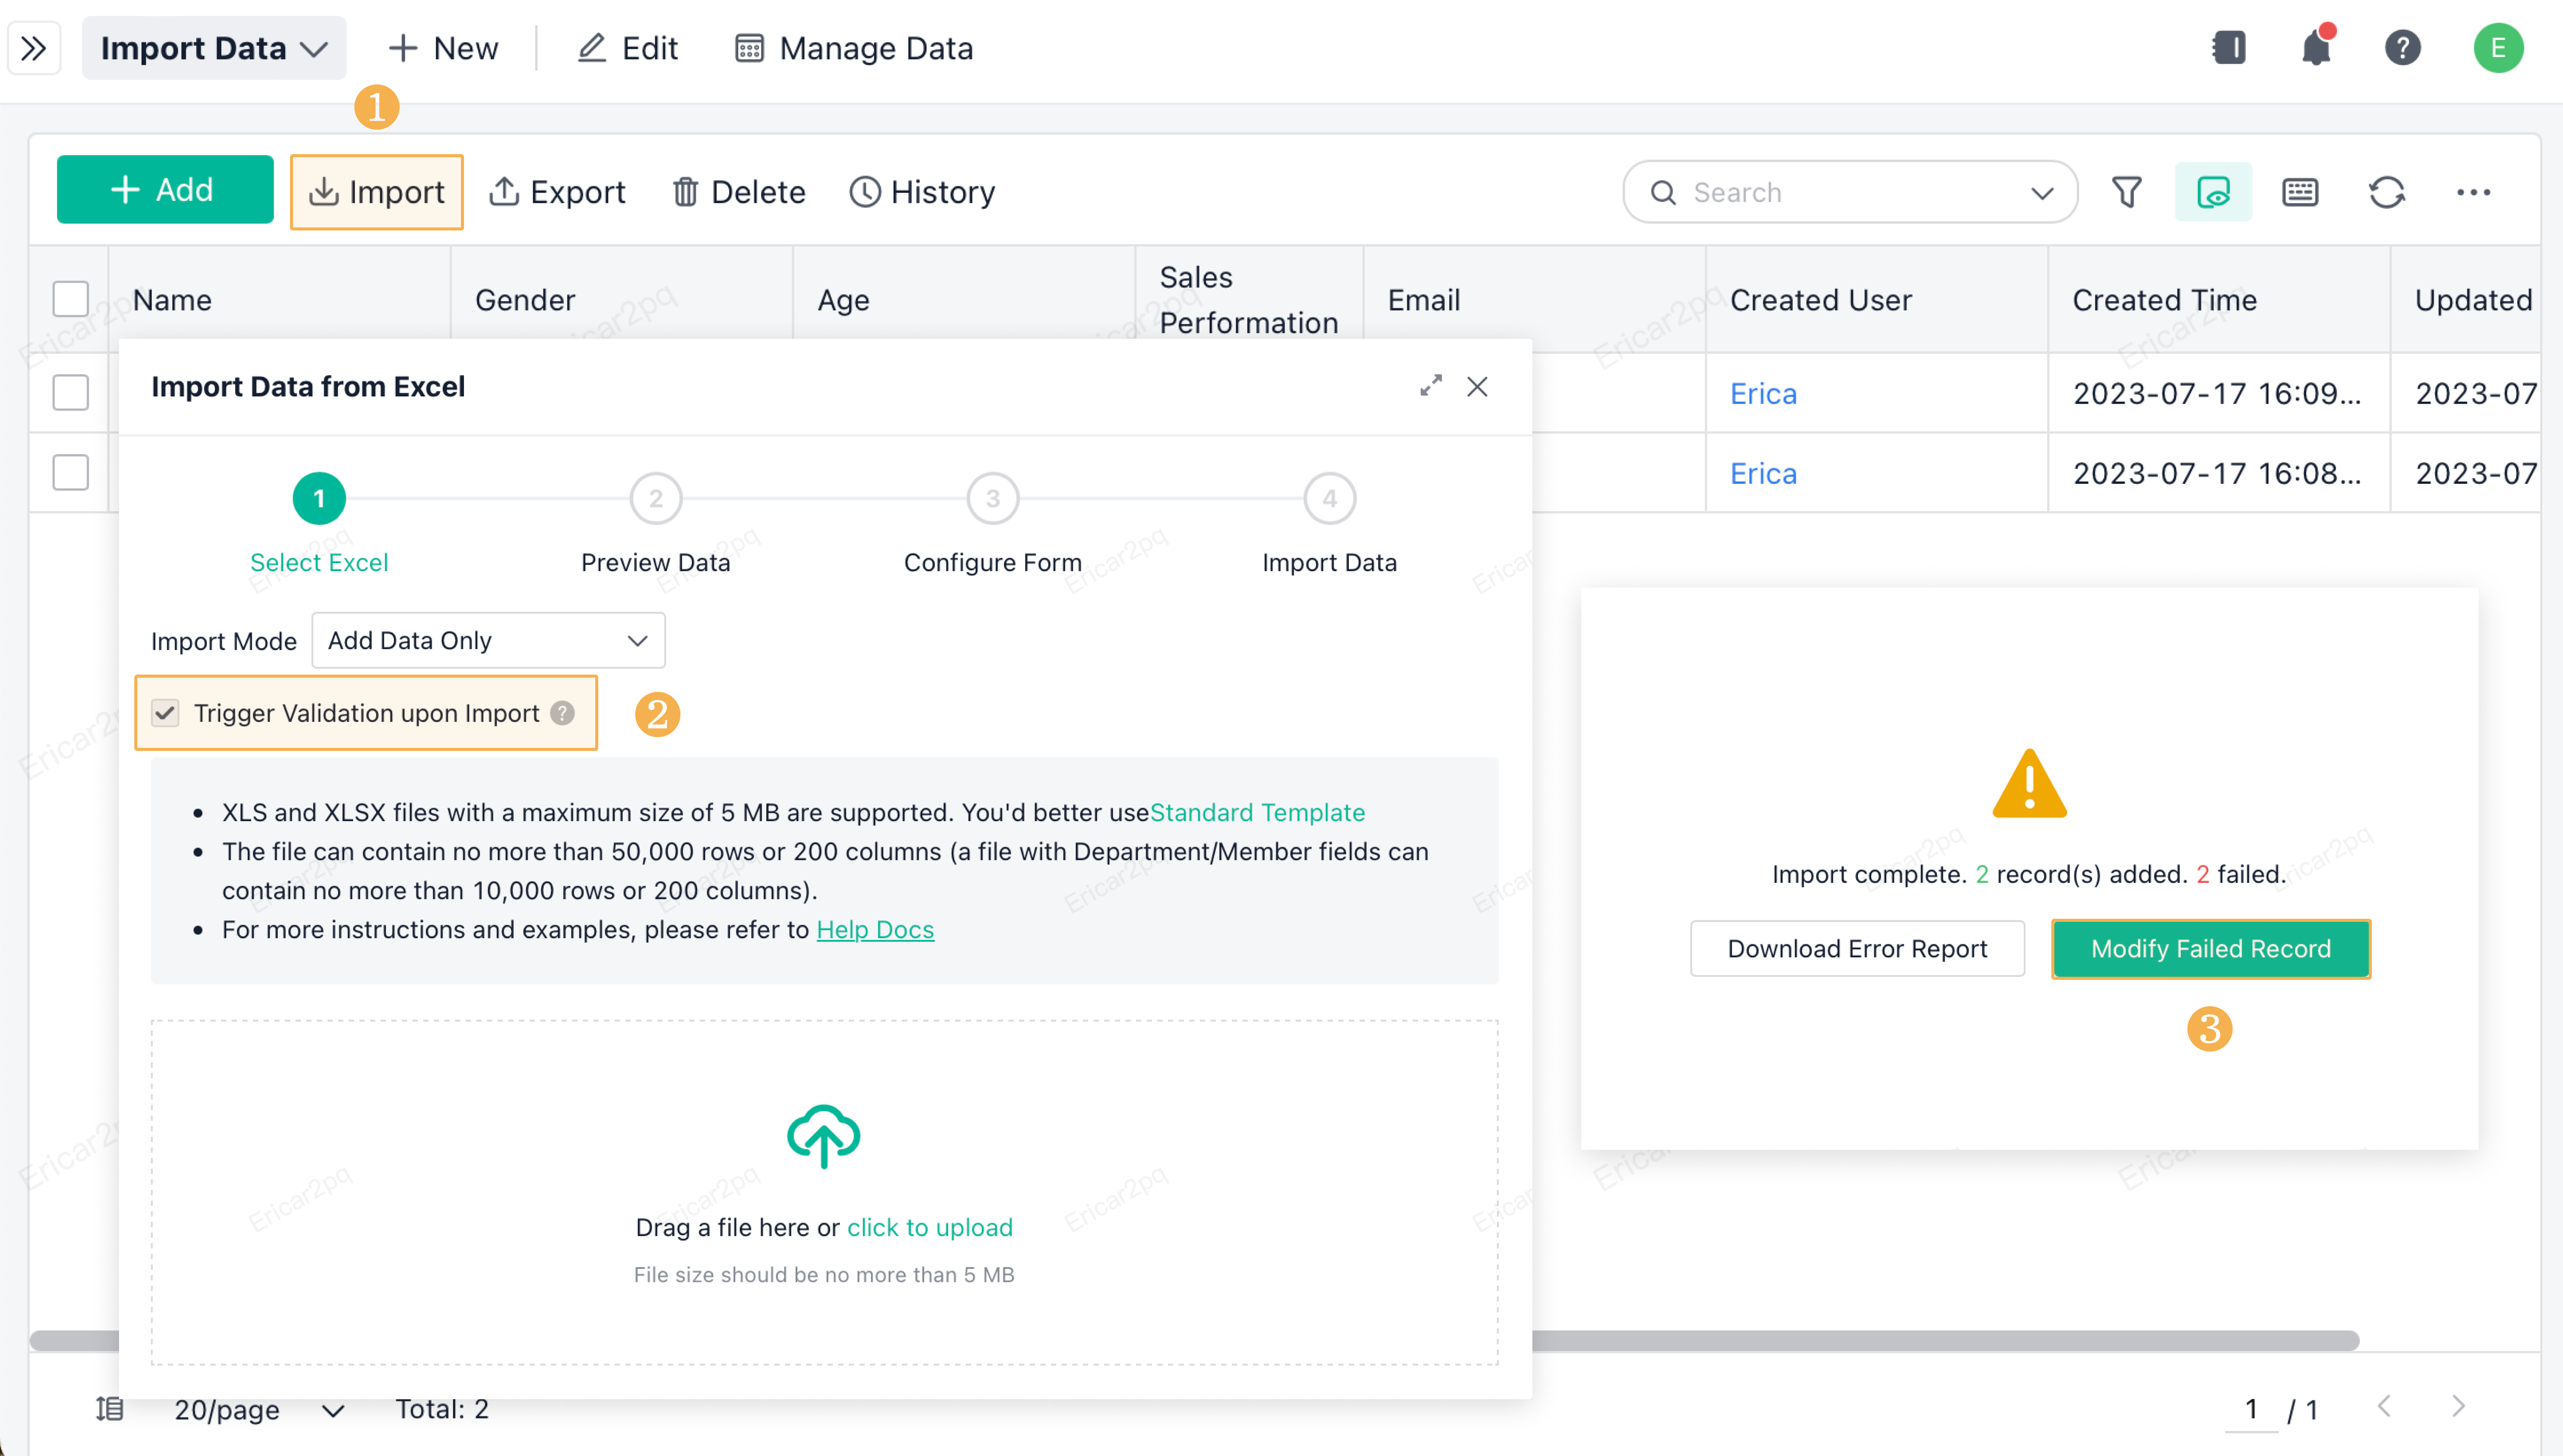
Supporting Validating Data Imported from Excel
In Ver.7.4.0, validations can be triggered when you import data in Manage Data or through permission sets. If you import data through permission sets, the Trigger Validation upon Import option will be ticked by default and cannot be modified. However, if you import data in Manage Data, you can choose whether to validate data or not.
Once Trigger Validation upon Import is ticked, validations on field formats and required fields will be triggered. Hence, only records that meet the validation rules can be imported successfully. For records that do not meet the validation rules, you can directly modify and reimport them on the data import page. For example, validations will be triggered after you import data through a permission set.
Note:
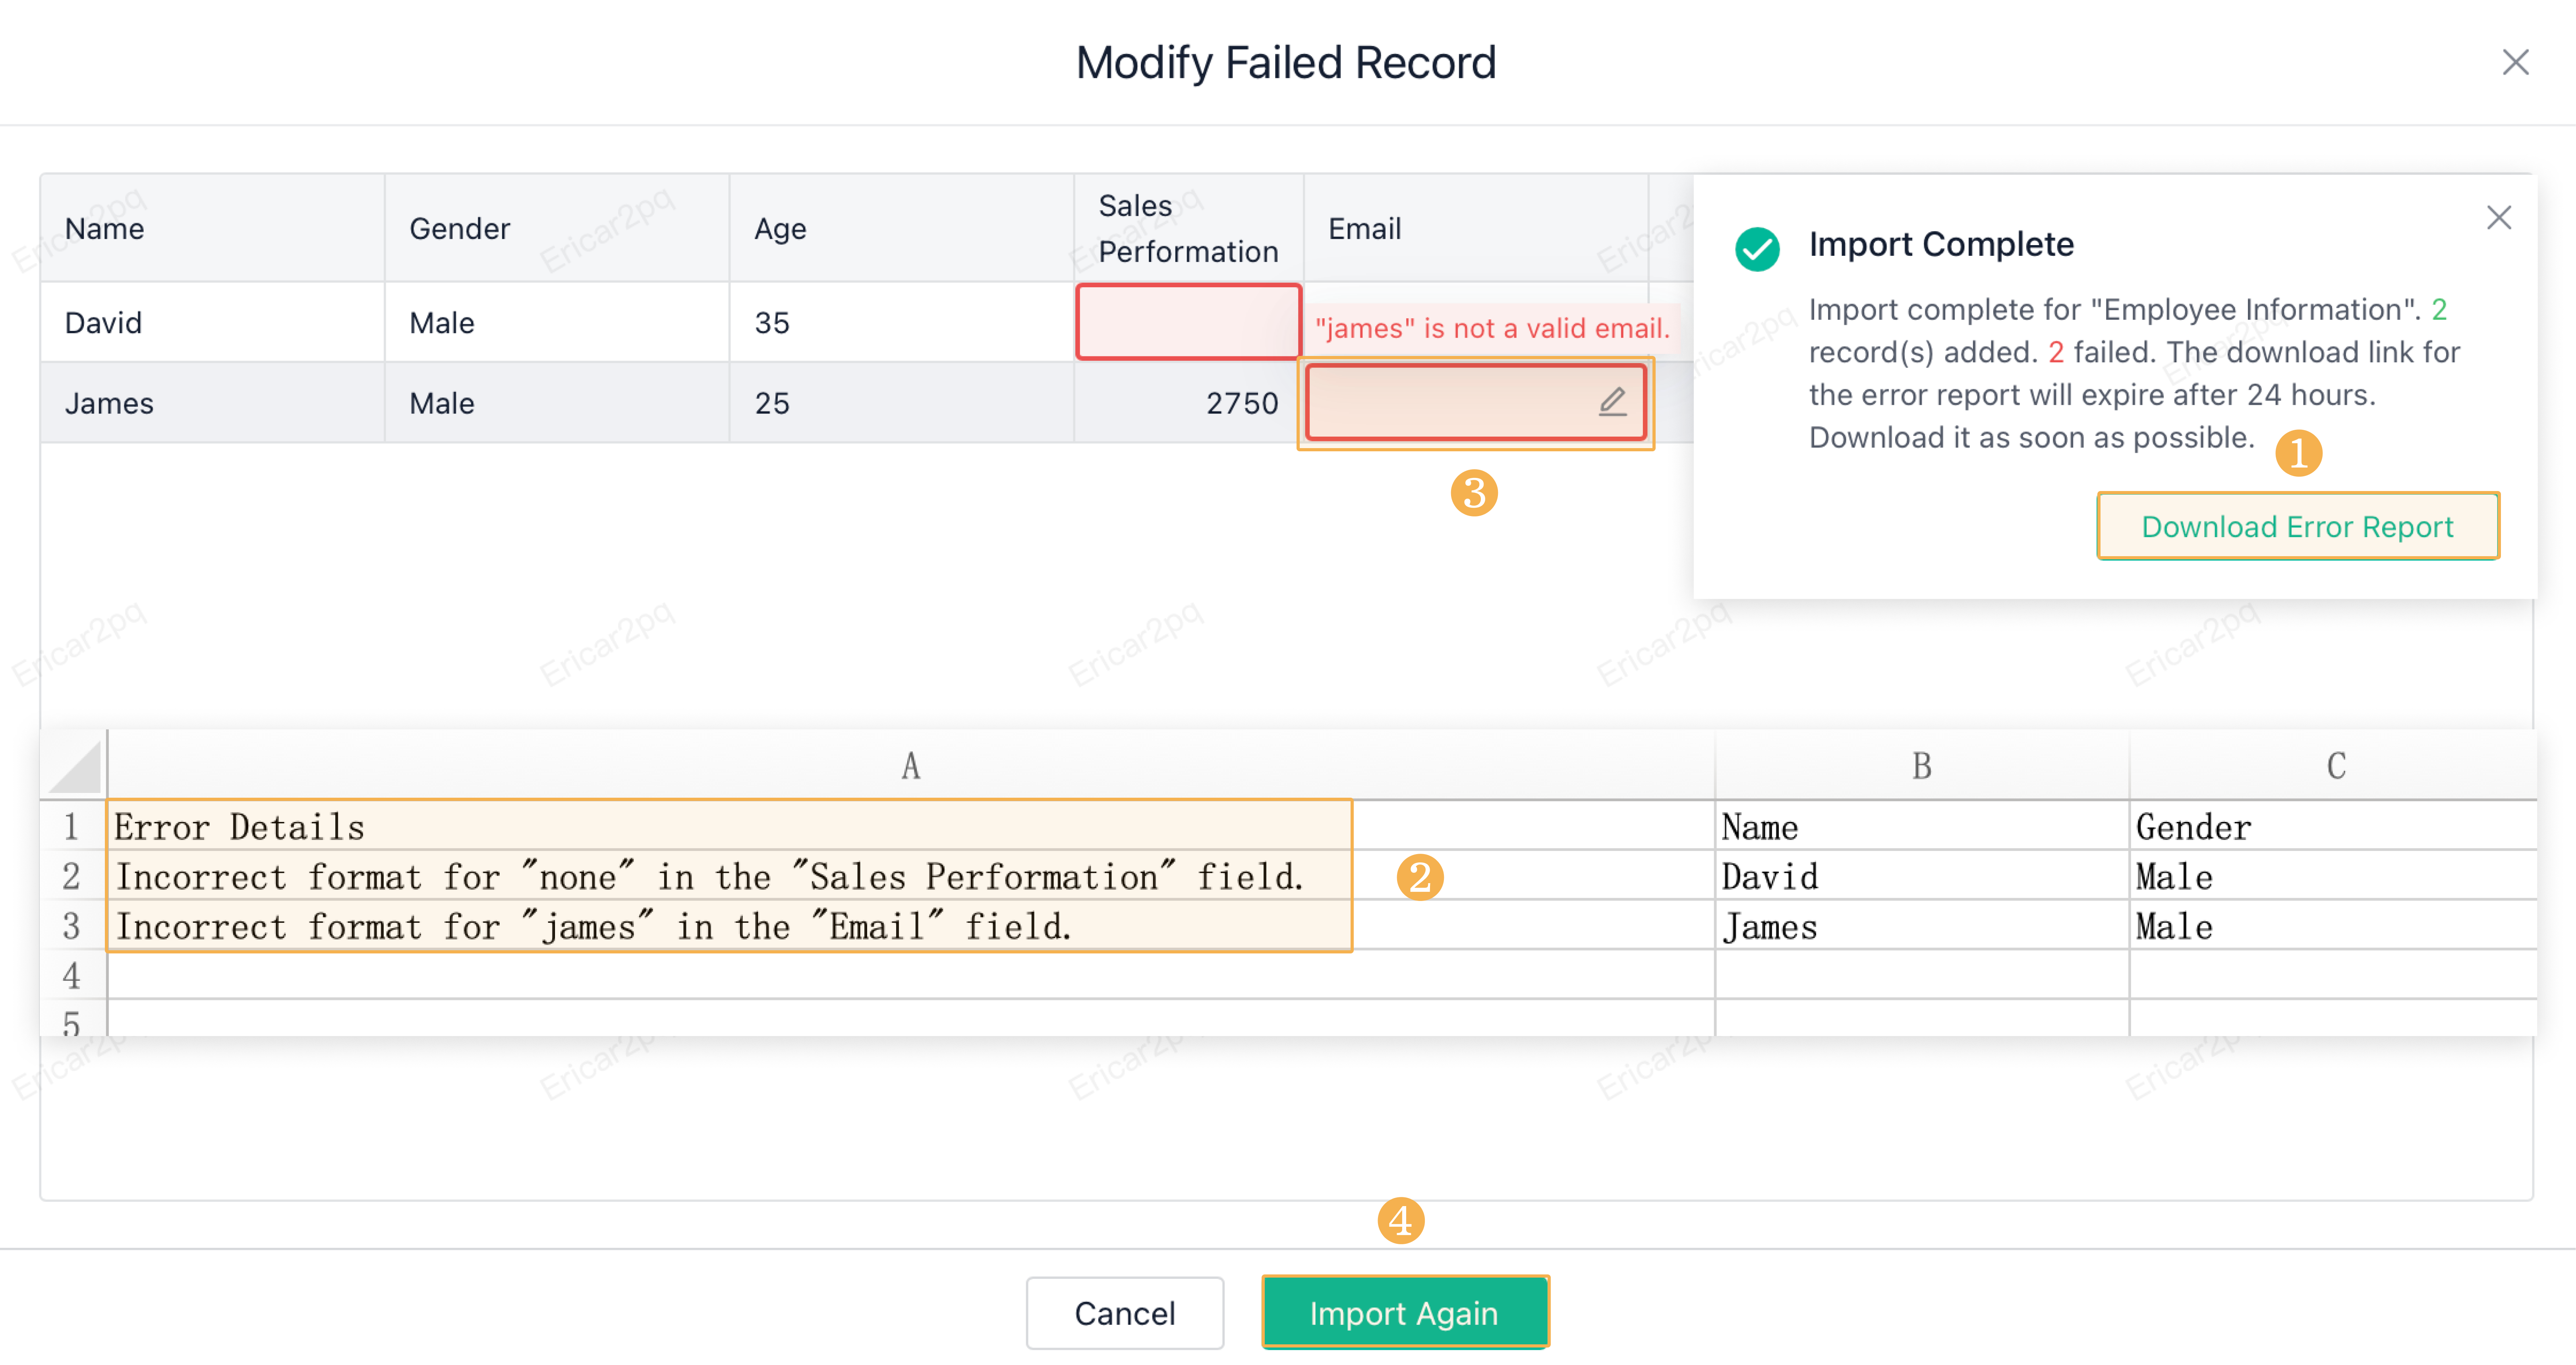
If the number of failed records does not exceed 30, you can click Modify Failed Record to edit them directly. Otherwise, you can only download the error report and import the data from scratch.
When modifying records, you can download the error report or hover the mouse over the failed record to view the error details. Once all modifications are done, you can reimport the data.
Note:
1. When Trigger Validation upon Import is ticked, validations on field formats and required fields will be triggered. Validations on field formats mainly target the following field types: Single Line (for example, whether the email format is correct), Number (whether the entered value is numeric and whether it is within the value range), and so on. For details about the validation rules, see Importing Data.
2. Validations on duplicate values when importing data will be available for you soon.
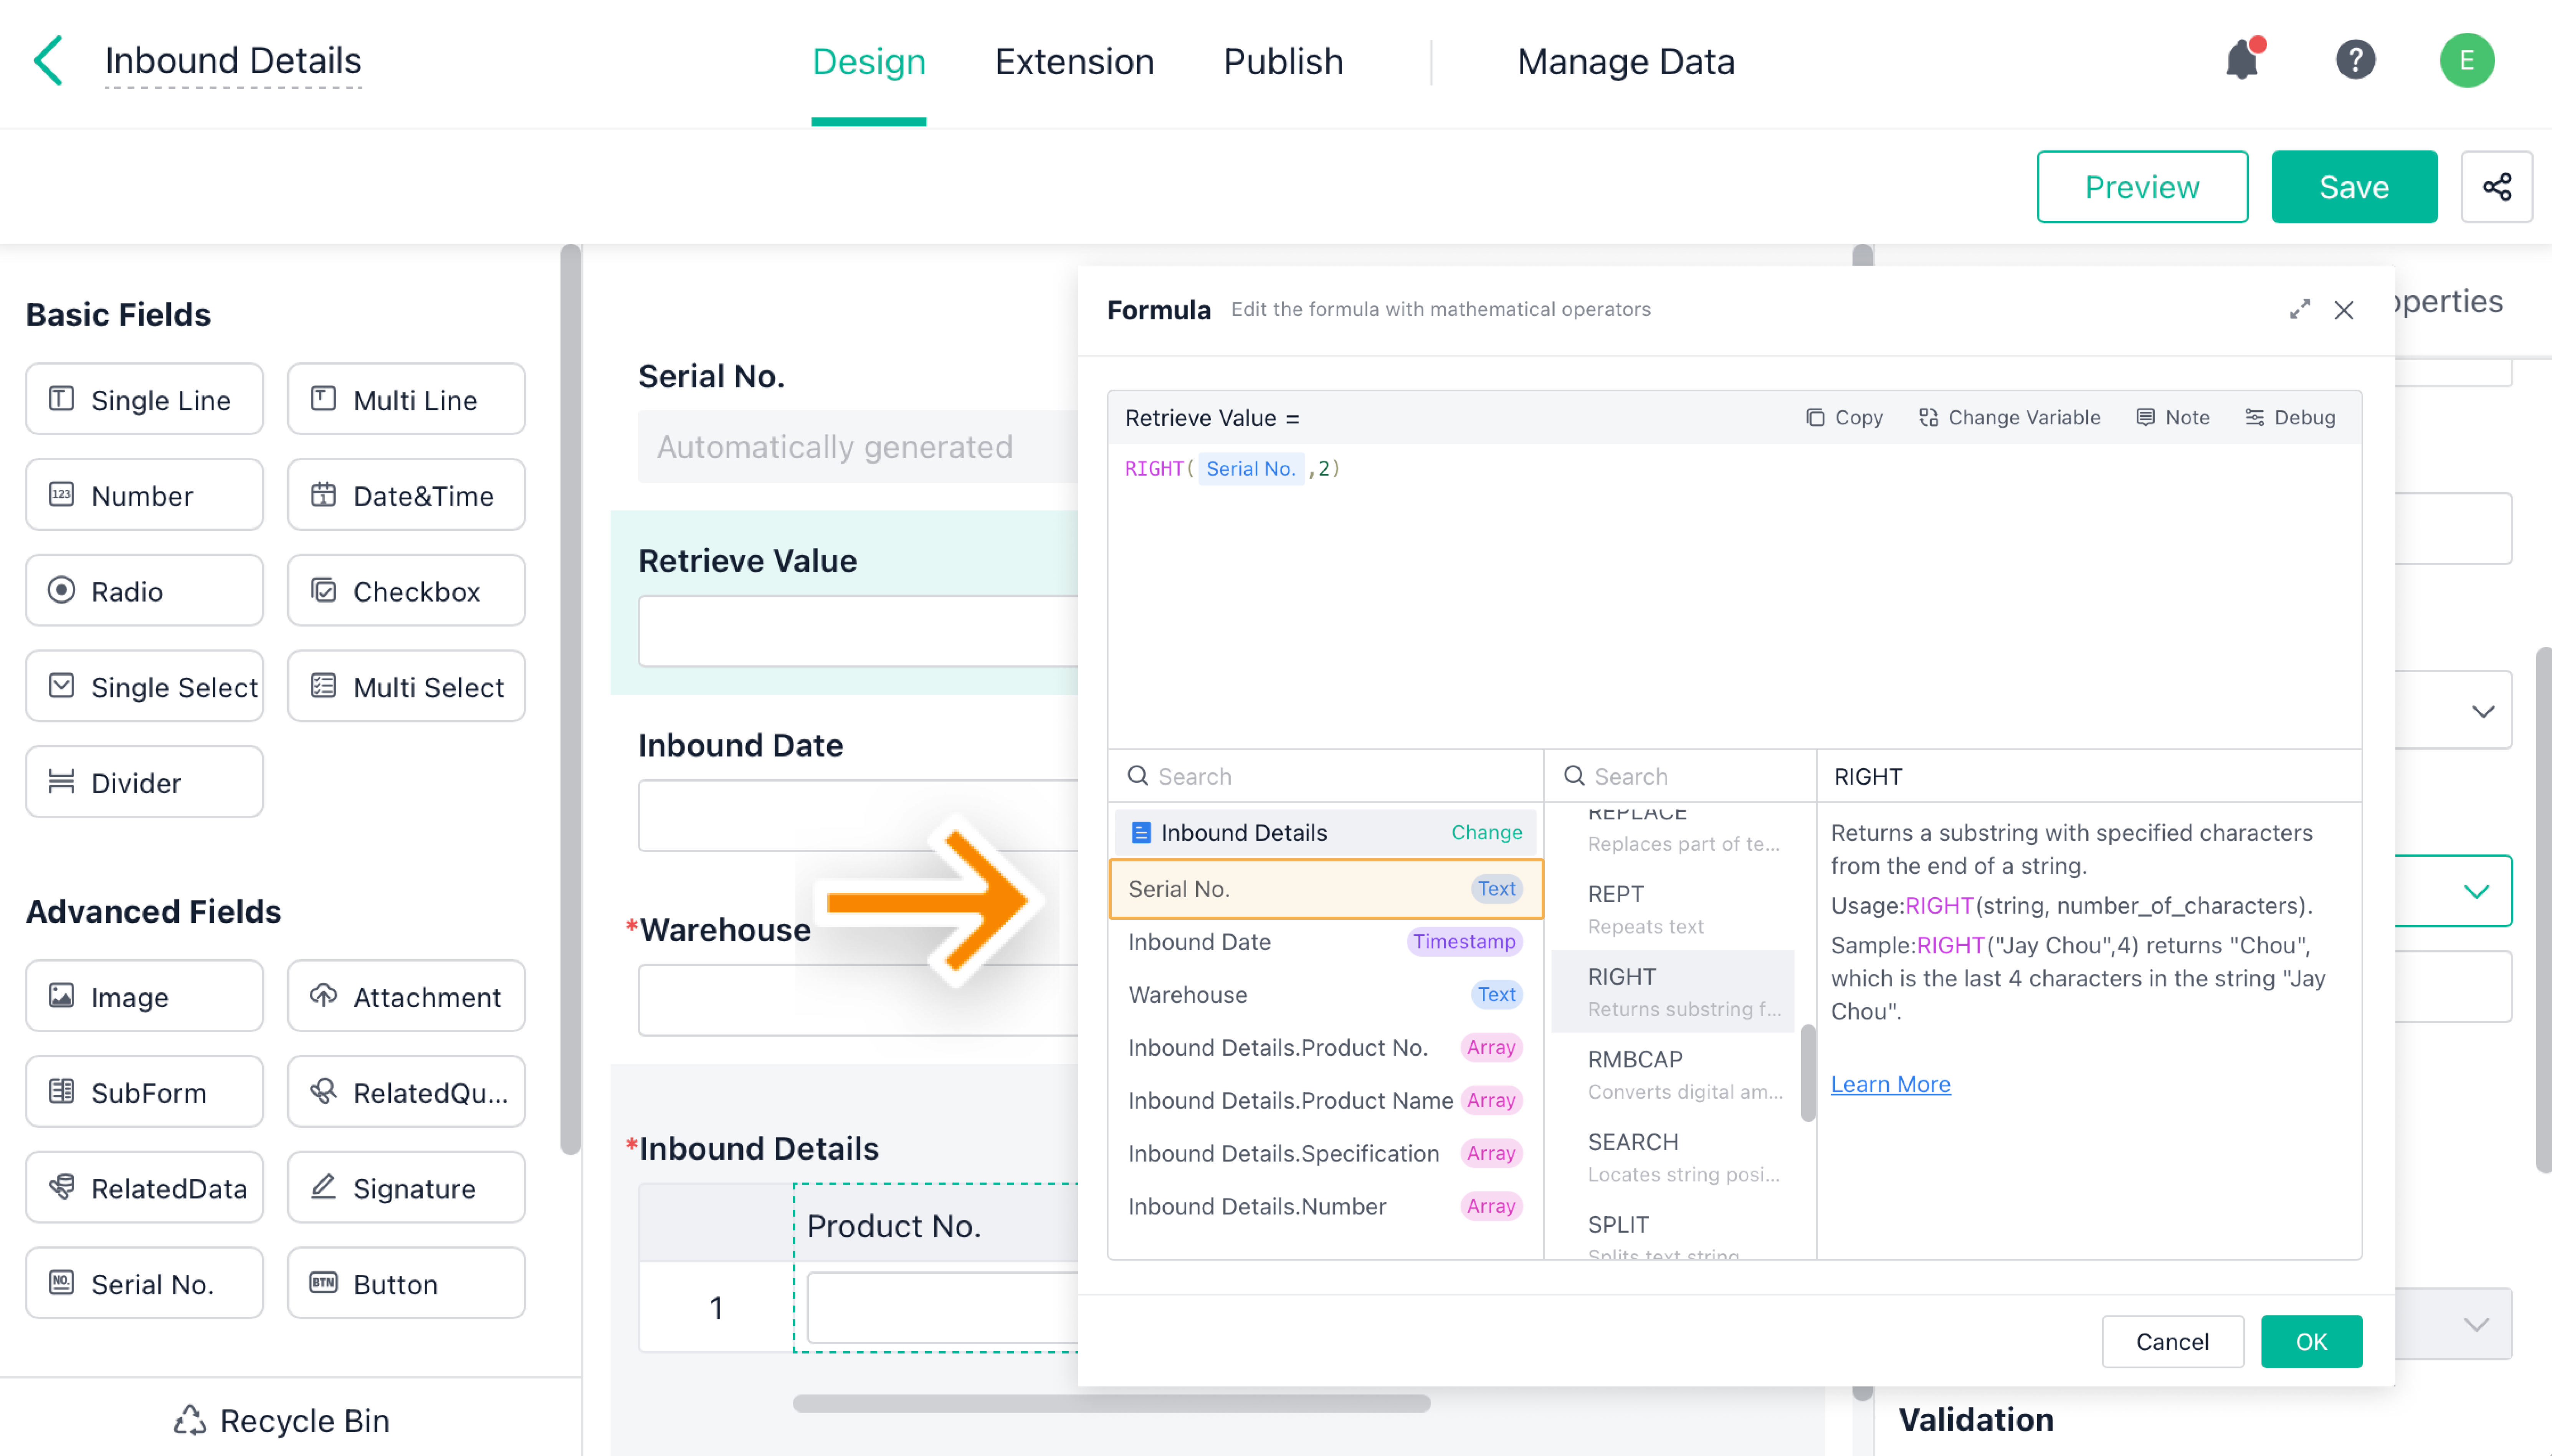
Supporting Adding Serial No. to Formula(s) or Front-End Event(s)
1. Support adding the Serial No. field to formulas.
When you edit formulas, the Serial No. field is treated as text. Therefore, you can directly apply it to text functions.
Note that the serial number is generated after the record is submitted. Hence, the formula cannot retrieve the value of the Serial No. field and will not be triggered immediately after the record is submitted. Instead, the formula will be triggered only when the Serial No. field included in that formula is updated.
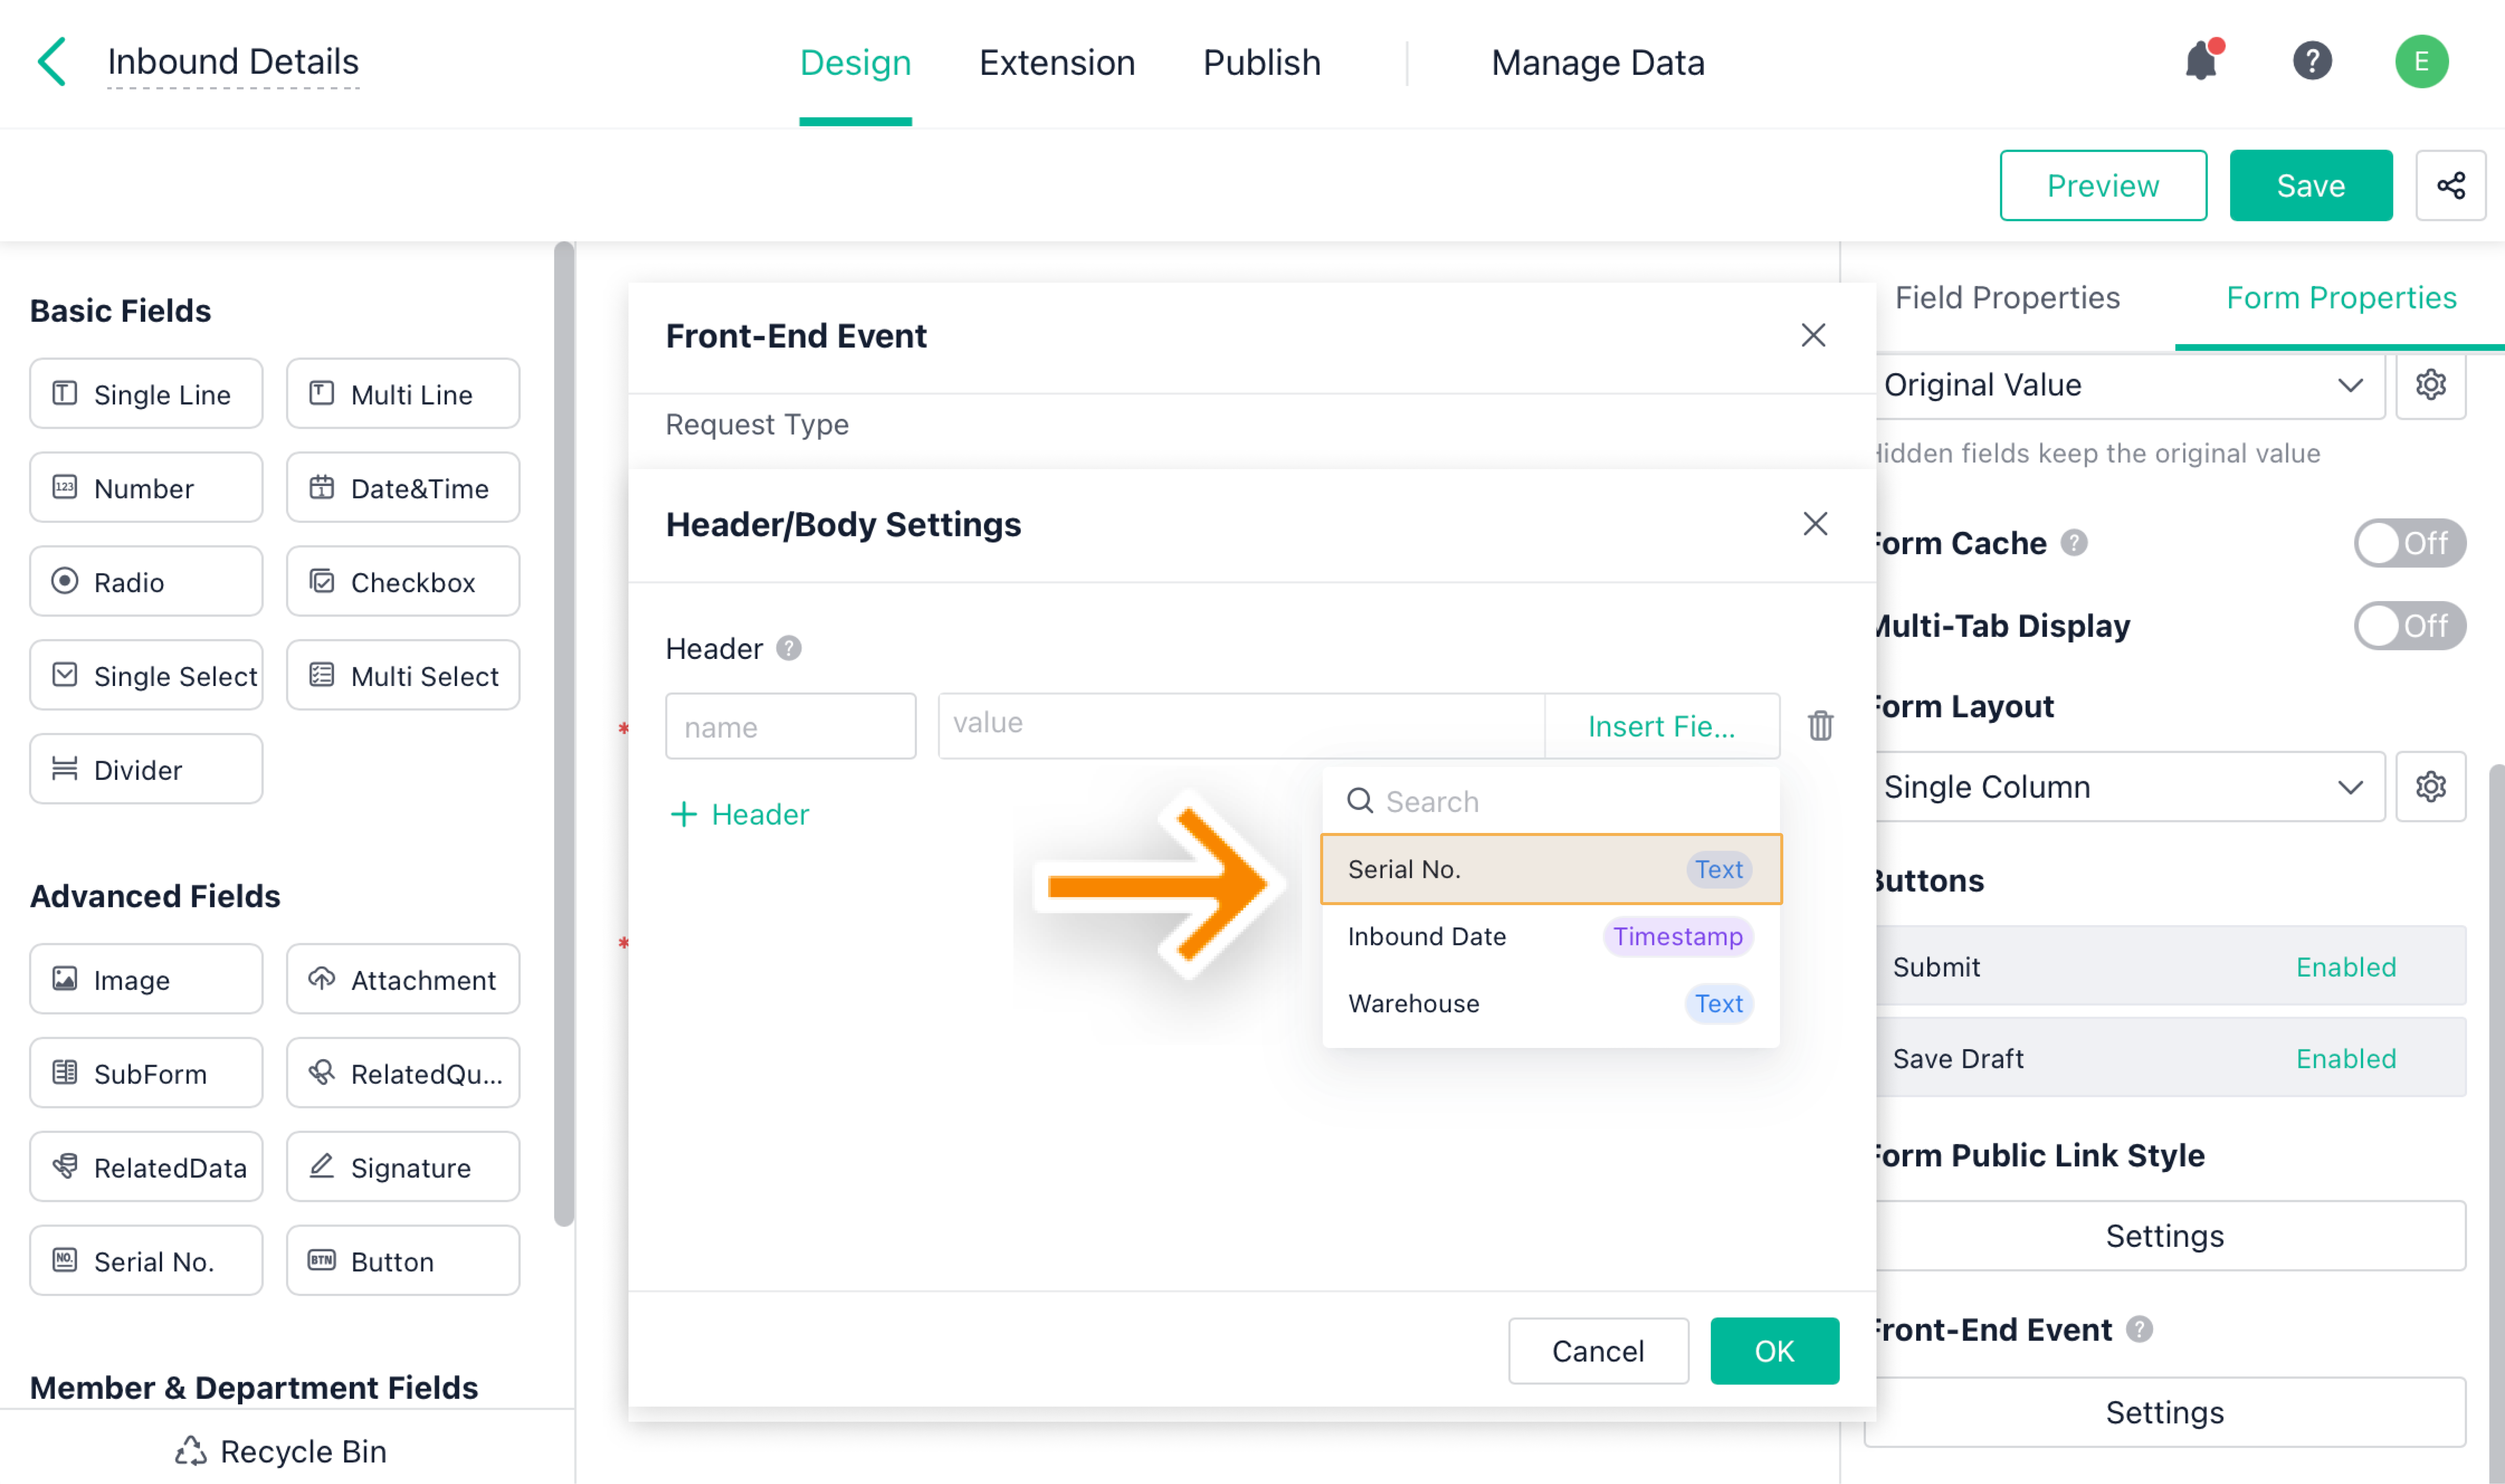
2. Support adding the Serial No. field to front-end events.
When configuring a front-end event, you can add the Serial No. field to Header/Body, URL, plugin parameters, and so on.
Note:
The Triggered Action settings of the Button field are the same as those of front-end events. Therefore, you can also add the Serial No. field to the setting items aforementioned when designing the button, for example, Header/Body, URL, plugin parameters, and so on.
Data Analysis
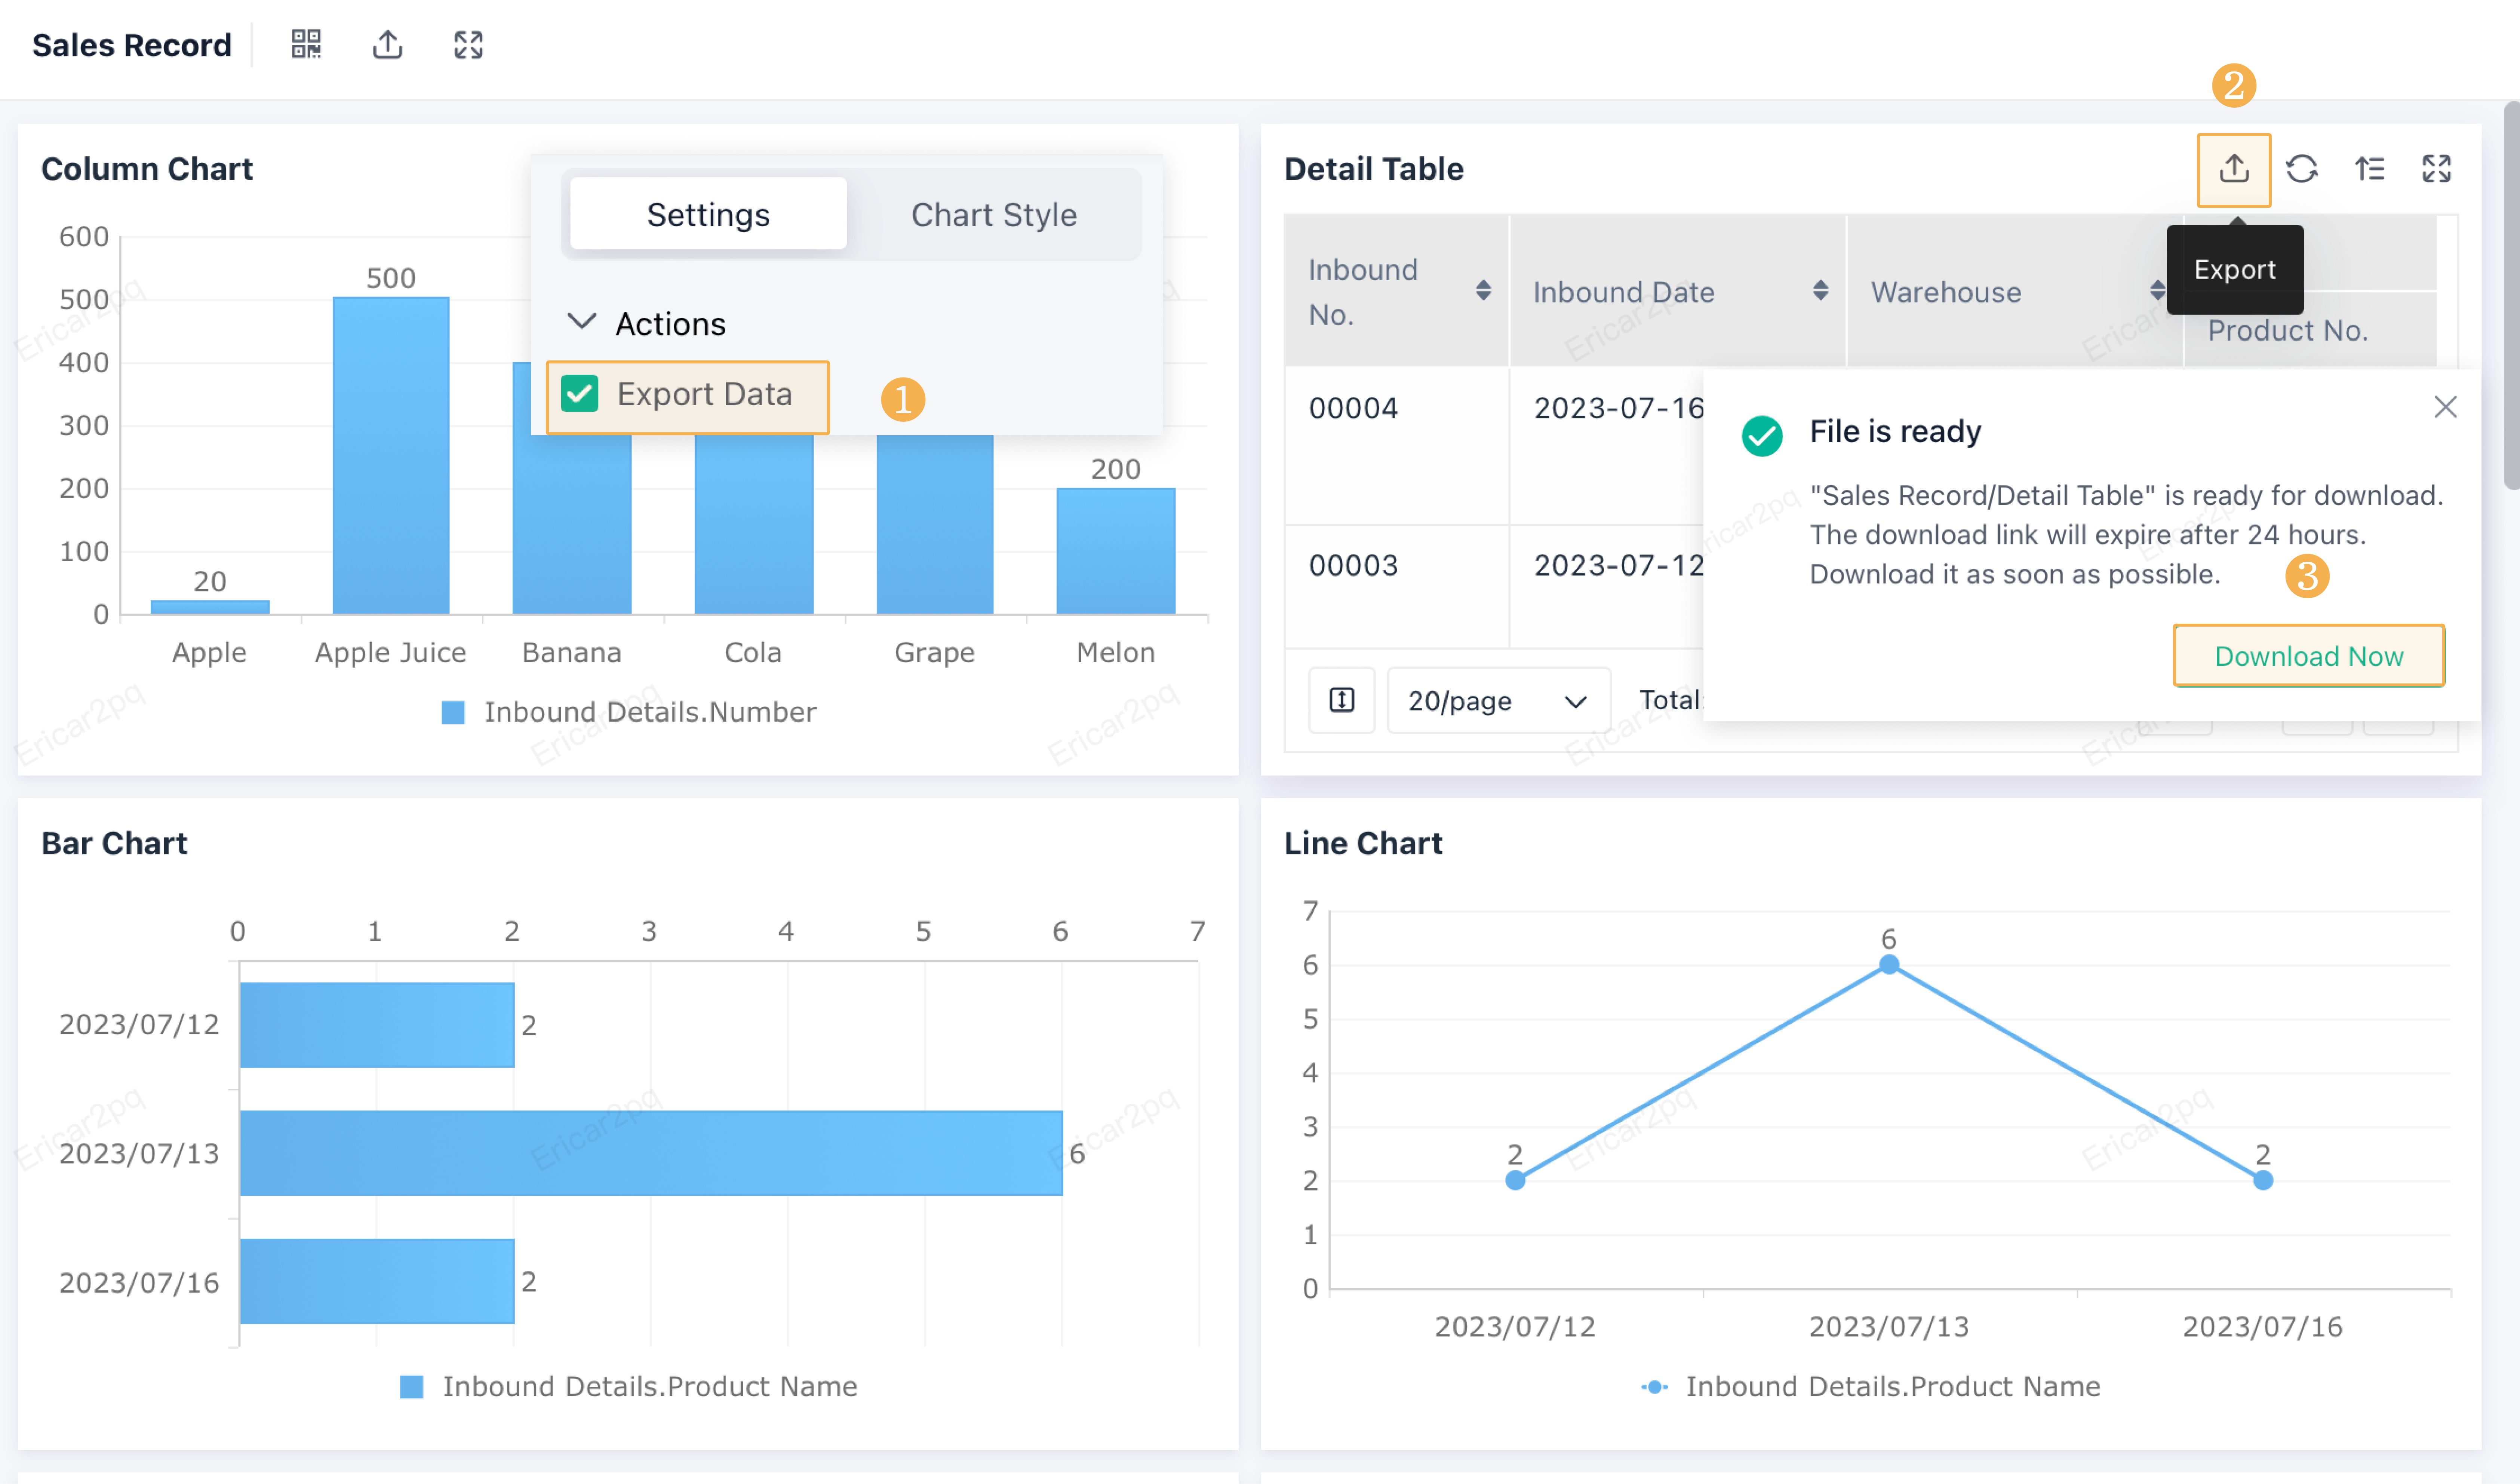
Supporting Exporting Chart Data When Accessing Dashboard(s) via Public Link(s)
In Publish, after enabling the public link for the dashboard, you can then enable Export Data from Chart.
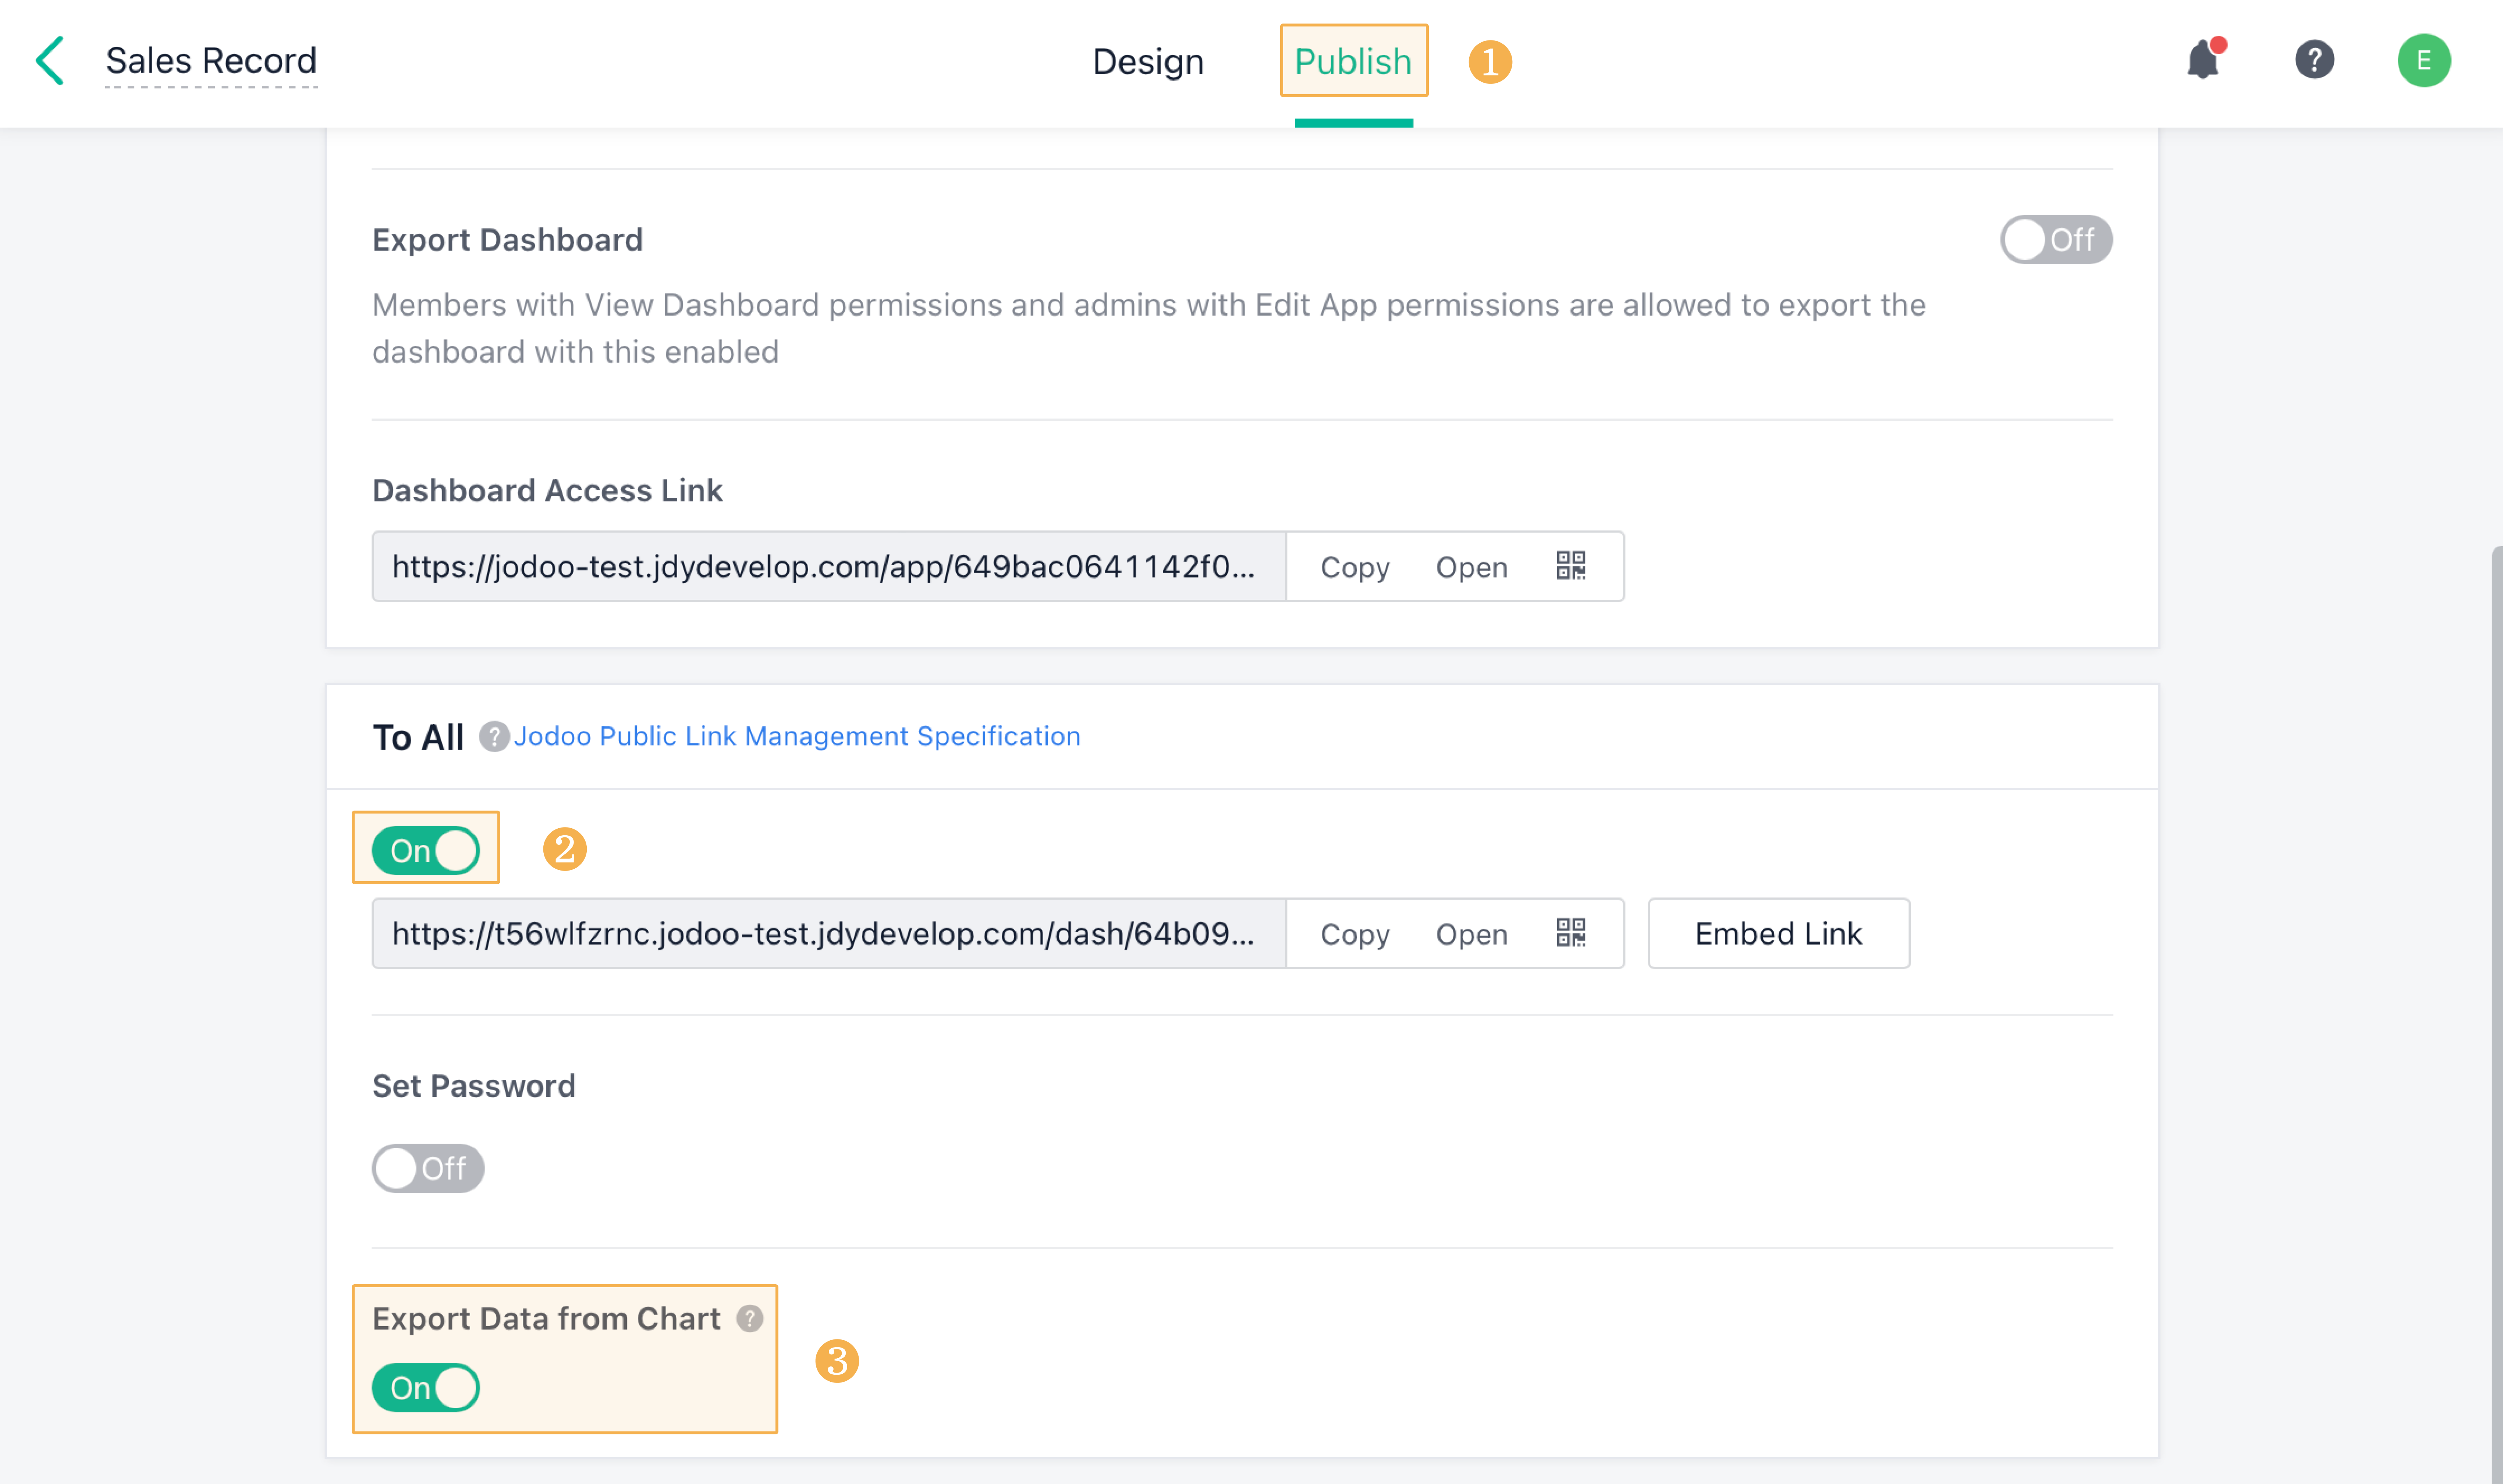
Therefore, when accessing the dashboard via the public link, you can export data from the charts for which you have ticked Export Data in Settings.
Common Feature(s)
Optimizing Interaction Design When Filtering Date&Time
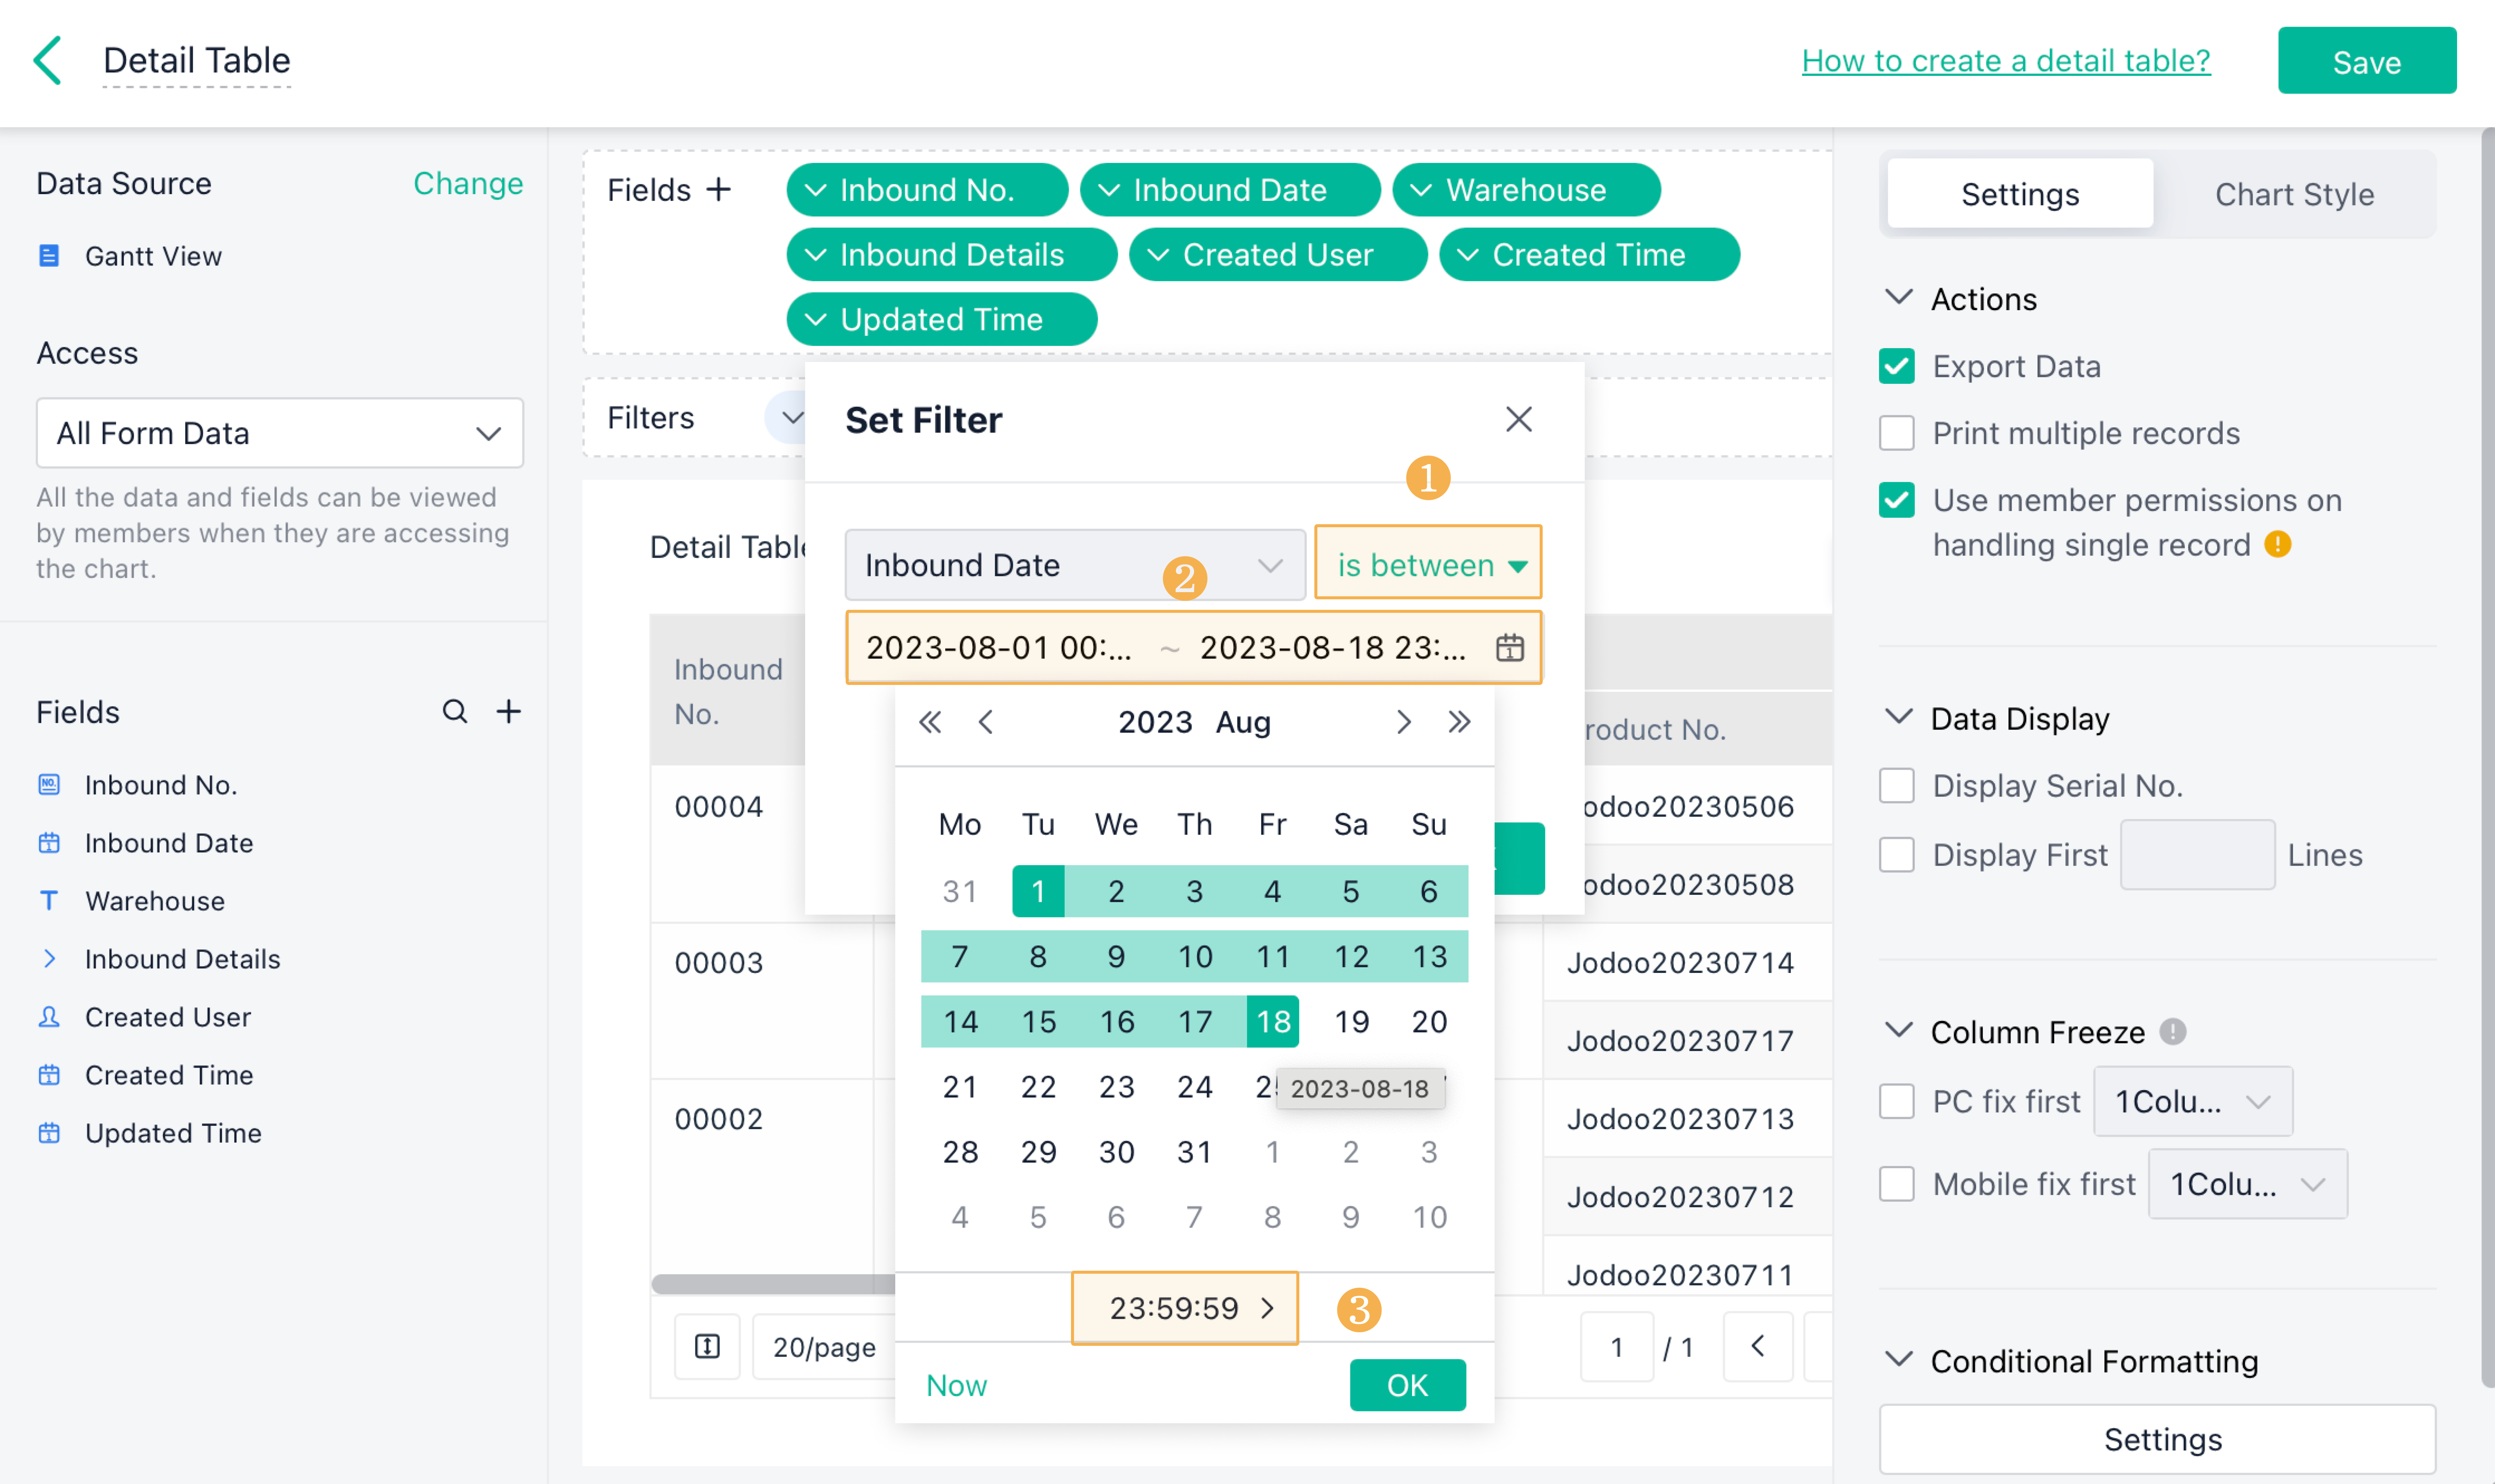
When designing a Date&Time field, you might set its type to YYYY-MM-DD HH:MM:SS. Then, if you want to filter data within a time range based on this field, you would need to specify the hours, minutes, and seconds for the start date and end date. However, this can be cumbersome because, in most cases, you prefer to set "00:00:00" for the start date and "23:59:59" for the end date as the date filtering range.
In Ver.7.4.0, you can now quickly set the filter condition. When you set the filter condition as Date&Time is between, the default time for the start date is 00:00:00, and the default time for the end date is 23:59:59. You can also customize the time according to your needs.
Note:
This optimization is not yet available when you filter time with the Filter component in dashboards.
Organizational Management
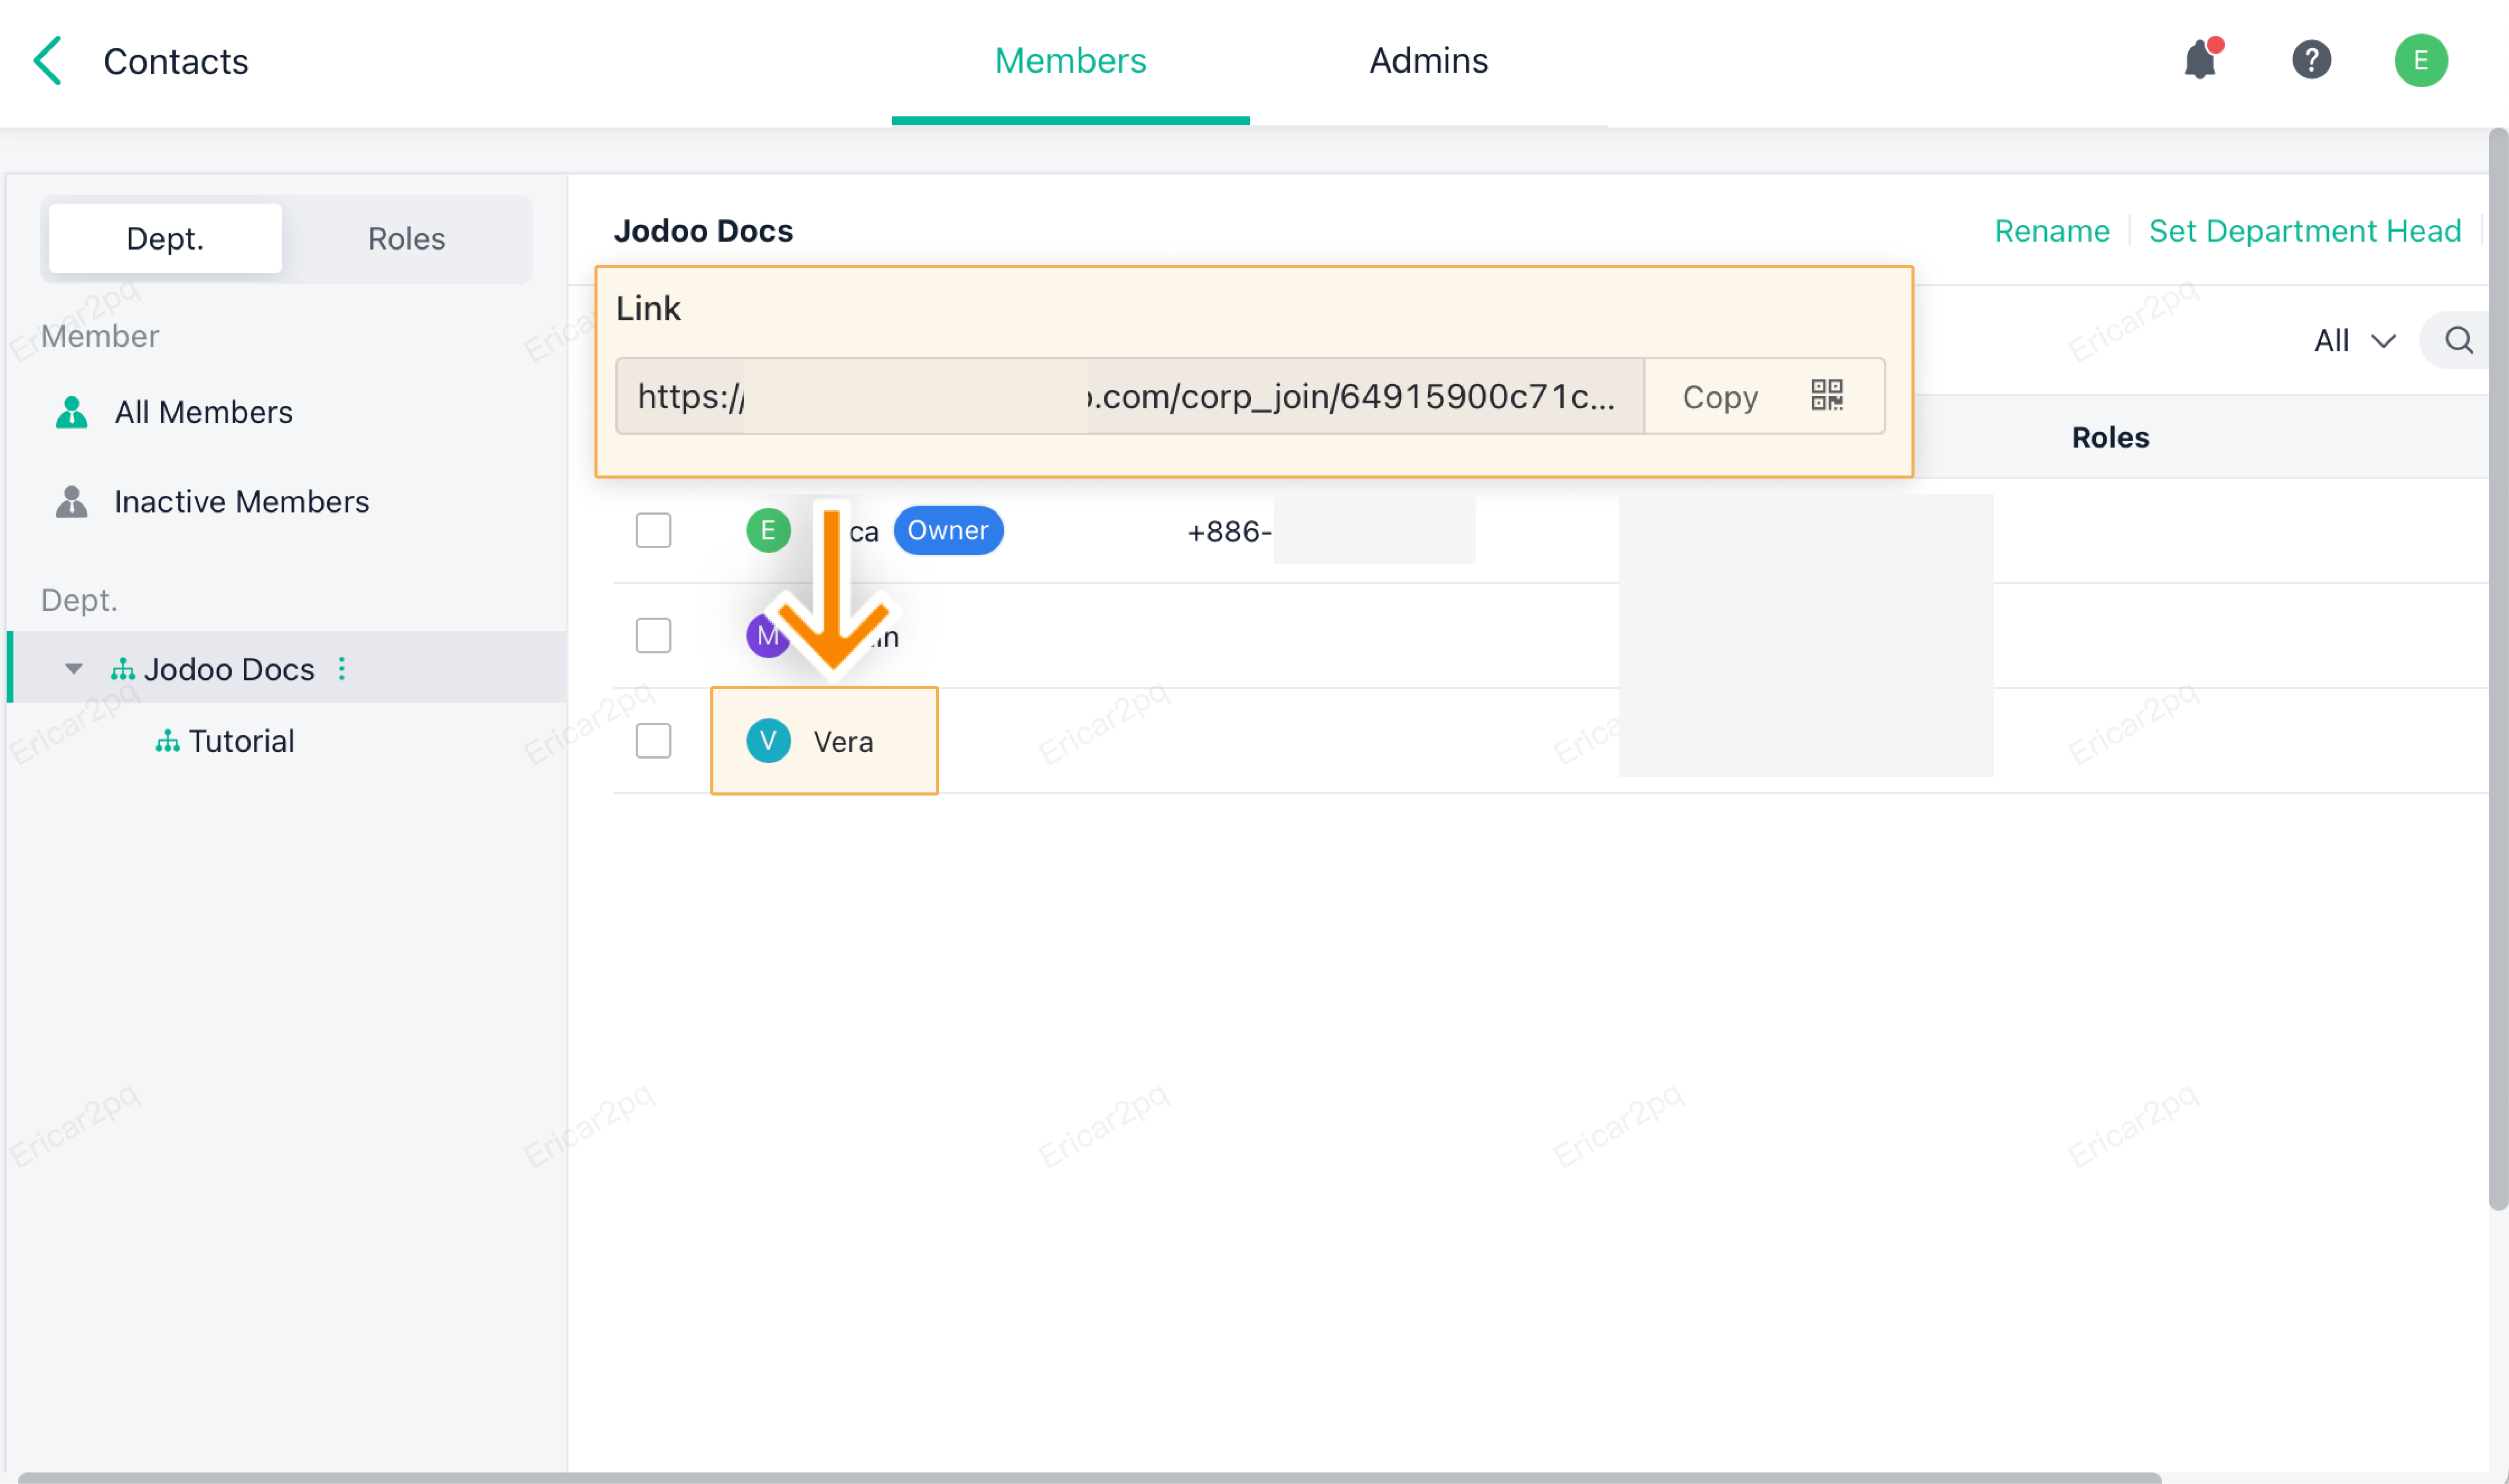
Supporting Inviting Member(s) to Specific Department(s)
Previously, when you invite members via links, they can only be added to All Members, instead of a specific department. In Ver.7.4.0, you can now invite members to a department directly.
Go to Contacts, select the desired department, and click Invite. Then go to Invite by Link, and you can enable Invite Link. Therefore, members who join the company through this link will be automatically added to the corresponding department. On this page, you can also set an expiration date for the link.
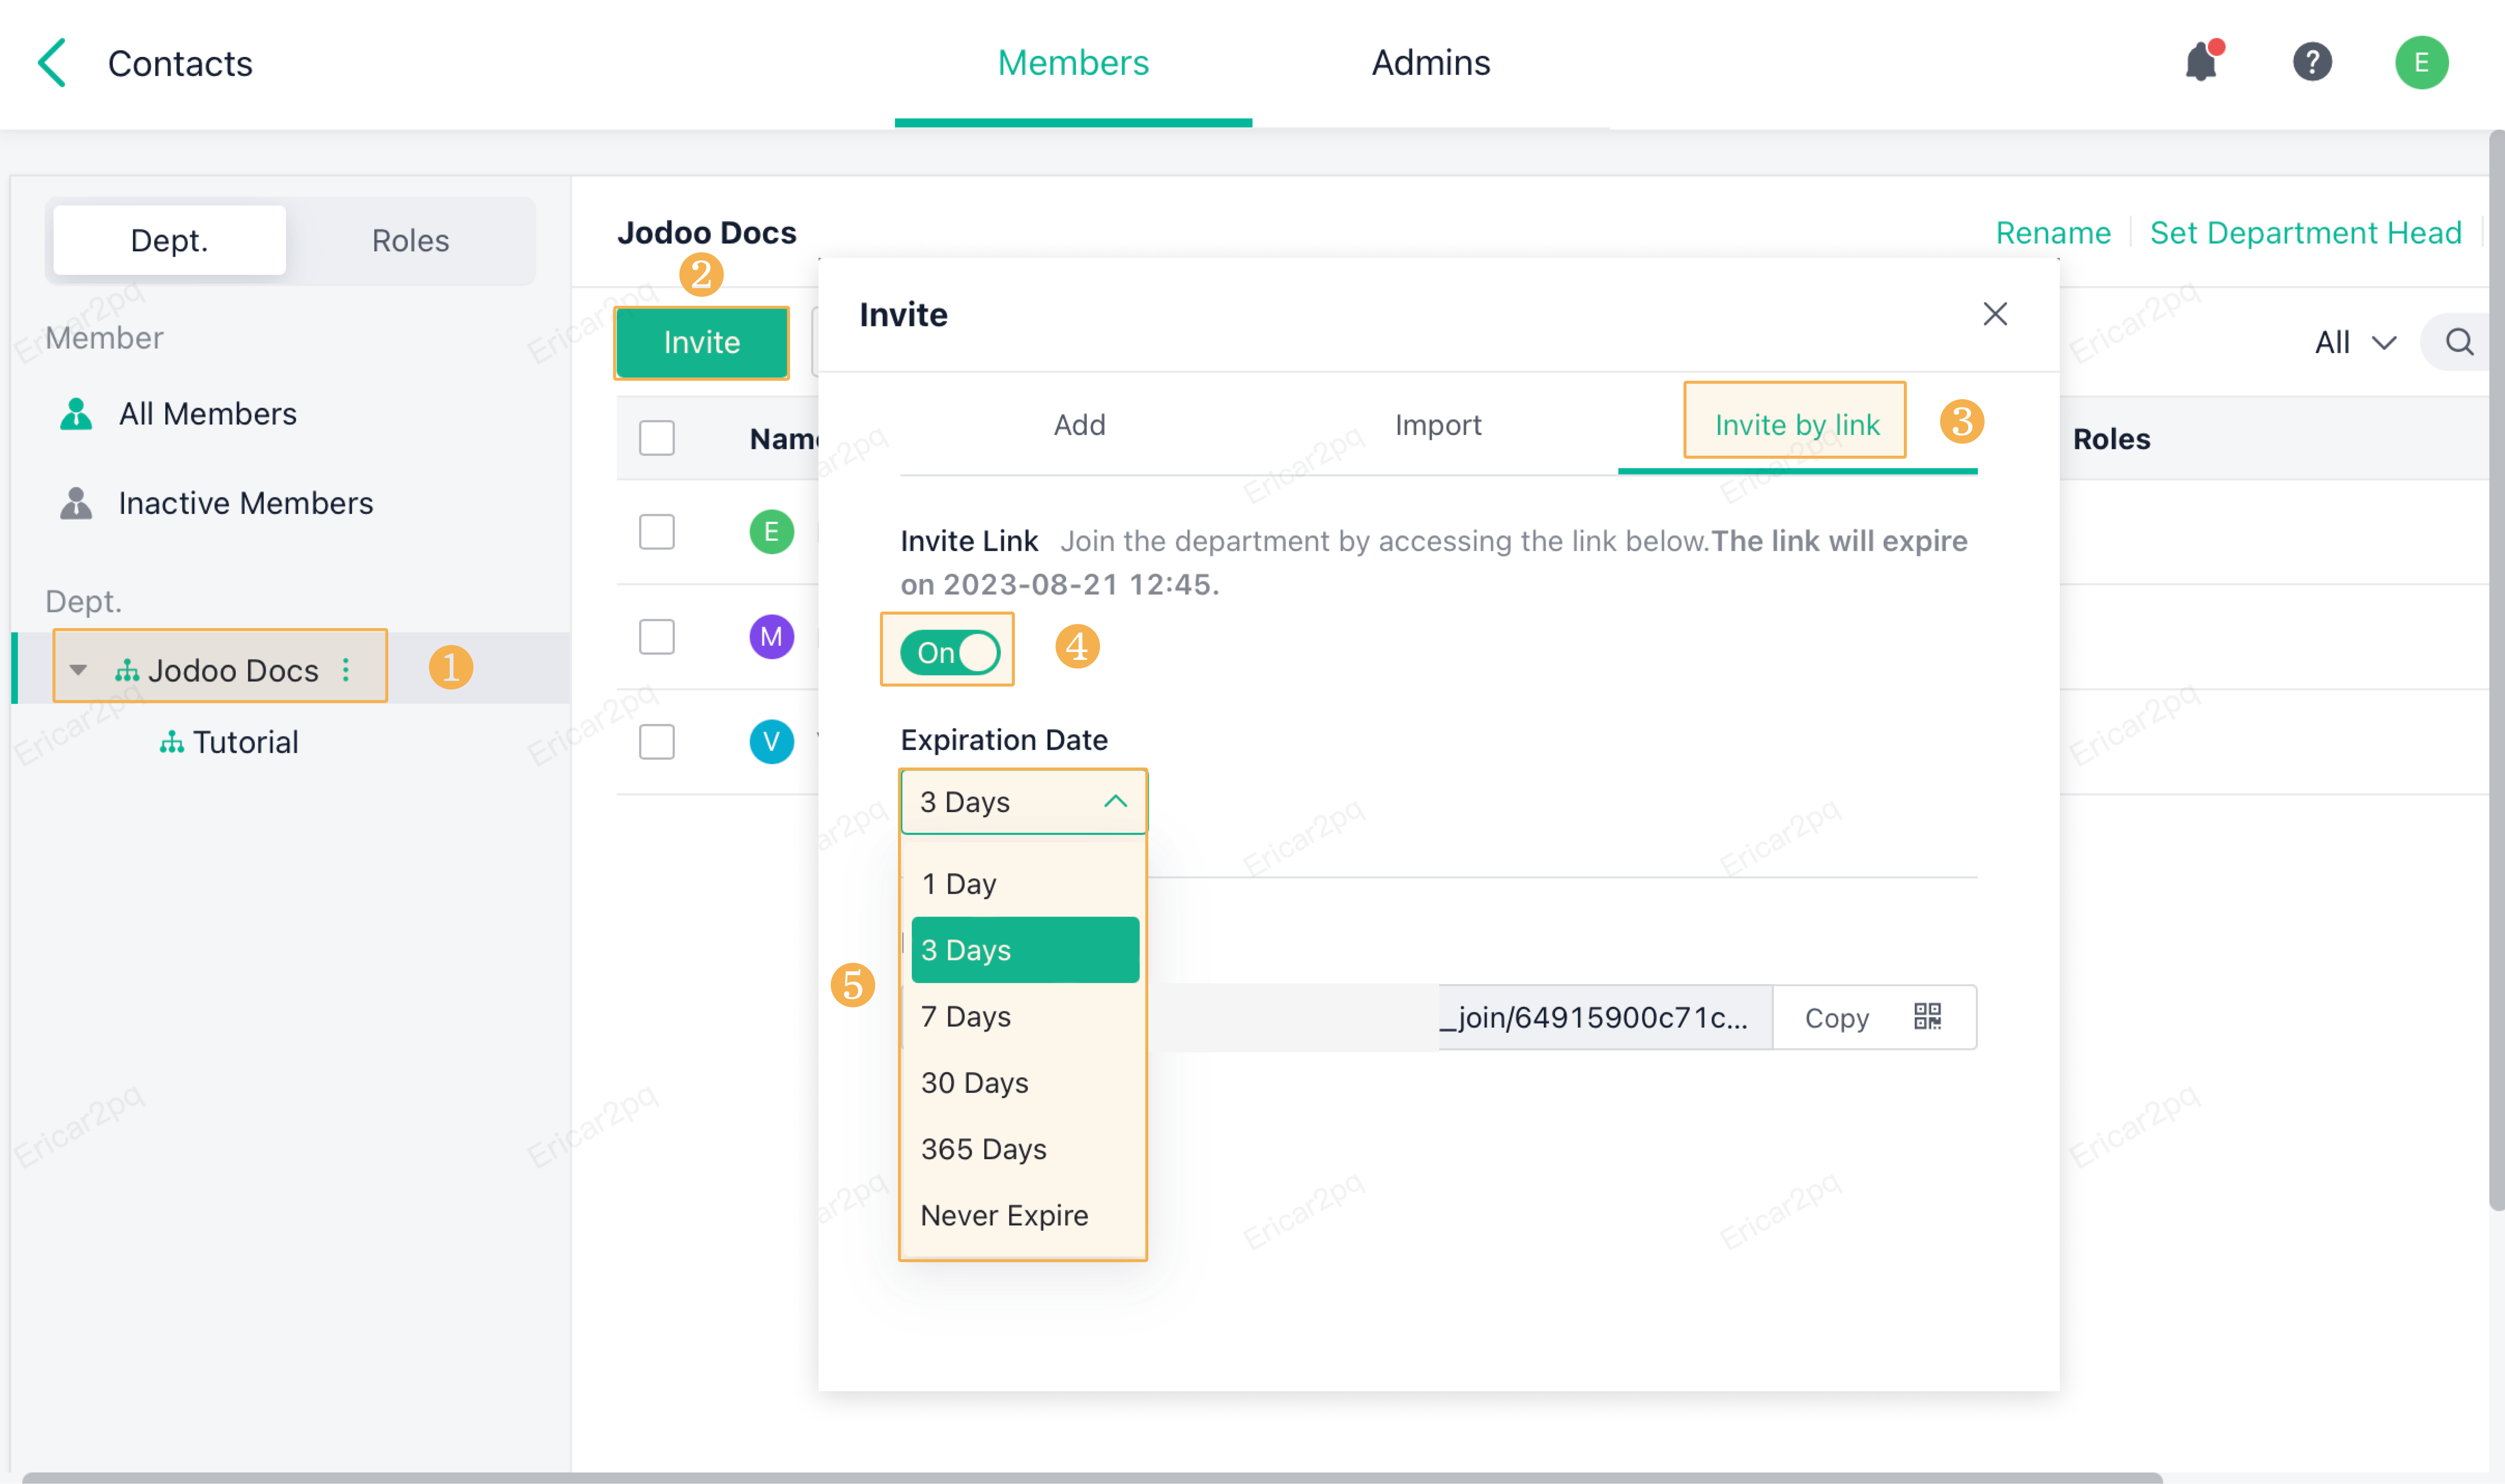
For example, you can invite a member to the Jodoo Docs department.
Note:
If you have set an expiration date for the invitation link, members will no longer be able to join the department via this link once it expires.
Do you have any suggestions for this update? Welcome to click feedback to tell us more.