


Designing a Workflow
This passage will introduce the basic configuration steps of designing a workflow and the properties of each step.
What is Designing a Workflow?
Designing a workflow refers to the entire process of configuring a workflow, including adding nodes, setting nodes, and connecting nodes.
How to Design a Workflow?
Step 1 Adding a Workflow
1. After designing a workflow form, go to Workflow > Get Started to go to the workflow design page.

2. Then, you will see the default workflow. The design page includes:

Note:
If there are no other rules to be set, you only need to select approvers and set field permissions for nodes.
Step 2 Constructing a Workflow Chart
Select different workflow nodes, and connect the scattered workflow nodes through connections. As shown below. For details, see Basic Settings & Toolbar of Workflow.

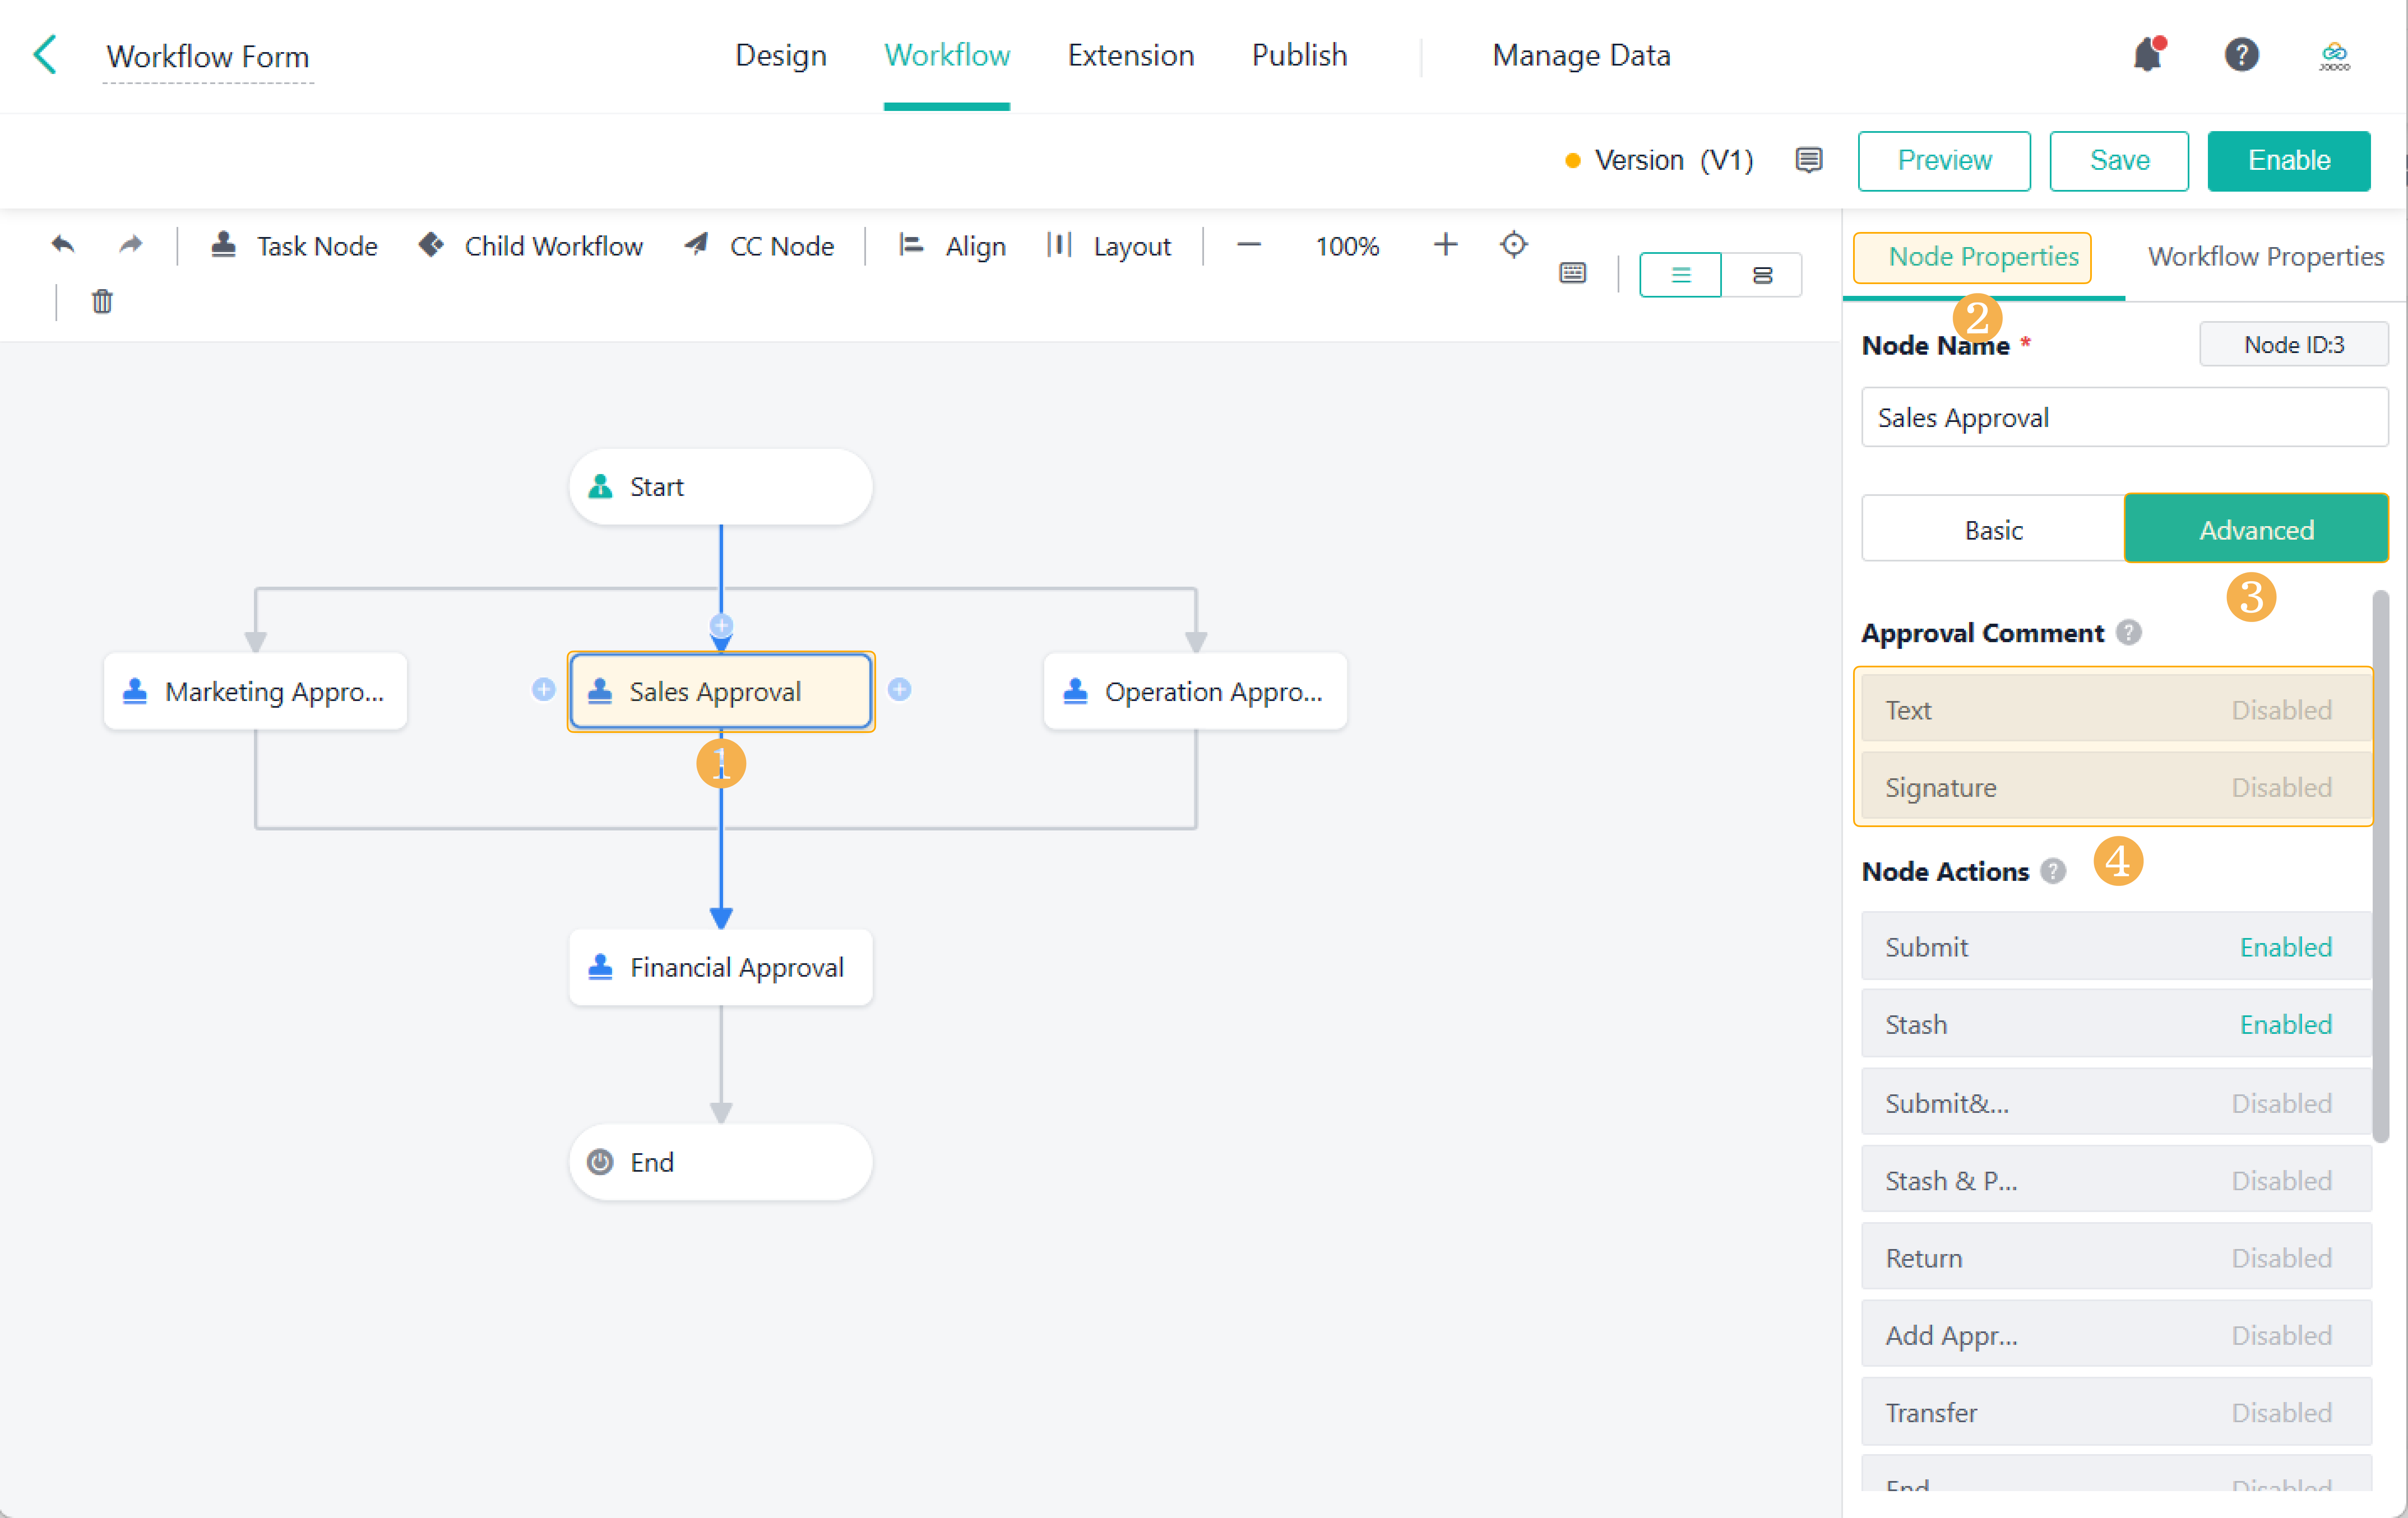
Step 3 Configuring Node Permissions(s)
1. Select approvers and set the fields viewing/editing permissions.
Click a node, go to Node Properties and you can select permissions for each field, including view, edit, and

2. Add approval comments.
Click Advanced > Approval Comment, there are two types of approval comments, Text and Signature.
Approval comments are used to annotate the form data submitted by an initiator. You can choose one to enable the approver to fill in the approval comments. For details, see Approval Comment.
Step 4 Configuring Node Action(s)
In the workflow, you can submit, stash, print, and return workflow data, as well as add approvers. You can set Node Actions for different nodes as needed. For details, see Node Actions.

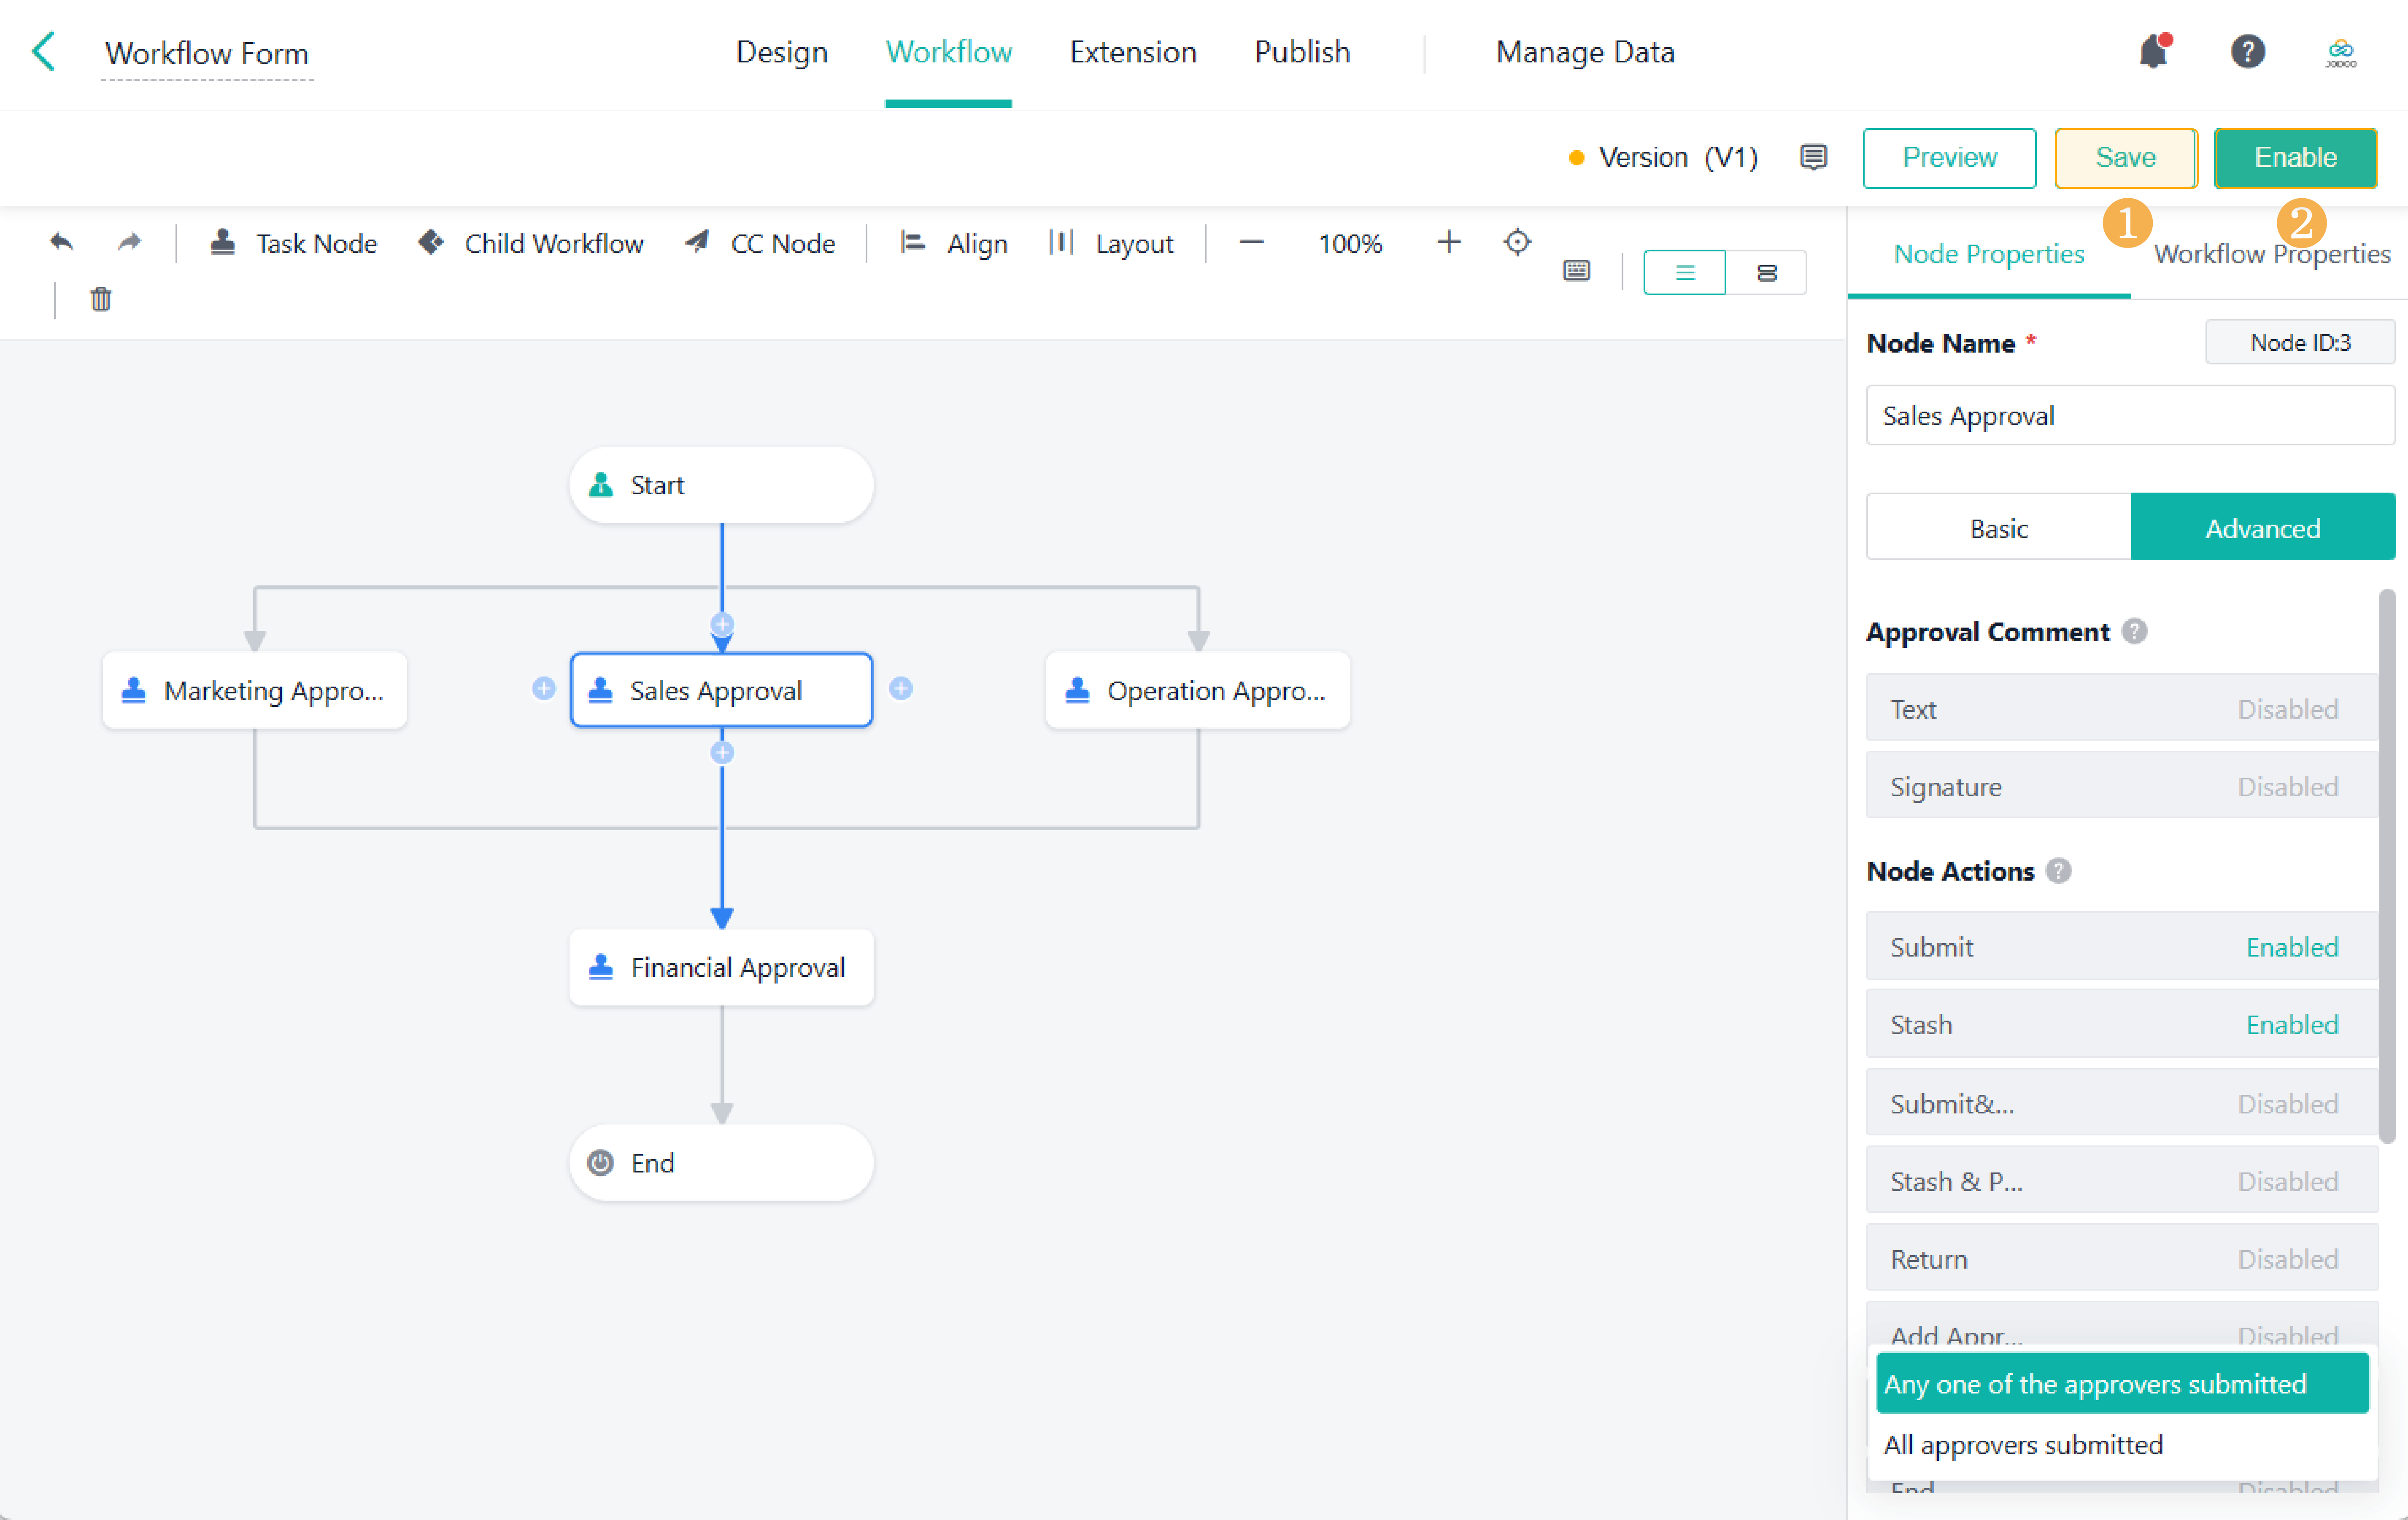
Step 5 Setting Proceeding Rule(s)
When there are multiple approvers in a workflow node, you can choose One approver submits or All approvers submits.
For details, see Proceeding Rules.

Step 6 Enabling a Workflow
After designing the workflow, click Save and Enable to enable the workflow. After it is enabled and published to members, members can initiate workflows.
FAQ(s)
Q: Are there any other features I can set in the workflow?
A: Apart from the above features, you can set CC, overdue actions, auto-submit, and check workflow versions.
I have finished reading. 🏆
👉I can't wait to DESIGN MY WORKFLOW.
👉I need more HELP in Discord Forum.